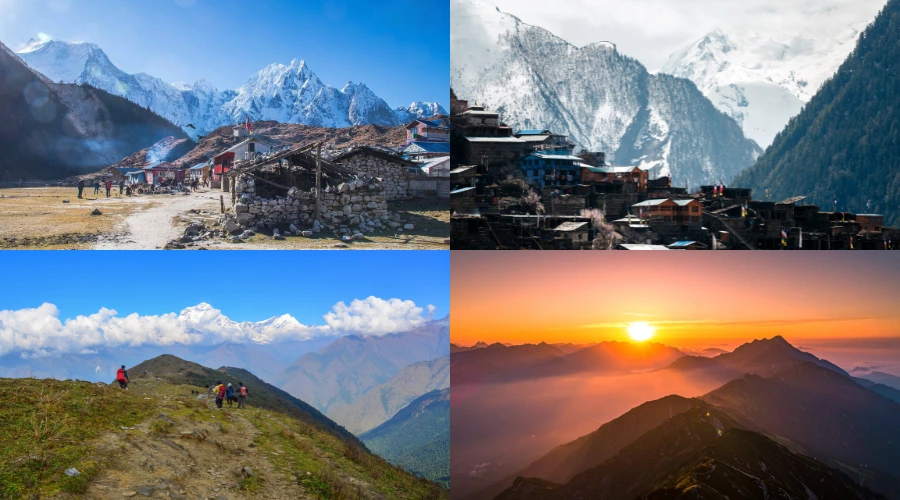
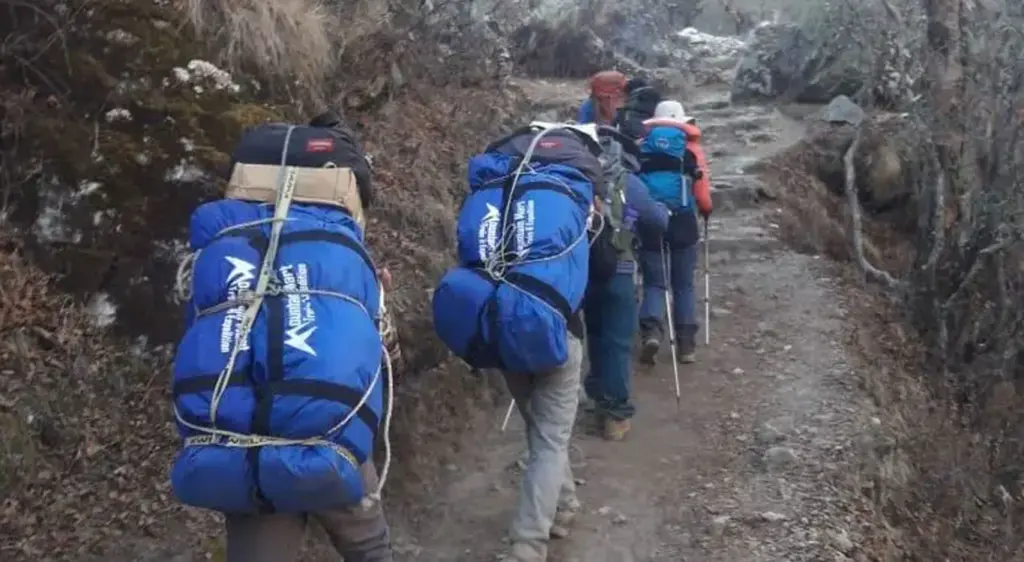
The Manaslu Circuit Trek is usually associated with autumn: stable weather, clear mountain views, and plenty of trekkers on the trail. Winter is a very different experience.
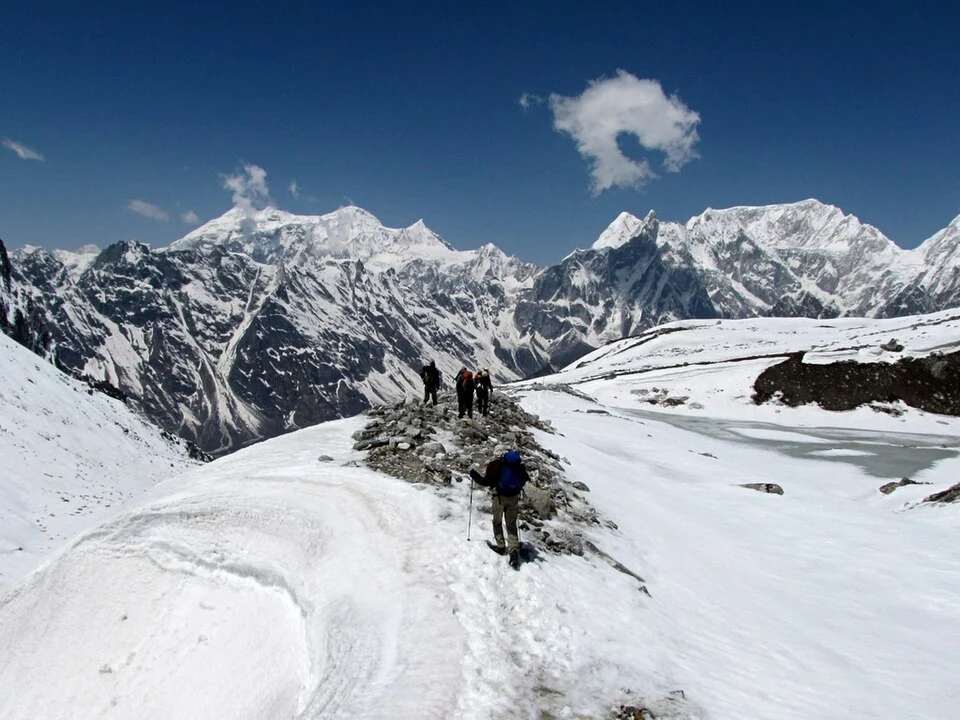
From December to February, temperatures drop sharply as you gain altitude, snow can cover sections of the trail, and some teahouses in the higher villages may close for the season. The biggest challenge is the crossing of Larkya La Pass at 5,106m.
But winter also has its advantages. The trails are much quieter, the mountain views can be exceptionally clear, and the Manaslu region takes on a completely different character.
If you are considering the trek during winter, you need to understand both sides of it. Here is what the cold, snow, accommodation, and high-pass conditions can mean for your trek.
The Winter Appeal: Why Trek Manaslu in the Cold?
Winter is not the easiest time to trek the Manaslu Circuit, but it can be rewarding for trekkers who are prepared for the conditions.
The first advantage is fewer people on the trail. Compared with the busy autumn months, winter feels much quieter. You may walk for long stretches without seeing many other trekking groups, particularly at higher elevations.
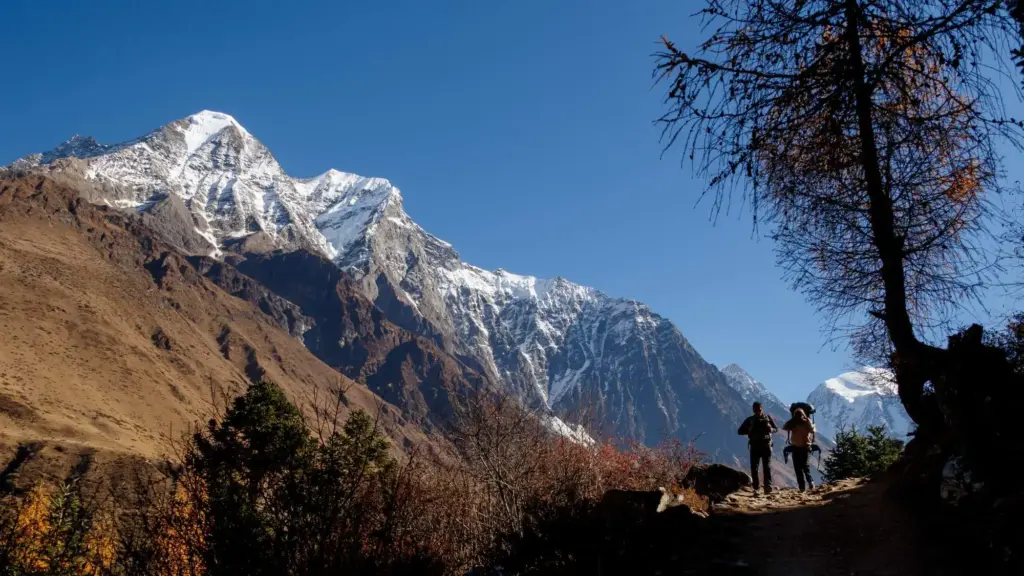
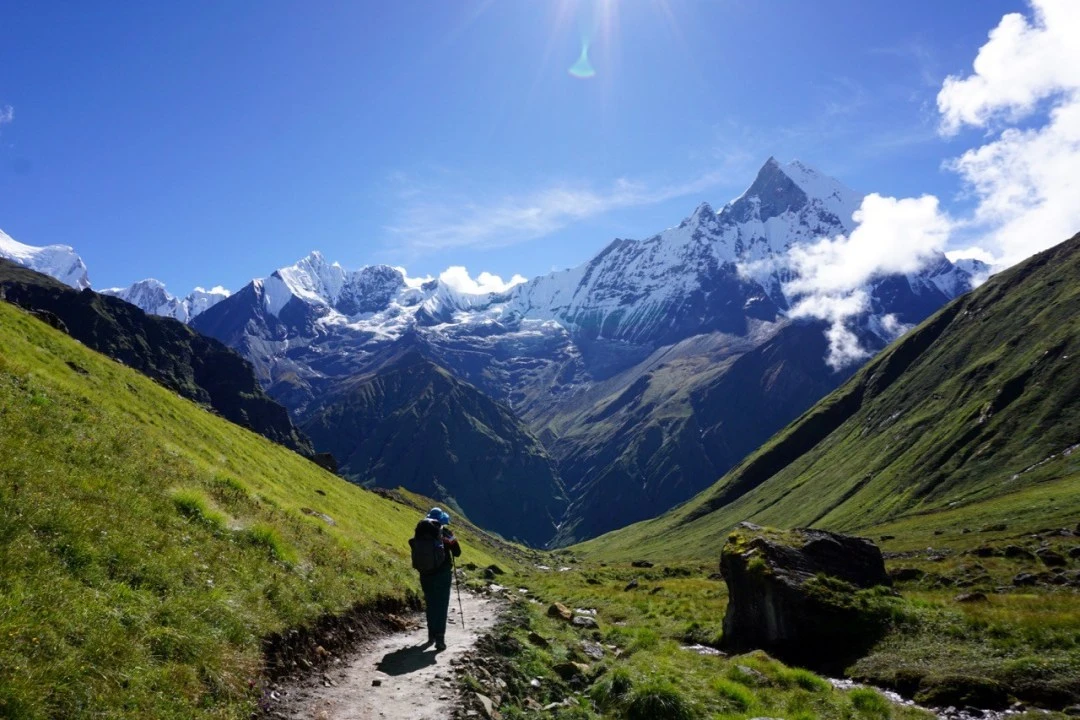
The mountain views can also be excellent on clear days. Cold, dry weather often brings good visibility, giving you impressive views of Mt. Manaslu (8,163m) and the surrounding peaks.
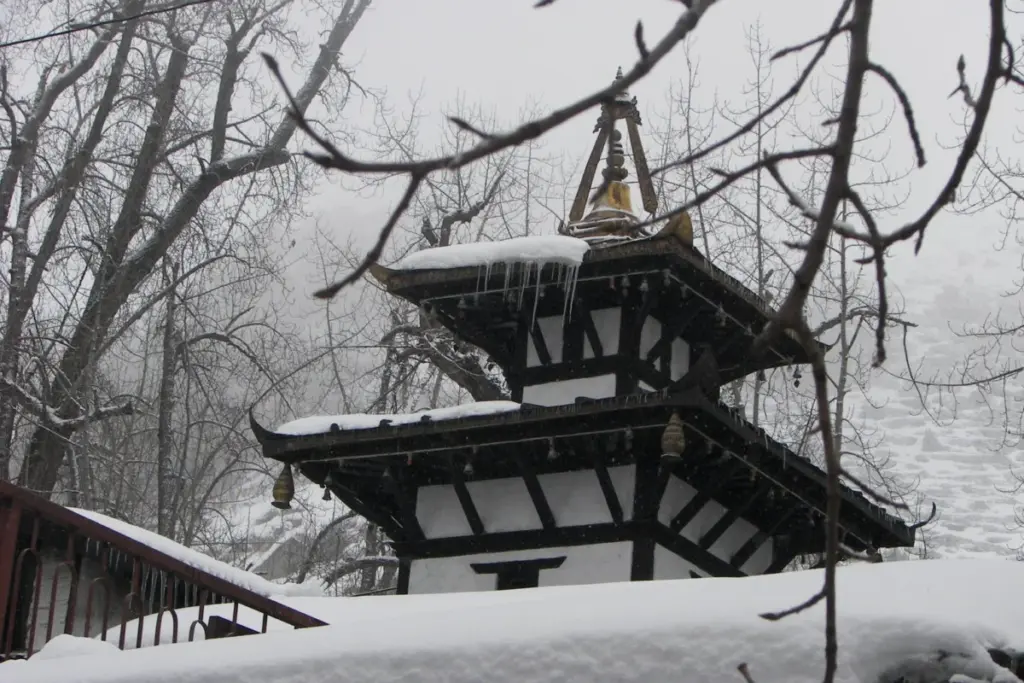
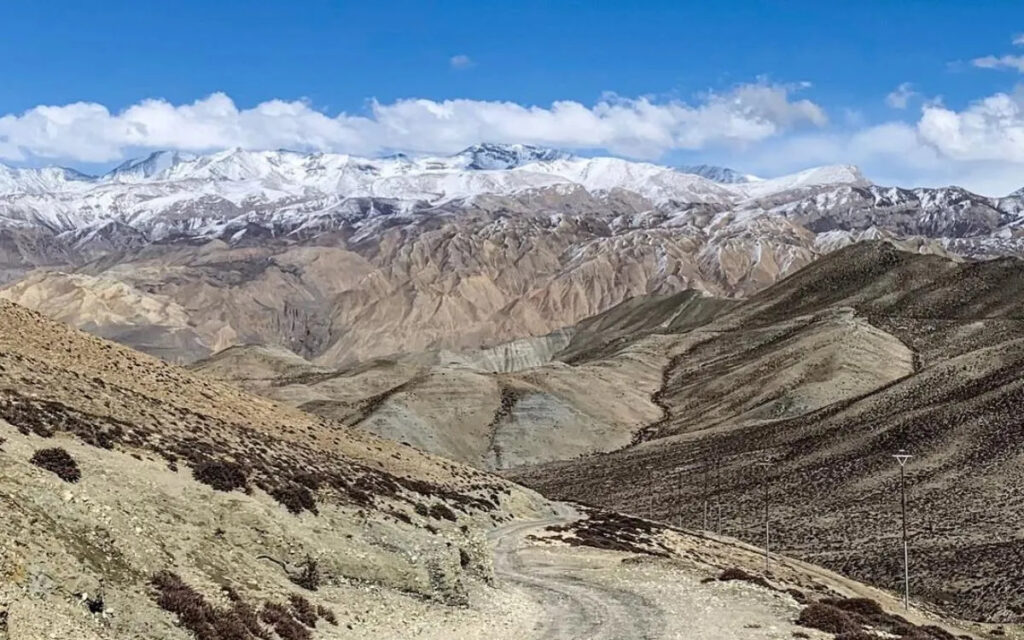
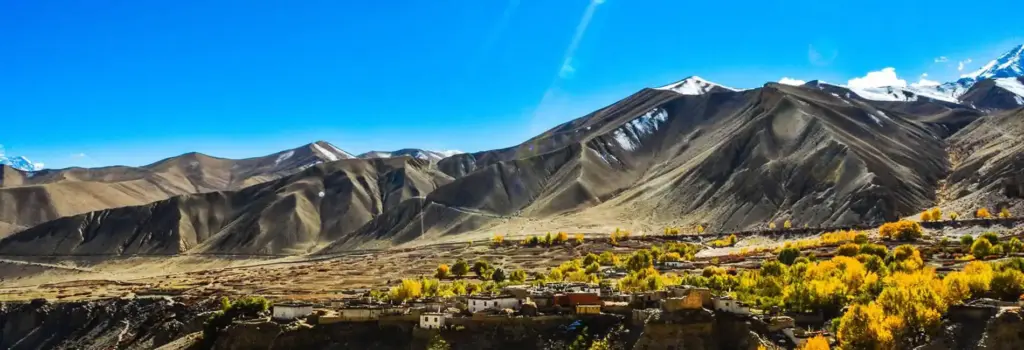
Snow changes the landscape as well. Forests, villages, streams, and mountain slopes can look completely different once winter arrives. The upper Manaslu Valley, with its Tibetan-influenced villages and high mountain scenery, becomes particularly striking under snow.
However, these benefits come with a trade-off. Shorter daylight hours, freezing temperatures, snow-covered trails, and limited accommodation make winter considerably more demanding than trekking in the main seasons.
The Crucial Crux: Larkya La Pass (5,106m)
The Larkya La Pass is the most important part of the winter Manaslu Circuit.
At 5,106m, the pass is already a demanding high-altitude crossing. Winter adds snow, ice, stronger winds, and much lower temperatures to the equation.
Snowfall can make sections of the route difficult to identify. Ice can make the trail slippery, while poor visibility can make navigation more complicated. Conditions can also change quickly, so a route that was manageable a few days earlier may become significantly harder after fresh snowfall.
This is why you should not treat crossing Larkya La as something that must happen regardless of conditions.
A safer winter plan should include:
Checking recent trail conditions: Your guide should have current information about snowfall and the pass.
Starting early: The pass is normally crossed early in the day, when conditions are more predictable.
Allowing buffer days: Extra time gives you more flexibility if weather prevents a safe crossing.
Being prepared to turn around: If conditions become unsafe, delaying the crossing is better than forcing it.
The pass is one of the main reasons winter Manaslu is better suited to trekkers with previous high-altitude experience.
The Teahouse & Logistical Reality
Accommodation is another major difference between winter and the main trekking seasons.
Some teahouses in the higher sections of the Manaslu Circuit close during the colder months. This is particularly important around places such as Samdo and Dharamsala, where accommodation options are already limited compared with lower villages.
That means you should not approach a winter trek with the assumption that every lodge will be open.
Accommodation and meal availability should be checked ahead of time, especially when planning overnight stops close to the Larkya La crossing. A local trekking agency can help confirm which lodges are operating and adjust the itinerary when necessary.
The Manaslu region is also a restricted trekking area, so the trek requires the appropriate permits and must be undertaken according to Nepal’s current guide and permit regulations.
This makes planning particularly important in winter, when weather and accommodation can affect the itinerary more than they would during the busier seasons.
Surviving the Cold: The Winter Gear Checklist
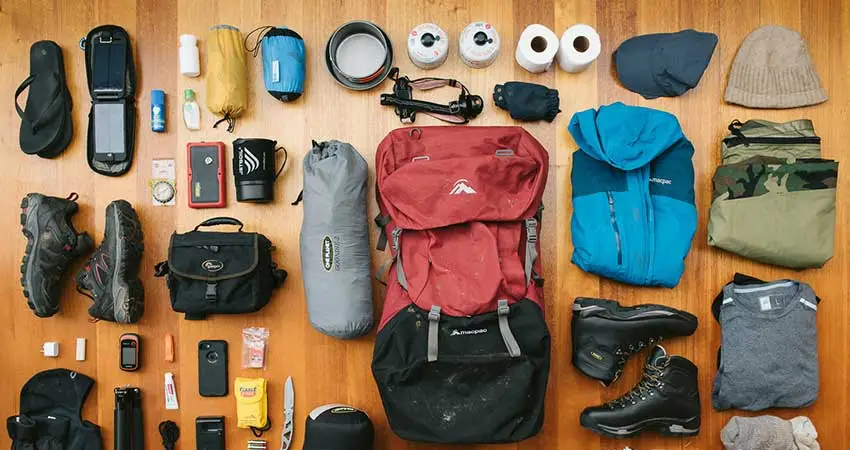
Your normal trekking clothes may not be enough for the Manaslu Circuit in winter. Temperatures can fall well below freezing at higher elevations, particularly overnight and around Larkya La.
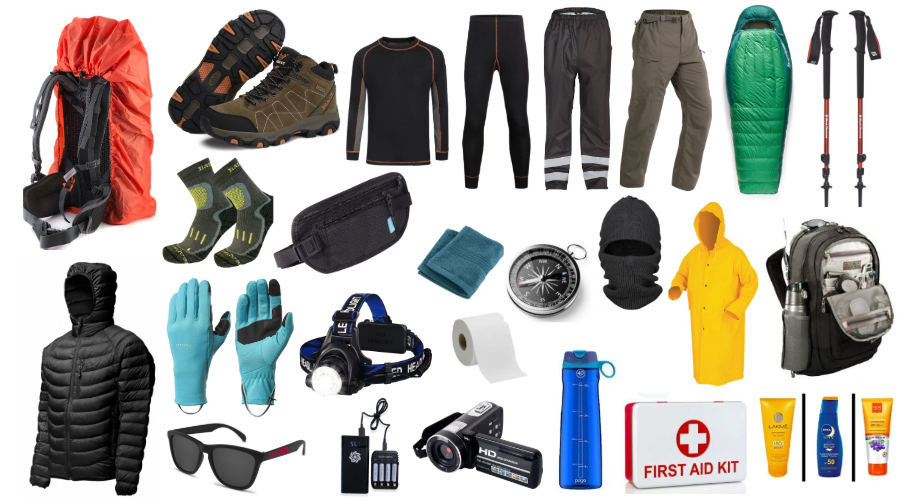
Here are some of the key items to consider:
Gear Category
Winter Requirement
Sleeping Bag
A winter-rated sleeping bag suitable for very cold nights
Insulation
Warm down or synthetic jacket for evenings and the pass day
Base Layers
Merino wool or thermal base layers
Mid Layers
Fleece or insulated mid-layer
Outer Layer
Waterproof and windproof jacket and trousers
Gloves
Warm liner gloves plus insulated outer gloves
Head & Face
Warm hat, buff or balaclava
Footwear
Waterproof trekking boots with good grip
Traction
Microspikes or crampons when trail conditions require them
Socks
Several pairs of warm trekking socks
Gaiters
Useful when walking through snow
Water
Insulated bottles to reduce the chance of freezing
Electronics
Extra batteries or power banks
A few simple habits can also make cold nights easier.
Keep your water bottle inside your sleeping bag overnight if conditions are cold enough for it to freeze. Store batteries and other sensitive electronics somewhere warm rather than leaving them exposed to the cold.
Most importantly, avoid relying on one heavy jacket or one pair of gloves. A good layering system gives you more control over your temperature as conditions change.
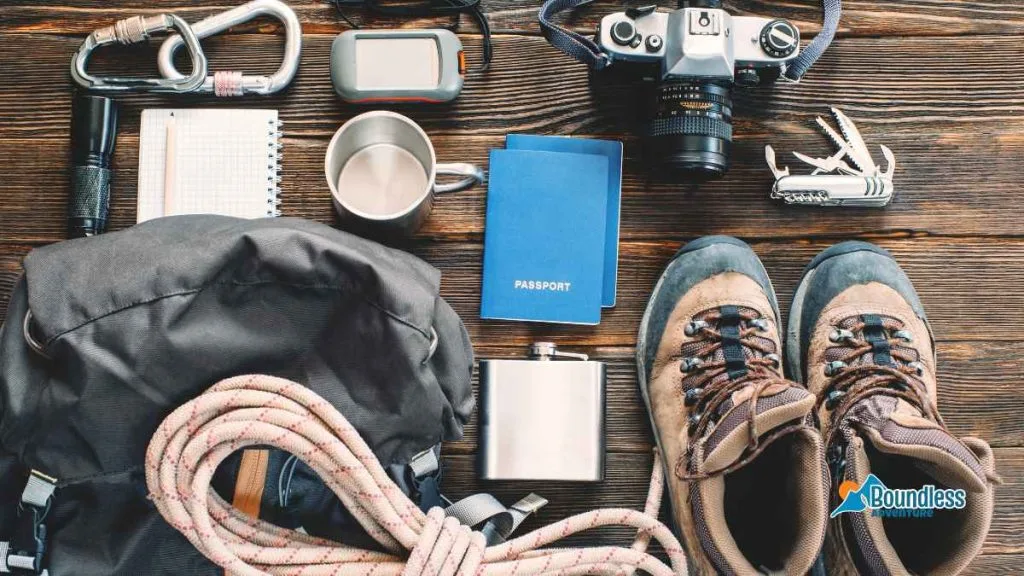
You can also use our general trekking packing list as a starting point and add winter-specific gear based on the forecast and route conditions.
Acclimatization and Health in the Cold
Cold weather does not protect you from altitude sickness.
The Manaslu Circuit gradually climbs from the lower valleys to elevations above 5,000m, so proper acclimatization remains essential regardless of the season.
The acclimatization stop around Samagaun gives trekkers an opportunity to adjust to the increasing altitude. Depending on the itinerary and conditions, hikes toward areas such as Pungyen Gompa or Manaslu Base Camp can be used for acclimatization.
Hydration is particularly important in winter. You may not feel as thirsty in cold weather, but your body still loses fluids through breathing, exertion, and dry mountain air.
Watch for symptoms such as:
Persistent headache
Nausea
Dizziness
Unusual tiredness
Loss of coordination
Difficulty breathing
Tell your guide if you feel unwell rather than trying to push through the symptoms.
Travel insurance that covers high-altitude trekking and emergency evacuation is also an important part of preparing for the trek.
Is a Winter Manaslu Trek Right for You?
A winter Manaslu Circuit Trek is best suited to trekkers who understand what they are signing up for.
You should be comfortable walking in cold conditions, prepared for snow and ice, and have some previous experience with long or high-altitude treks. You also need to be comfortable with the possibility of changes to your itinerary because of weather.
If your priority is stable weather, open teahouses, and easier trail conditions, autumn or spring may be a better choice.
But if you prefer quieter trails, winter scenery, and do not mind dealing with colder and less predictable conditions, winter can offer a very different Manaslu experience.
Winter trekking requires more planning than simply following the standard Manaslu Circuit itinerary.
Trail and weather conditions need to be checked regularly, accommodation needs to be confirmed, and the schedule may need to change if Larkya La is affected by snowfall.
With Hi Nepal Treks, our team can help arrange the required permits, accommodation, transportation, guides, and other logistics for the trek.
More importantly, a local team can help you respond to conditions on the ground. If weather affects the planned route or an overnight stop is unavailable, the itinerary can be adjusted rather than relying entirely on assumptions made before leaving Kathmandu.
If you are considering the Manaslu Circuit in winter, share your preferred dates and previous trekking experience with our team. We can help you assess whether the season and route are suitable for your plans and build the itinerary around realistic winter conditions.
Frequently Asked Questions (FAQs)
Can you trek the Manaslu Circuit in winter?
Yes, winter trekking is possible, but conditions are considerably colder and more challenging than during the main trekking seasons. Snow, icy trails, limited accommodation, and Larkya La conditions need to be considered.
How cold is the Manaslu Circuit in winter?
Temperatures vary significantly with altitude and weather. Higher sections can become extremely cold at night, with temperatures well below freezing. Conditions around Larkya La can be particularly harsh because of altitude and wind.
Is Larkya La Pass open in winter?
It depends on snowfall and current trail conditions. Heavy snow can make the pass difficult or temporarily unsafe to cross. A flexible itinerary is therefore important.
Are teahouses open during winter?
Some teahouses remain open, while others may close for the winter season, particularly at higher elevations. Accommodation should be confirmed before starting the trek.
Do I need a guide for the Manaslu Circuit Trek?
The Manaslu region is a restricted trekking area and has specific guide and permit requirements. These requirements should be checked with a registered trekking agency before your trek.
What gear is essential for a winter Manaslu Circuit Trek?
Warm layers, a suitable winter sleeping bag, insulated gloves, waterproof clothing, warm socks, good trekking boots, and appropriate traction equipment are among the key items. Your exact gear should depend on the weather and trail conditions.
Is altitude sickness a risk in winter?
Yes. The risk of altitude sickness remains regardless of the season. Gradual ascent, proper acclimatization, hydration, and responding quickly to symptoms are important.
Is the Manaslu Circuit suitable for beginners in winter?
Winter adds another layer of difficulty to an already demanding high-altitude trek. Previous trekking experience is strongly recommended.
What are the benefits of trekking the Manaslu Circuit in winter?
The main advantages are quieter trails, fewer trekkers, winter landscapes, and potentially excellent mountain visibility on clear days.
Why choose a local agency for a winter Manaslu trek?
A local agency can help with permits, accommodation planning, guides, transportation, and changes to the itinerary when weather or trail conditions affect the route. This can be particularly useful during the less predictable winter season.
Few questions create more confusion among travelers heading to the Himalaya than this one: “Can I still trek alone in Nepal?” The Solo Trekking in Nepal 2026: Where You Can & Can’t Go (New Rules)
Can you trek alone in Nepal in 2026? Yes, but solo trekking and independent trekking are not the same thing.
You can travel as a solo client, have your own itinerary and trek without joining a group. However, many of Nepal’s major trekking routes require foreign trekkers to travel with a licensed guide.
The rules also differ for restricted areas such as Manaslu, Upper Mustang, Tsum Valley and Dolpo. Recent changes have made it possible for a single traveller to obtain permits for some restricted areas, but the guide and agency requirements still apply.
Here’s what solo trekkers need to know before planning a trip to Nepal in 2026.
Solo Trekking vs. Independent Trekking: The Crucial Distinction
Solo trekking means travelling as a single trekker rather than as part of a group. You can have your own itinerary, choose your travel dates and trek with a guide assigned specifically to you.
Independent trekking means trekking without a guide or agency.
This distinction matters because Nepal has restricted independent trekking on many major trekking routes. A solo traveller can still trek these routes, but they generally need to arrange a licensed guide through a registered trekking agency.
So, saying that “solo trekking is banned in Nepal” is misleading.
The restriction is primarily about travelling independently without the required guide, not about travelling as a single person.
The “No-Go” Independent Zones
Foreign trekkers cannot simply arrive in Nepal and independently walk every major trekking route without a guide.
Routes commonly subject to the mandatory-guide requirement include:
Everest Base Camp
Annapurna Circuit
Annapurna Base Camp
Langtang Valley
Ghorepani Poon Hill
Mardi Himal
Other designated trekking routes where the guide requirement applies
The exact permit and guide requirements can vary according to the route, protected area and current regulations, so check the rules before starting your trek.
For example, if you’re considering the two most popular Himalayan regions, you can compare the Annapurna vs. Everest Base Camp experience before deciding.
The practical takeaway is simple: you can travel alone, but that does not necessarily mean you can trek without a guide.
The 2026 Restricted Area Breakthrough
Restricted trekking areas have traditionally had an additional barrier for solo travellers: some permits required a minimum of two trekkers.
The current 2026 rules have opened the possibility for a single traveller to obtain a restricted-area permit with the required licensed guide and agency arrangements for applicable routes.
This is particularly relevant to destinations such as:
The important distinction is that this does not mean these areas have become open to independent solo trekking.
You can travel as one trekker, but the restricted-area permit still needs to be arranged through the appropriate registered agency, and the applicable guide requirement remains.
For someone who doesn’t want to find another traveller just to meet a minimum group requirement, this makes planning a solo trip considerably easier.
How E-TIMS Works for Solo Trekkers
The Electronic Trekkers’ Information Management System (E-TIMS) is part of Nepal’s trekker registration system.
For routes where E-TIMS is required, solo trekkers need to complete the registration through the appropriate registered trekking agency.
The process generally involves providing information such as:
Passport details
Trekking route
Travel dates
Emergency contact information
Guide and agency details
Depending on your destination, you may also need additional permits.
For example, a trek in the Annapurna region can require an Annapurna Conservation Area Permit (ACAP), while Everest routes involve the relevant national park and local entry requirements. Restricted areas require their specific permits as well.
Mandatory Insurance and Heli-Evacuation
Travel insurance is particularly important for high-altitude trekking.
Before leaving, check that your policy covers:
The maximum altitude of your trek
Trekking or hiking at that altitude
Emergency medical treatment
Helicopter evacuation
Trip cancellation or interruption, where relevant
Don’t assume that a standard travel insurance policy automatically covers high-altitude trekking. Check the actual terms and altitude limit before purchasing.
Solo Trekking Cost Comparison: Restricted vs. Open Routes
Travelling alone does not automatically mean paying for an entire group.
Your total cost depends on the route, guide, permits, accommodation, transportation and number of trekking days.
Route
Guide Required?
Can You Trek as a Solo Client?
Everest Base Camp
Yes
Yes
Annapurna Circuit
Yes
Yes
Annapurna Base Camp
Yes
Yes
Langtang Valley
Yes
Yes
Manaslu Circuit
Yes
Yes, with applicable restricted-area permit
Upper Mustang
Yes
Yes, with applicable restricted-area permit
Tsum Valley
Yes
Yes, with applicable restricted-area permit
Dolpo
Yes
Yes, with applicable restricted-area permit
The biggest cost difference usually comes from the route itself.
Restricted areas can involve additional permit fees and more expensive logistics. Open trekking routes may have fewer permit requirements, but a solo traveller still needs to account for the cost of a private guide rather than splitting that cost among a larger group.
Why Solo Trekking with a Guide Is Better Than It Sounds
For travellers who originally wanted to trek alone, hiring a guide can feel like losing some of the freedom of independent travel.
In practice, you can still have a private itinerary and travel at your own pace.
A guide can take care of practical details such as:
Route navigation
Accommodation arrangements
Local communication
Permit and checkpoint requirements
Weather and trail information
Altitude monitoring
Emergency coordination
You also have someone familiar with the local area if your plans change.
The key is to communicate your expectations before the trek. If you prefer slower mornings, additional rest days or a particular walking pace, discuss those details with your agency and guide before departure.
A Quick Pre-Departure Checklist for Solo Trekkers
Before travelling to Nepal for a solo trek, check these points:
Confirm the route requirements: Find out whether your trek requires a guide, E-TIMS or special permits.
Book your guide: Use a registered trekking agency for routes where a guide is mandatory.
Check your insurance: Make sure high-altitude trekking and helicopter evacuation are covered.
Prepare your documents: Keep your passport, insurance information and permit details accessible.
Check the altitude: Understand the highest point of your trek and plan enough time for acclimatization.
Pack appropriately: Your equipment should match the season, altitude and length of the trek.
The Bottom Line for 2026
Solo trekking in Nepal is still possible in 2026, but solo does not mean unguided.
On many popular trekking routes, foreign travellers need to trek with a licensed guide. In restricted areas, additional permits and agency arrangements apply.
The important change for solo travellers is that applicable restricted-area rules now allow a single traveller to obtain a permit with the required guide and agency support, removing the need to find another trekker simply to meet the previous minimum-group requirement.
So if you want the independence of travelling alone, you don’t necessarily have to give that up. You just need to plan around Nepal’s current trekking regulations.
Plan Your Solo Adventure with Hi Nepal Treks
If you’re planning a solo trek in Nepal, Hi Nepal Treks can arrange the guide, permits, E-TIMS registration and other logistics required for your route.
Tell the agency your preferred destination, dates and trekking style, and confirm the current permit and guide requirements before booking.
Frequently Asked Questions
Can I trek solo in Nepal in 2026?
Yes. You can travel as a solo trekker, but many major trekking routes require foreign trekkers to be accompanied by a licensed guide. Solo trekking and independent, unguided trekking are different.
Is independent trekking without a guide banned in Nepal?
Independent trekking without a guide is restricted on many major trekking routes. The exact requirements depend on the route and current regulations, so check the rules for your specific trek before travelling.
Can a solo traveler trek the Manaslu Circuit in 2026?
Yes, a solo traveller can plan the Manaslu Circuit with the required restricted-area permit, licensed guide and registered trekking agency arrangements.
Do solo trekkers need an E-TIMS card in Nepal?
E-TIMS requirements depend on the trekking route and current regulations. Where E-TIMS is required, solo trekkers must arrange the registration through the appropriate registered agency.
Is travel insurance mandatory for solo trekking in Nepal?
You should have travel insurance that specifically covers your trekking altitude and emergency helicopter evacuation. Check the policy terms carefully before your trek.
Can I trek to Everest Base Camp without a guide?
Foreign trekkers should not plan to trek to Everest Base Camp independently without a licensed guide. The current rules require a guide on the route.
Which restricted areas can solo trekkers visit in Nepal?
Applicable 2026 rules allow solo clients to arrange trips to restricted areas such as Manaslu, Upper Mustang, Tsum Valley and Dolpo with the required permits, guide and agency support.
How much does solo trekking in Nepal cost?
There is no single price for solo trekking. The total depends on your route, number of days, guide, permits, accommodation, transportation and other trip expenses. Restricted-area treks generally involve additional permit costs.
Is solo trekking in Nepal safe?
A guided solo trek gives you the independence of travelling as a single client while still having local support for navigation, altitude concerns, logistics and emergencies.
How do I book a solo trekking package in Nepal?
Contact a registered trekking agency with your preferred destination, dates and approximate trek duration. The agency can confirm the current requirements and arrange your guide, permits, accommodation and transportation.
For years, entering Nepal’s restricted Upper Mustang region came with a fixed USD $500 permit fee for the first 10 days. That meant a traveller staying for only four or five days still paid the full amount.
The permit system has changed in 2026. The Restricted Area Permit (RAP) is now charged at USD $50 per person, per day spent inside the restricted area beyond Kagbeni.
That means a 4-day stay costs USD $200 in RAP, while a 10-day stay costs USD $500. You still need to account for other required fees, including the Annapurna Conservation Area Permit (ACAP) and applicable E-TIMS registration.
Here’s what the new Upper Mustang permit cost means for your trip.
Upper Mustang Permit Cost 2026: What’s Changed With the New Daily Rate?
The major change in 2026 is the move from the previous 10-day minimum RAP charge to a daily system.
Under the previous structure, the first 10 days cost USD $500, with an additional USD $50 for each day after that. A traveller planning a shorter trip therefore paid for 10 days even if they stayed for less time.
The current rate is simpler:
USD $50 per person, per day inside the restricted area.
For example:
4 days: USD $200
6 days: USD $300
10 days: USD $500
12 days: USD $600
The change is particularly relevant for shorter Upper Mustang trips, including Jeep tours and shorter treks.
The daily RAP applies to the restricted zone beyond the Kagbeni checkpoint, so your itinerary needs to account for the number of days you will actually spend inside the restricted area.
Full Cost Breakdown: RAP, ACAP, and E-TIMS Fees Explained
The RAP is not the only cost involved in entering Upper Mustang. Depending on your route and travel arrangements, you also need to consider the following:
Restricted Area Permit (RAP): USD $50 per person, per day inside the restricted area.
Annapurna Conservation Area Permit (ACAP): NPR 3,000 for foreign visitors.
E-TIMS: NPR 2,000 where applicable.
The RAP is the main variable because it increases with the number of days spent inside the restricted area. ACAP and applicable E-TIMS fees are separate charges.
Upper Mustang lies within the Annapurna Conservation Area, which is why the ACAP is required alongside the restricted-area permit.
Your trekking agency should confirm the applicable permit requirements for your exact route before departure, particularly if you are travelling overland through Lower Mustang or entering by air.
Old System vs. New Daily Structure: How Much Will You Save?
The biggest difference becomes clear when comparing the old and current RAP structures.
Itinerary Length
Old RAP
2026 Daily RAP
Savings
4 Days
USD $500
USD $200
USD $300
6 Days
USD $500
USD $300
USD $200
10 Days
USD $500
USD $500
USD $0
These figures compare the RAP only. ACAP and applicable E-TIMS charges are separate.
If you are planning a traditional 10-day Upper Mustang trip, the RAP remains USD $500. The difference becomes significant when your itinerary is shorter than 10 days.
For example, someone planning a four-day trip now pays USD $200 in RAP rather than the previous USD $500.
Upper Mustang Regulations 2026: Mandatory Guides & New Solo Travel Rules
The lower RAP cost for shorter trips does not mean that Upper Mustang has become an unrestricted destination.
Upper Mustang remains a restricted area, and foreign travellers must follow the applicable permit and guide requirements.
Independent trekking without the required agency and guide arrangements is not permitted. The restricted-area permit must be processed through an authorised, government-registered trekking agency.
In 2026, solo travellers can also plan an Upper Mustang trip without finding another traveller to form a group, provided they meet the applicable requirements and travel with the required licensed guide.
You should also carry your passport during the trip. Permit details are checked at checkpoints, and your entry and exit dates need to match the approved permit.
Because the RAP is calculated according to the number of days inside the restricted area, your itinerary should be planned carefully before the permit is issued.
How to Apply: Why You Need a Registered Nepal Trekking Agency
The Upper Mustang permit process involves more than simply paying the daily RAP fee.
A registered trekking agency can arrange the required permits, confirm the applicable fees, prepare the necessary documentation and organise a licensed guide for your trip.
This is particularly important because your permit needs to match your planned entry and exit dates.
Your agency can also help determine whether additional registrations or permits apply based on your chosen route, such as whether you are travelling overland through the Annapurna region or using domestic flights.
For travellers planning a shorter Upper Mustang trip, getting the number of restricted-area days right is especially important because the RAP is now calculated on a daily basis.
Plan Your Upper Mustang Trip With Hi Nepal Treks
The 2026 daily RAP structure makes shorter Upper Mustang trips considerably more straightforward to price.
Instead of automatically paying USD $500 for the first 10 days, you now pay according to the number of days spent inside the restricted area.
However, the permit remains only one part of planning the trip. You also need to consider ACAP, applicable E-TIMS registration, guide requirements, transportation and your overall itinerary.
Hi Nepal Treks can help arrange the required permits and plan your Upper Mustang trip according to the number of days you want to spend in the restricted area.
Whether you’re planning a short Jeep journey or a longer trek towards Lo Manthang, confirm the current permit requirements and total trip costs before booking.
FAQ’s
Can I apply for the Upper Mustang Restricted Area Permit (RAP) by myself?
No. The RAP must be processed through a registered Nepali trekking agency, and travellers entering the restricted area must follow the applicable guide requirements.
What happens if I stay past the dates on my permit?
Your permit is issued for specific dates. Staying beyond the approved period can result in additional government charges or penalties. Speak with your trekking agency if your itinerary changes while you are in the region.
Do Indian nationals have to pay the USD $50 daily fee?
The applicable RAP rules and fees depend on the traveller’s nationality and current government regulations. Indian travellers should confirm the current rate with a registered agency or the Department of Immigration before travelling.
Is there an age limit or a discount for children?
Permit charges can vary according to the type of permit and applicable government rules. Check the current requirements with the agency processing your permit before booking a family trip.
Can I get a refund on my permit fees if my trip gets cut short?
Permit fees are subject to the government’s applicable refund and cancellation rules. If your itinerary changes after the permit has been issued, ask your trekking agency whether any refund or adjustment is possible.
Where exactly does the “Restricted Area” start and end?
For Upper Mustang, the restricted area begins beyond the Kagbeni checkpoint. The RAP applies to the restricted section of the route, including the area around Lo Manthang and other destinations within Upper Mustang.
Ask most travelers when to trek in Nepal, and they’ll tell you to wait for autumn. But here’s a secret that seasoned guides have known for generations: some of the most spectacular trekking in the entire Himalaya happens during the monsoon months of June, July, and August. The myth that the whole country shuts down under torrential rain simply isn’t true.
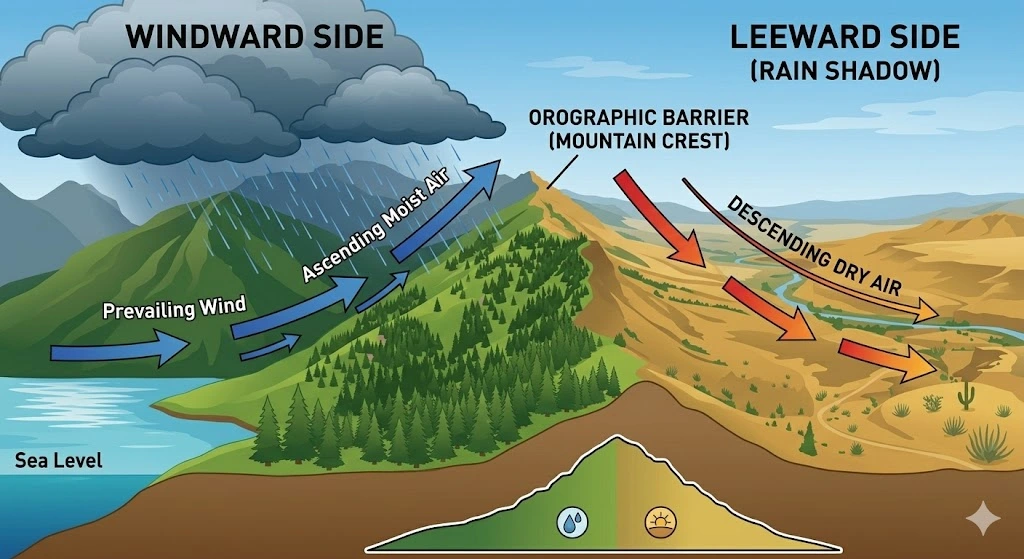
The key is understanding the rain shadow effect. As monsoon clouds sweep north from the Indian Ocean, they slam into the great Himalayan wall and dump their moisture on the southern slopes. By the time the air climbs over the 8,000-meter giants, it has nothing left to give. The land beyond becomes arid, Tibetan-style high desert, where skies stay blue, trails stay dry, and wildflowers and barley fields burst into bloom while the rest of the region drips.
In this 2026 guide, we’ll walk you through the seven best monsoon treks in Nepal, plus the honest logistics, safety considerations, and packing strategies you need to make a summer trek a success.
Why the Rain Shadow Changes Everything
The rain-shadow regions sit in the trans-Himalayan zone, tucked behind ranges like the Annapurna, Dhaulagiri, and Manaslu massifs. These barriers act as natural umbrellas. While Kathmandu and Pokhara see daily downpours, places like Upper Mustang receive a fraction of that rainfall, often just a few overcast hours rather than days of rain.
The reward is a trekking experience few people ever see: empty trails, lush lower valleys, dramatic cloud-and-shadow photography, and cultural festivals like Tiji that breathe life into ancient walled kingdoms. Let’s get into the routes.
1. Upper Mustang: The Forbidden Kingdom of Lo
Trip Facts
Details
Duration
10–14 Days
Difficulty
Moderate
Maximum Elevation
3,840 m (Lo Manthang) / 4,230 m (Marang La Pass)
Permit Requirements
Restricted Area Permit (RAP): USD 50 per person per day (no minimum 10-day block required).
Completely dry, desert-like landscape with clear blue skies while the rest of Nepal experiences heavy rainfall.
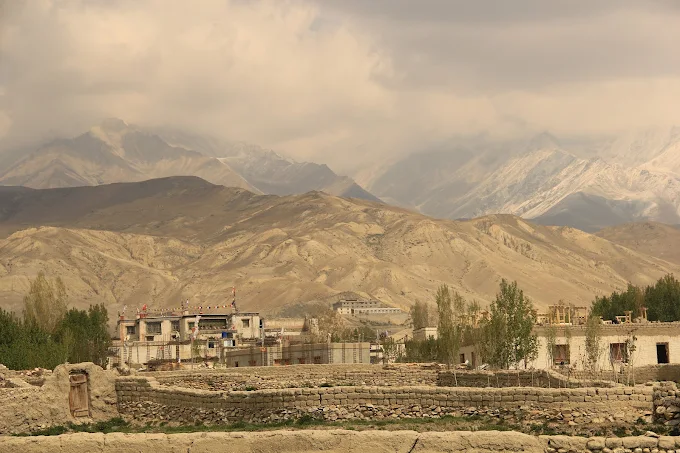
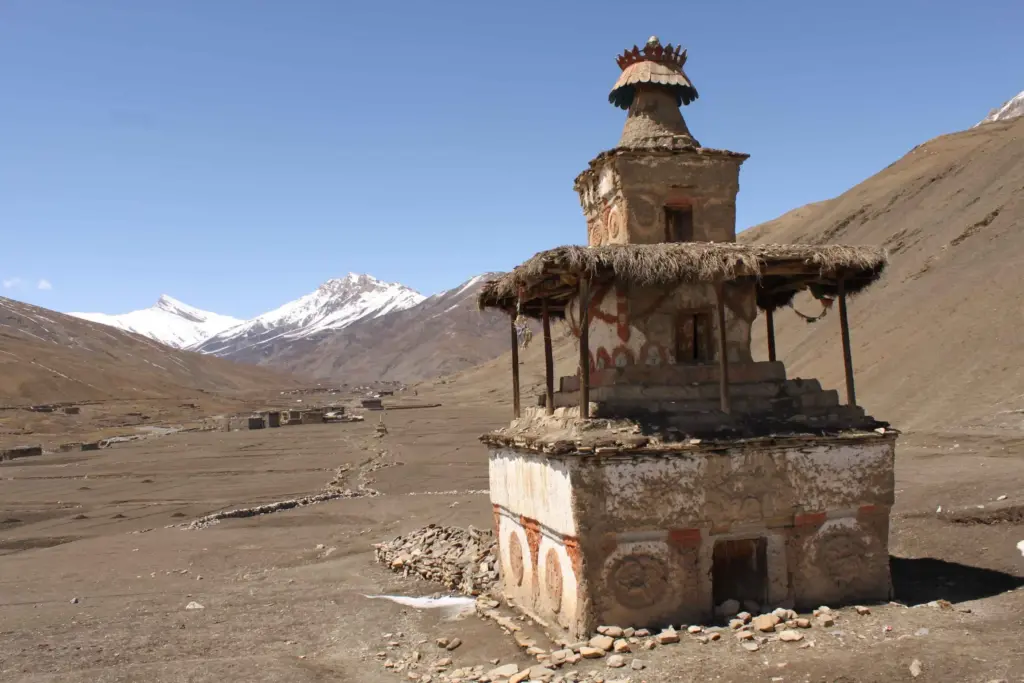
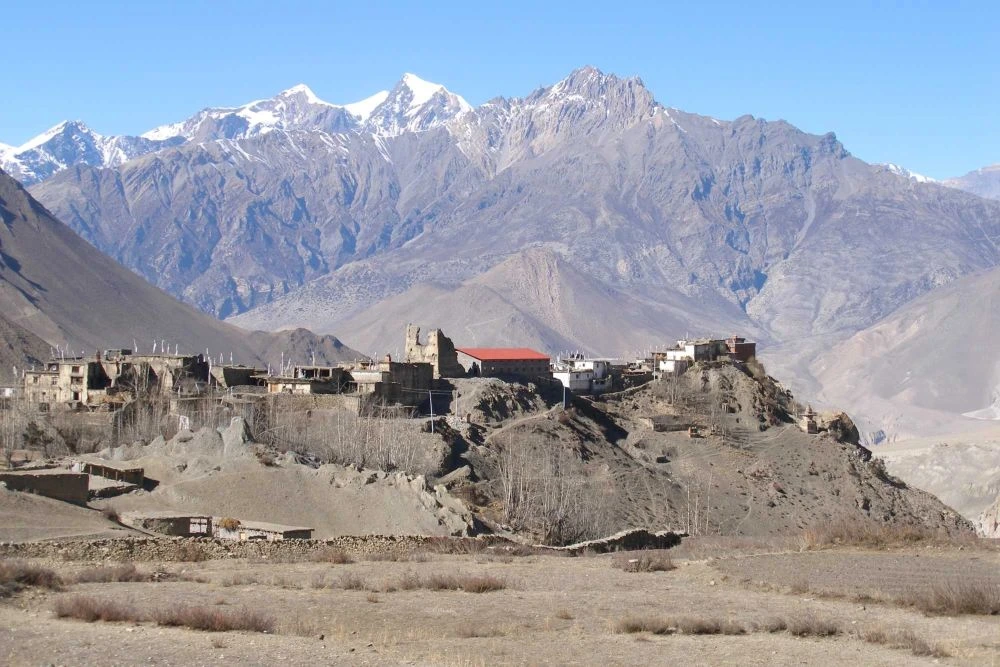
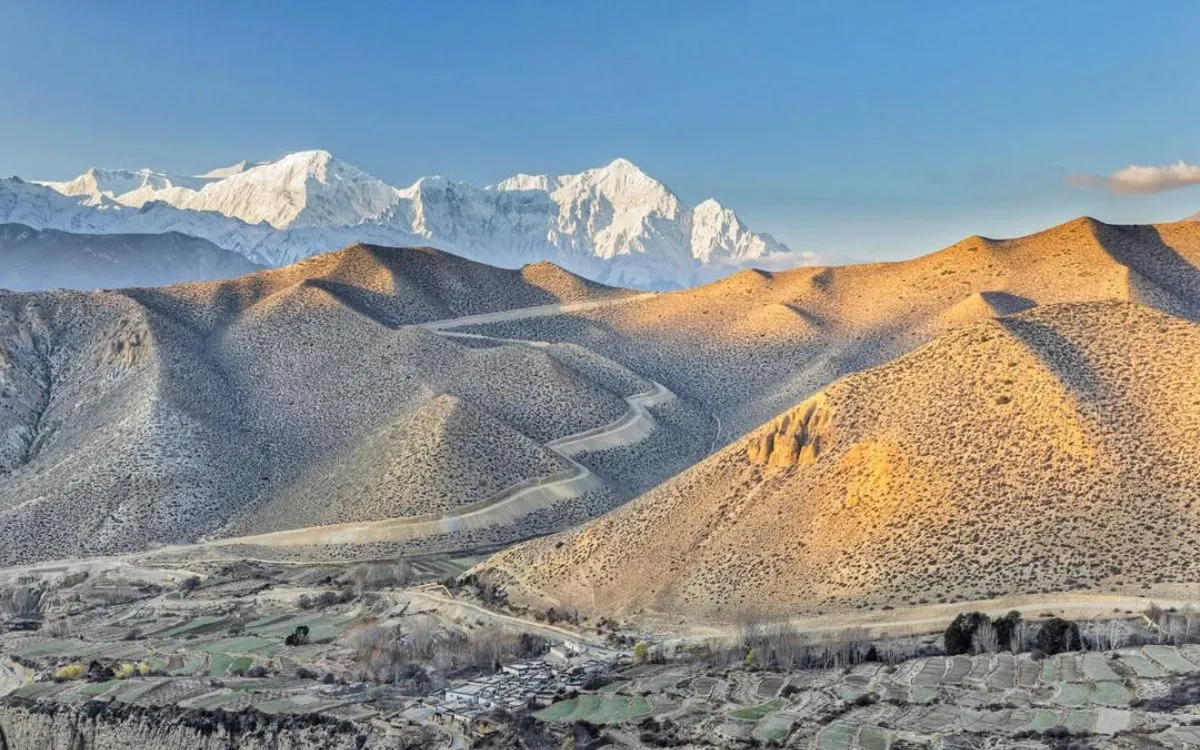
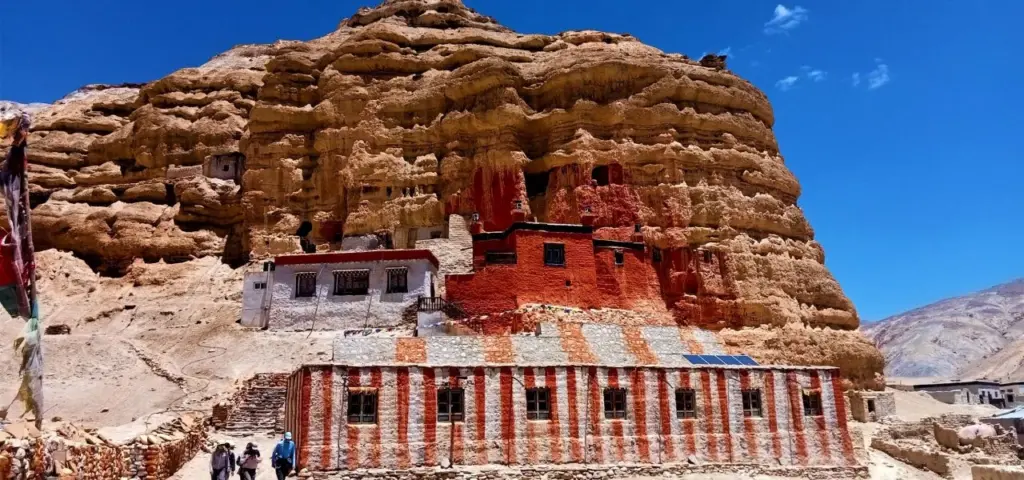
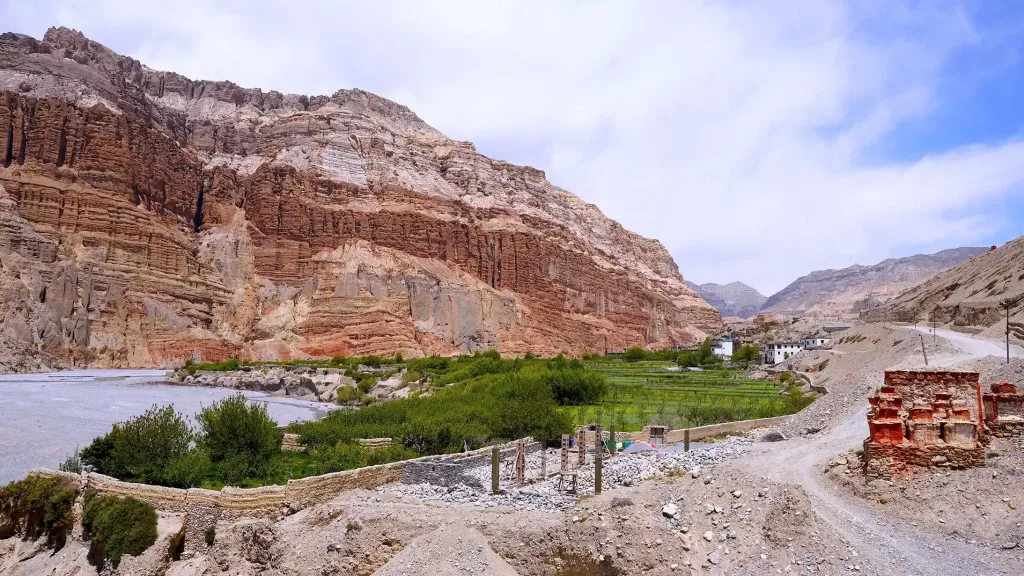
If there is one definitive monsoon trek in Nepal, it is Upper Mustang. This former Tibetan kingdom of Lo sits deep in the rain shadow of the Annapurna and Dhaulagiri ranges, making it one of the driest inhabited regions on earth. Eroded ochre cliffs, hidden sky caves, whitewashed monasteries, and the walled capital of Lo Manthang await.
Summer is also when the famed Tiji festival sometimes falls, filling the desert towns with masked dancers and ceremonial color. Because the landscape is so arid, monsoon barely registers here, you’ll trek under wide blue skies while the foothills below are soaked. Note that Upper Mustang is a restricted area requiring a special permit and a licensed guide.
Bonus 2026 Fact: The Department of Immigration also lifted the strict two-person minimum rule for Upper Mustang. Solo travelers can now legally get an Upper Mustang RAP, provided they still hire a mandatory licensed guide through an authorized agency.
2. Upper Dolpo: Pristine, Remote, and Rain-Free
Trip Facts
Details
Duration
20–25 Days
Difficulty
Strenuous / Challenging
Maximum Elevation
5,360 m (Kang La Pass)
Permit Requirements
Restricted Area Permit (RAP): USD 500 per person for the first 10 days, then USD 50 per person per day for additional days.
Shey Phoksundo National Park Entry Permit: NPR 3,000 (Approx. USD 25 per person).
Total isolation in an untouched rain-shadow wilderness with virtually no tourist crowds.
Few places on the planet feel as untouched as Upper Dolpo. Sealed off behind the Dhaulagiri massif, this remote region is almost entirely shielded from heavy rainfall. Ancient Bon-Po culture, yak caravans, and centuries-old monasteries make it a journey back in time.
This is a serious, committing expedition reserved for experienced trekkers who crave true wilderness. The trails are long, the villages sparse, and the rewards immense. Because services are limited, going with a well-organized local team is not optional, it’s essential.
Note:A registered trekking agency must process this RAP, and a licensed guide is strictly mandatory (no solo trekking allowed).
3. Lower Dolpo: Turquoise Phoksundo Without the Downpour
Trip Facts
Details
Duration
12–15 Days
Difficulty
Moderate to Strenuous
Maximum Elevation
5,310 m (Numala Pass) / 5,214 m (Bagala Pass)
Permit Requirements
Restricted Area Permit (RAP): USD 20 per person per week. Additional days beyond 7 days are charged at USD 5 per person per day.
Shey Phoksundo National Park Entry Permit: NPR 3,000 (Approx. USD 25 per person).
TIMS Card: NPR 2,000 (Approx. USD 15) per person.
Accommodation
Combination of teahouses and camping
Best Monsoon Feature
Phoksundo Lake reaches its deepest and most surreal turquoise color due to summer glacier melt.
For those who want a taste of Dolpo’s magic with a slightly shorter commitment, Lower Dolpo delivers. The crown jewel here is Phoksundo Lake, a surreal turquoise alpine lake framed by dramatic cliffs and pine forests. During monsoon trek, the lake’s color is at its most vivid, and the surrounding rain-shadow terrain stays comfortably dry.
Lower Dolpo combines accessible scenery with genuine remoteness, offering a perfect balance for adventurous travelers who don’t want to brave the full Upper Dolpo expedition.
9–12 Days (often combined with the Annapurna Circuit)
Difficulty
Strenuous
Maximum Elevation
5,320 m (Kang La Pass)
Permit Requirements
Restricted Area Permit (RAP):
• Autumn (September–November): USD 100 per person per week, plus USD 15 per person per day beyond one week.
• Rest of the Year (December–August): USD 75 per person per week, plus USD 15 per person per day beyond one week.
ACAP Permit: NPR 3,000 (Approx. USD 25).
Accommodation
Teahouses
Best Monsoon Feature
Experience a dramatic transition from lush, rain-soaked lower gorges to a completely dry Tibetan-style high valley.
Tucked away behind the Annapurna range, the Nar Phu Valley is a secret world of medieval stone villages, narrow gorges, and high-altitude pastures. The valley sits in a partial rain shadow, so while the approach can see some greenery and showers, the upper sections stay far drier than the southern trails.
This is a culturally rich, less-trodden route where you’ll encounter Tibetan Buddhist communities living much as they have for centuries. Like Upper Mustang and Dolpo, Nar Phu is a restricted area requiring permits and a guide.
Note to avoid confusion: The Annapurna region has its own Kang La Pass entirely separate from the one in Dolpo!
5. Limi Valley, Humla: Wild Borderland Trekking
Trip Facts
Details
Duration
15–18 Days
Difficulty
Strenuous
Maximum Elevation
4,990 m (Nyalwa Lagna Pass) or 5,000 m+ depending on specific ridges
Permit Requirements
Restricted Area Permit (RAP): USD 50 per person per week, plus USD 10 per person per day beyond one week.
Local/National Park Fees: Applicable entry fees at Simikot or Namkha checkpoints.
Accommodation
Primarily Camping
Best Monsoon Feature
The ultimate frontier trek experience—very likely to encounter no other trekking groups throughout the entire valley.
For the truly intrepid, the Limi Valley in far-northwestern Humla is one of Nepal’s last great frontiers. Bordering Tibet, this raw and remote region offers untouched landscapes, traditional Tibetan villages, and the kind of solitude that has all but vanished from more popular trails.
Limi sits firmly in the rain shadow, making summer a viable window to explore it. Access involves flights to Simikot and careful logistical planning, so this trek is best undertaken with an agency that knows the region intimately.
6. Ghorepani Poon Hill: The Lush Monsoon Exception
Trip Facts
Details
Duration
4–5 Days
Difficulty
Easy to Moderate
Maximum Elevation
3,210 m (Poon Hill Viewpoint)
Permit Requirements
ACAP Permit: NPR 3,000 (Approx. USD 22–25).
TIMS Card: NPR 2,000 (Approx. USD 15).
Accommodation
Comfortable Teahouses
Best Monsoon Feature
Thundering waterfalls, neon-green terraced hillsides, and a legendary viewpoint almost entirely to yourself.
Not every great monsoon trek is in the rain shadow. The classic Ghorepani Poon Hill trek is the notable exception on this list. Yes, it sits in the monsoon belt and you should expect occasional showers, but the trade-off is glorious. The hills explode in green, waterfalls thunder at full force, and rhododendron forests glisten after the rain.
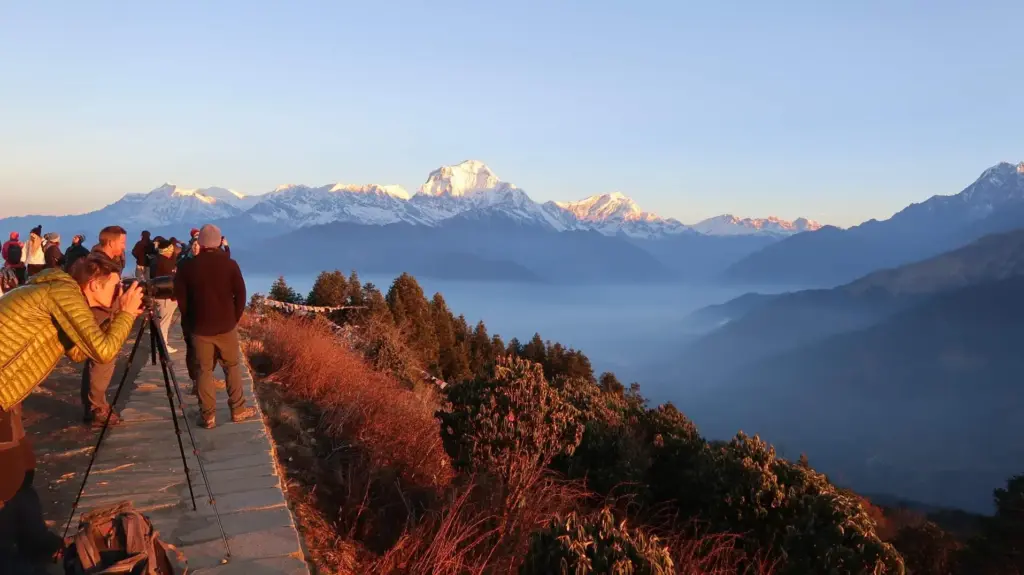
Best of all, the trails are blissfully quiet. If you don’t mind getting a little wet and you want a shorter, scenic trek with sweeping Annapurna and Dhaulagiri views from the Poon Hill viewpoint, summer can be a magical (and crowd-free) time to go. Just come prepared for leeches in the lower forests with waterproof trail runners or boots with a solid grip.
7. Jomsom to Muktinath: High Desert Made Easy
Trip Facts
Details
Duration
5–7 Days (or 3–4 days if using jeeps)
Difficulty
Easy to Moderate
Maximum Elevation
3,760 m (Muktinath Temple)
Permit Requirements
ACAP Permit: NPR 3,000 (Approx. USD 22–25).
TIMS Card: NPR 2,000 (Approx. USD 15).
Accommodation
High-quality, comfortable teahouses
Best Monsoon Feature
The most logistically flexible trek in summer—if flights to Jomsom are cancelled, you can switch to a 4×4 jeep journey through the dry Kali Gandaki Valley.
The Jomsom–Muktinath route offers rain-shadow trekking that is remarkably accessible. Flying into Jomsom (or reaching it by Jeep) drops you straight into the arid Kali Gandaki valley, where the dramatic high-desert scenery rivals Upper Mustang at a fraction of the permit cost.
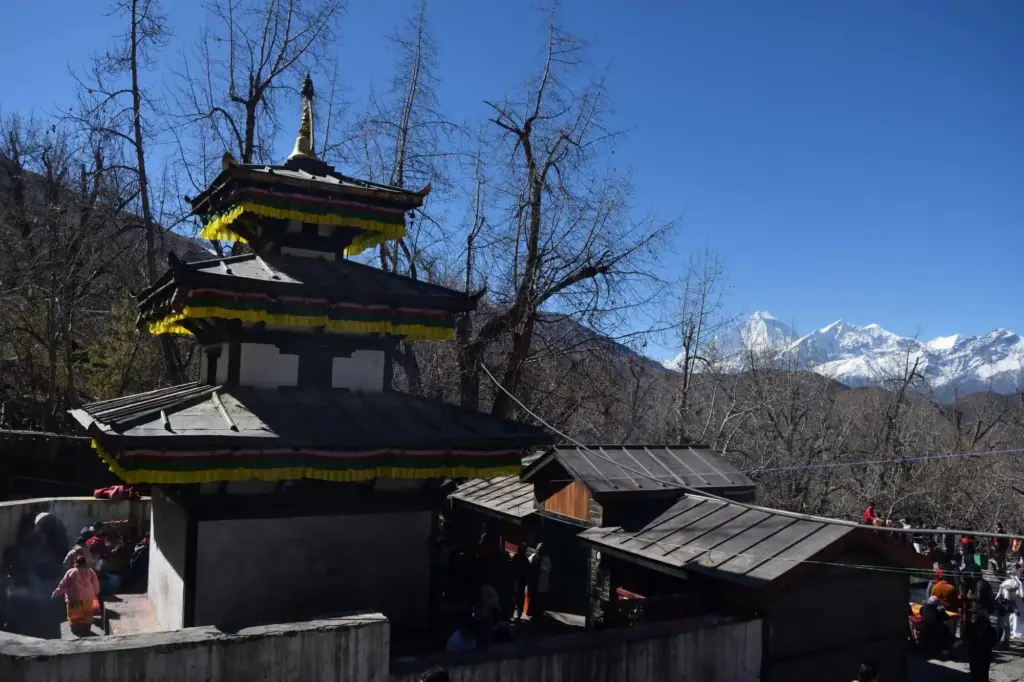
The sacred Muktinath Temple, holy to both Hindus and Buddhists, sits at the head of the trek and is a pilgrimage highlight. For travelers short on time who still want dry skies and dramatic landscapes, this is an ideal monsoon trek choice. You can even reach the region via the popular Pokhara to Muktinath Jeep route if flights are disrupted.
Logistics & Safety: The Honest Truth
Monsoon trekking is rewarding, but only if you go in with realistic expectations. Here are the real-world challenges we want you to understand:
Flight delays: Domestic flights to Pokhara and Jomsom are weather-dependent and can be delayed or cancelled during monsoon. Always build buffer days into your schedule.
Highway landslides: Road access to regions like Mustang and Dolpo can be affected by landslides on mountain highways. A flexible itinerary and an experienced team make all the difference.
The value of a local guide: An experienced local guide can read changing conditions, reroute around problem zones, and secure reliable lodging, turning potential disruptions into smooth adventures.
For deeper insight into how these mountain journeys are organized, our overview of high-altitude trekking logistics is a useful read. And if you’re weighing your overall options, the trekking routes guide helps you compare regions.
Essential Monsoon Trek Packing Tips
Smart packing separates a frustrating wet trek from a comfortable one. Prioritize these items:
Lightweight waterproof shell: A breathable, packable rain jacket and pants are non-negotiable, even in rain-shadow zones where afternoon showers can surprise you.
Quick-dry layers: Synthetic or merino base layers dry fast and prevent the misery of damp cotton.
Robust trekking poles: Slippery, muddy trails demand stability, poles save knees and prevent falls.
Leech protection: In lower forests (especially around Ghorepani), use gaiters, tuck in your layers, and carry salt or a leech repellent.
Dry sacks: Waterproof bags protect electronics, documents, and spare clothing inside your pack.
The monsoon doesn’t have to mean missing out on Nepal. With the rain shadow on your side and the right local team behind you, summer can deliver some of the most rewarding, crowd-free trekking of your life.
Ready to chase blue skies behind the Himalaya? Explore Hi Nepal Treks’ tailored summer itineraries or message our travel experts to check real-time trail conditions and build a flexible monsoon trek designed around your goals. Our deep local network is your insurance against the unexpected.
Frequently Asked Questions
Is monsoon a good time for first-time trekkers?
Rain-shadow routes like Jomsom–Muktinath are very approachable for beginners. The remote Dolpo and Limi treks, however, are best left to experienced trekkers.
Will I see mountain views?
Yes, in the rain-shadow regions, mornings are typically clear with stunning visibility before clouds build in the afternoon.
Do I need permits?
Restricted areas like Upper Mustang, Dolpo, Nar Phu, and Limi require special permits and a licensed guide. We handle all of this for you.
Can I trek solo in these restricted regions if I have a guide?
Yes! The Department of Immigration officially removed the old rule requiring a minimum group size of two foreign nationals for restricted areas like Upper Mustang, Dolpo, and Nar Phu. You can absolutely do these treks as a solo traveler, provided you are accompanied by a government-licensed guide and your permits are processed through a registered trekking agency.
How do I get to the rain-shadow areas if monsoon flights are canceled?
This is a huge factor during the summer. Regular domestic mountain flights, especially the Pokhara-to-Jomsom sector, are frequently suspended for months during the peak monsoon due to low visibility and high winds. To ensure your trip goes smoothly, your itinerary should rely on overland 4×4 Jeeps via the Beni route to reach Mustang, or you should build 2–3 buffer days into your schedule if you are heading to far-western hubs like Simikot (Humla) or Juphal (Dolpo).
Are there leeches on rain-shadow trekking trails?
Inside the true rain shadow (like the deep desert valleys of Upper Mustang and Upper Dolpo), there are zero leeches because the climate is too arid for them to survive. However, you will encounter them during the initial “approach days” when walking through the lower, lush green valleys (like the lower section of the Nar Phu approach or the lower forests of the Ghorepani Poon Hill trail) before you cross past the mountain walls into the dry zones.
Why do I need a mandatory licensed guide for standard trails like Poon Hill or Jomsom?
Nepal enforces a strict safety policy across all national parks and conservation areas. Even though trails like Ghorepani Poon Hill and Jomsom–Muktinath are straightforward and have highly developed teahouse infrastructure, they sit within the Annapurna Conservation Area (ACAP). Checkpoints along these routes rigorously verify that every foreign trekker is accompanied by an authorized, licensed guide.
What kind of travel insurance do I need for a monsoon trek?
Your policy must specifically cover emergency helicopter evacuation up to 5,000 m. Landslides in the lower valleys can occasionally block road networks during heavy summer downpours, making air rescue the only option if a medical emergency or severe altitude sickness occurs. Always verify that your policy does not have a “monsoon exclusion” clause.
Not everyone has the time or the physical ability to spend days walking through the Himalayas trail.
This is where a helicopter tour comes in.
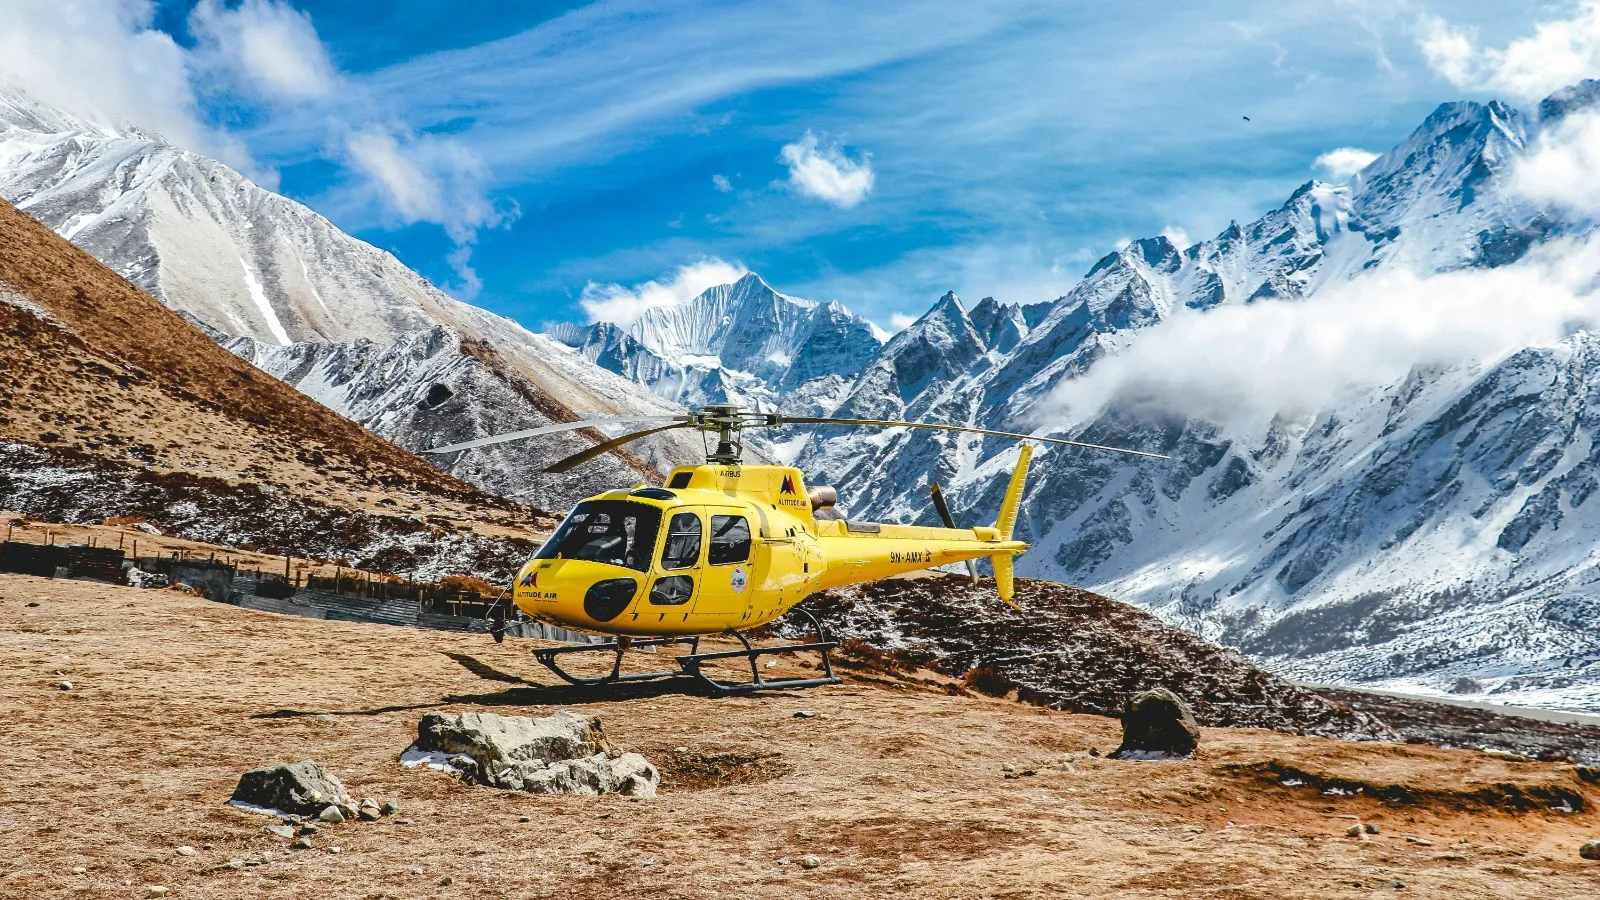
These types of tour gives you another way to experience Nepal’s mountains, whether you want to see Everest from above, visit Muktinath, reach Annapurna Base Camp, or simply spend a few hours in the Himalayas instead of several days on a trail.
Nepal helicopter tours are also useful when the destination itself is more important to you than the trek. You can fly into high mountain regions, spend some time at the destination when the itinerary allows, and return to Kathmandu or Pokhara the same day.
But the price, flight duration, route and experience can vary considerably between tours.
This guide covers the main Nepal helicopter tour packages, their typical routes, what affects the price, who they suit, and what to consider before booking.
Nepal Helicopter Tours: What You Can Expect
A helicopter tour in Nepal can be as short as a mountain sightseeing flight or as destination-focused as a helicopter trip to Everest Base Camp or Muktinath.
The experience depends largely on the route you choose.
For example, an Everest helicopter tour is mainly about getting a close aerial view of the world’s highest mountain and the surrounding Himalayan range.
An Annapurna Base Camp flight takes you deeper into the Annapurna Sanctuary, while a Muktinath helicopter tour is often chosen by travellers who want to visit the important pilgrimage site without undertaking the longer trek.
You can generally choose between:
Shared helicopter tours, where the flight cost is divided among passengers
Private helicopter charters, where you book the helicopter for your own group
Mountain sightseeing flights, focused primarily on aerial views
Destination-based tours, where the helicopter takes you to a specific Himalayan location
The right option depends on your destination, group size, available time and budget.
Nepal Helicopter Tour Prices
The cost of a helicopter tour in Nepal isn’t a single fixed amount. It depends on the destination, departure point, number of passengers, whether the flight is shared or private, and the type of landing or stop included in the itinerary.
For travellers comparing packages, these are the main things to check before looking at the price alone:
Factor
Why it matters
Destination
Longer routes generally require more flight time
Departure point
Kathmandu and Pokhara serve different helicopter routes
Shared or private
Private charters cost more but give your group exclusive use
Number of passengers
Shared tours divide the helicopter cost between passengers
Landing
A landing at a mountain destination can affect the itinerary and cost
Flight duration
Longer flights generally have higher operating costs
Season
Availability and operating conditions can vary throughout the year
So when you see a Nepal helicopter tour price, check exactly what that price covers rather than comparing the numbers alone.
For example, ask whether airport transfers, permits, landing charges, meals, or other services are included in the quoted package.
Popular Helicopter Tour Packages in Nepal
Nepal’s helicopter routes cover several of the country’s best-known mountain destinations. Some are primarily sightseeing experiences, while others are designed to take travellers directly to a particular destination.
Everest Base Camp Helicopter Tour
The Everest Base Camp helicopter tour is one of the most popular ways to experience the Everest region without committing to a full trek.
The flight takes you towards the Khumbu region, with views of the surrounding Himalayan peaks and the Everest landscape. Depending on the itinerary and weather conditions, the tour may include a stop around the Everest region before returning to Kathmandu.
It is particularly useful for travellers with limited time who still want to see the Everest region from close range.
Annapurna Base Camp Helicopter Tour
An Annapurna Base Camp helicopter tour takes you into the Annapurna Sanctuary without the several-day trek normally required to reach the base camp.
The route offers views of the Annapurna range, Machhapuchhre and surrounding mountains before reaching the high Himalayan landscape around base camp.
This can be an alternative for travellers who want to experience Annapurna but cannot fit a longer trek into their Nepal itinerary.
Muktinath Helicopter Tour
Muktinath is one of Nepal’s significant pilgrimage destinations and sits at a high altitude in the Mustang region.
This helicopter tour makes it possible to visit Muktinath without spending several days travelling overland or trekking through the region.
The route is particularly relevant for travellers whose main purpose is visiting the temple rather than completing a Mustang trek.
Rara Lake Helicopter Tour
Rara Lake sits in western Nepal, far from the country’s main tourist centres.
Travelling overland to Rara can take considerable time, which makes a helicopter flight an option for travellers who want to see the lake while avoiding the long road journey.
The appeal here is less about reaching a trekking destination and more about getting to one of Nepal’s remote natural landscapes in a much shorter time.
Tilicho Lake Helicopter Tour
Tilicho Lake lies in the Annapurna region at a high elevation and normally requires trekking to reach it.
A Tilicho helicopter tour offers a different way to experience the lake and surrounding mountains, particularly for travellers who have limited time or do not want to undertake the full trek.
Langtang Helicopter Tour
The Langtang region is relatively close to Kathmandu compared with many of Nepal’s other Himalayan destinations.
A helicopter flight provides an aerial perspective of the Langtang mountains and valleys while significantly reducing the travel time compared with trekking.
Kapuche Lake Helicopter Tour
Kapuche Lake is known for its high-altitude landscape and glacial surroundings in the Annapurna region.
A helicopter tour can be an option for travellers who want to see the lake without committing to the longer trek required to reach it on foot.
Mardi Himal Helicopter Tour
A Mardi Himal helicopter flight offers views of the Mardi Himal and surrounding Annapurna landscape without requiring a multi-day trek.
Helicopter Tours for Elderly Travellers
Helicopter tours can be considered by older travellers who want to experience Nepal’s mountains but do not want to undertake a demanding multi-day trek.
A helicopter can reduce the amount of walking and travel required to reach a high-altitude destination. However, that does not automatically make every helicopter tour suitable for every older traveller.
Altitude, cold temperatures, changes in weather and the physical conditions at the landing point still matter.
If you’re travelling with an elderly family member, consider:
How comfortable they are with flying
Whether they have any medical conditions that could be affected by altitude
How long they will need to remain at a high-altitude destination
Whether the itinerary involves getting out of the helicopter
The weather and expected conditions on the day
Whether their doctor has advised any precautions for high-altitude travel
For travellers with existing medical concerns, getting appropriate medical advice before booking is sensible.
Best Time for a Helicopter Tour in Nepal
Weather plays an important role in helicopter operations in Nepal.
Clear mountain views are generally easier to enjoy when visibility is good, while cloud, wind and other weather conditions can affect flights and sightseeing.
For travellers mainly interested in Himalayan mountain views, the clearer periods of the year are generally more attractive than periods with frequent cloud or precipitation.
However, the “best” time also depends on your destination.
For example, a flight to a pilgrimage destination may have different priorities from a mountain sightseeing flight. Similarly, a traveller visiting Nepal during the monsoon may need to be more flexible with the flight schedule.
Rather than choosing a date based only on a general travel season, check the current weather forecast and flight conditions with the operator before departure.
What Is Included in a Helicopter Tour Package?
The inclusions vary between helicopter tours, so don’t assume that every package offers the same service.
Depending on the route and operator, a package may include some combination of:
Helicopter flight
Airport or hotel transfers
Landing charges
Permits or local fees where applicable
Meals or refreshments
Ground transportation
Assistance from the tour operator
The exact inclusions should be clearly stated before you make a booking.
This is particularly important when comparing helicopter tour prices. A cheaper-looking package may not actually cost less if important services are excluded from the advertised price.
Before confirming your booking, ask:
What exactly is included in the quoted price?
That one question can prevent confusion later.
How to Book a Helicopter Tour in Nepal
Once you’ve decided on a route, booking is relatively straightforward, but there are a few things worth confirming first.
1. Choose Your Destination
Start with the experience you actually want.
Do you want to see Everest, visit Muktinath, fly into the Annapurna region, or simply enjoy a Himalayan sightseeing flight?
The destination determines most of the rest of the itinerary.
2. Decide Between Shared and Private
If you are travelling alone or as a small group, a shared helicopter tour may be more practical when available.
A private charter gives your group more control over the arrangement, but the total cost is different because you are not sharing the charter with other passengers.
3. Check the Departure Point
Confirm whether your tour starts from Kathmandu or Pokhara.
This matters not only for the price but also for planning the rest of your day.
4. Check What the Price Includes
Ask for the complete package inclusions before paying.
Confirm the flight, transfers, landing charges, meals, permits and any other services that are part of the package.
5. Confirm the Weather and Flight Conditions
Helicopter flights in the Himalayas are weather-dependent.
A tour can therefore be affected by conditions that are outside the operator’s control. Keep some flexibility in your itinerary where possible, especially if the helicopter flight is one of the main reasons for your Nepal trip.
6. Confirm the Cancellation or Rescheduling Policy
Before booking, understand what happens if the flight cannot operate because of weather or other operational reasons.
A clear cancellation and rescheduling policy is particularly important for travellers with tight international flight schedules.
Frequently Asked Questions
How much is a helicopter ride in Nepal?
The cost depends on the destination, departure point, flight duration, number of passengers and whether you book a shared flight or private charter. There isn’t one fixed price for every helicopter ride in Nepal.
How much does a helicopter tour cost in Nepal?
Nepal helicopter tour prices vary significantly between routes. Everest, Muktinath, Annapurna and other destinations have different operating requirements, so compare the complete package rather than looking only at the advertised starting price.
Are helicopter tours suitable for elderly travellers?
They can be an option for older travellers who want to experience the Himalayas without completing a multi-day trek. However, high altitude, cold temperatures and the conditions at the destination still need to be considered. Travellers with medical concerns should seek appropriate medical advice before travelling.
Which helicopter tour is best in Nepal?
That depends on what you want from the trip. Everest is suited to travellers focused on the Everest region, Muktinath to those visiting the pilgrimage site, while Annapurna and other routes offer different Himalayan experiences.
Can I book a private helicopter in Nepal?
Private helicopter charters are available for some routes. The cost depends on the route, aircraft requirements, passenger numbers and operating conditions.
How long is a helicopter tour in Nepal?
There is no standard duration. Some flights are short sightseeing experiences, while destination-based tours can take several hours depending on the route, stops and weather conditions.
Are helicopter tours in Nepal affected by weather?
Yes. Mountain weather can change quickly, and visibility, wind and other conditions can affect helicopter operations. Operators may delay, reschedule or cancel a flight when conditions are not suitable.
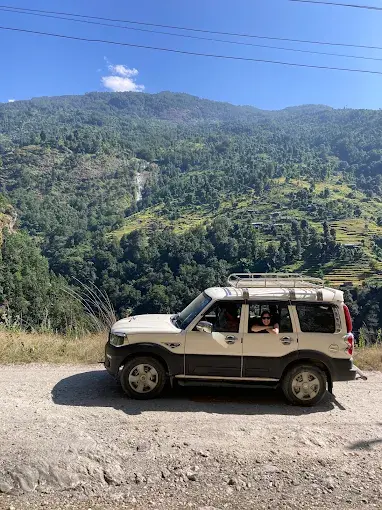
Planning a Pokhara to Muktinath tour by Jeep? This road journey takes you from Pokhara through the Kali Gandaki Valley to Muktinath, a sacred Hindu and Buddhist pilgrimage site at 3,710 m in Mustang. Along the way, you’ll pass through changing landscapes, mountain villages, and dramatic Himalayan terrain.
At Hi Nepal Treks & Expedition, our Muktinath tour package from Pokhara is designed for travelers who want to experience the journey comfortably by road, whether you’re visiting for pilgrimage, a family trip, or a Himalayan adventure. You can also explore our Jomsom Muktinath Trek for a trekking-based alternative.
Pokhara to Muktinath by Jeep – Why It’s the Best Way to Reach Muktinath Temple
The Pokhara to Muktinath by jeep route stands out among all travel options for its stunning scenery, cost-efficiency, and flexibility. Here is why thousands of travelers choose the jeep route every season:
Jaw-Dropping Scenery: Drive through the Kali Gandaki Gorge (the world’s deepest gorge), Thakali villages, apple orchards of Marpha, and the arid Mustang plateau, landscapes you simply cannot experience from a plane or helicopter.
No Flight Delays: Flights from Pokhara to Jomsom are notoriously unreliable due to strong afternoon winds. The jeep route operates on a reliable daily schedule with no weather cancellations.
Best Value for Money: The Pokhara to Muktinath jeep fare is a fraction of helicopter costs, yet far more comfortable and scenic than the overnight bus.
Flexible Stopovers: Private jeeps allow you to stop at Tatopani Hot Springs, Marpha village, Kagbeni, and other hidden gems along the route at your own pace.
Cultural Depth: Pass through living museum villages – Beni, Dana, Ghasa, Lete, Marpha, where Thakali and Tibetan cultures blend seamlessly in daily life.
Browse our full range of Nepal multi-day tour packages to combine your Muktinath journey with other iconic Nepal destinations.
Pokhara to Muktinath Distance by Road – Complete Route Breakdown
Understanding the exact Pokhara to Muktinath distance is essential for planning your itinerary. The total distance from Pokhara to Muktinath by road is approximately 210 km, traversing mixed terrain from city highways to high-altitude gravel mountain roads.
Route Segment
Distance
Road Condition
Duration
Pokhara → Beni
~66 km
Paved Highway
~1.5 hrs
Beni → Tatopani
~44 km
Partially Paved
~1.5 hrs
Tatopani → Ghasa
~28 km
Gravel / Mountain Road
~1 hr
Ghasa → Jomsom
~44 km
Gravel / Off-road
~2 hrs
Jomsom → Kagbeni
~18 km
Gravel / Flat
~30 min
Kagbeni → Muktinath
~10 km
Steep Gravel Road
~30–40 min
TOTAL: Pokhara → Muktinath
~210 km
Mixed Road Types
7–9 Hours
The distance between Pokhara to Muktinath by jeep is the same for both shared and private vehicles. Road conditions above Tatopani require a proper 4WD high-clearance vehicle, which is why all Hi Nepal Treks jeeps are fully equipped 4WD air-suspension vehicles. For the trekking version of this route, visit our Jomsom Muktinath Trek package.
Pokhara to Muktinath by Jeep Timings – Best Departure Schedule for 2025
Knowing the correct Pokhara to Muktinath by jeep timings is critical for a safe and enjoyable journey. Strong afternoon winds (called the ‘Mustang Wind’) build up in the Kali Gandaki valley from midday, making an early morning departure non-negotiable.
Departure Option
Departure Time
Arrival at Muktinath
Total Drive Time
Private Jeep (Hi Nepal Treks)
5:00 AM – 5:30 AM
12:00 PM – 2:00 PM
7–8 Hours
Shared Jeep (Local Service)
6:00 AM – 7:00 AM
2:00 PM – 4:00 PM
8–10 Hours
Jomsom → Muktinath Jeep
Flexible
+1 hr 30 min
~1.5 Hours
Kagbeni → Muktinath Jeep
Flexible
+30–40 min
~40 Minutes
Pro Tip: Always depart Pokhara by 5:30 AM at the latest. Our Hi Nepal Treks private jeep packages include hotel pickup at 5:00 AM to ensure you beat the afternoon winds and arrive at Muktinath with ample time to explore the temple before sunset.
Pokhara to Muktinath by Jeep Price & Fare – 2025 Updated Rates
The Pokhara to Muktinath by jeep price varies depending on vehicle type (shared vs. private), season, and inclusions. Below is our comprehensive 2025 pricing guide, covering the Pokhara to Muktinath by jeep fare for all options:
Pokhara to Muktinath Shared Jeep Ticket Price
Route
Service Type
Price Per Person (NPR)
Price Per Person (USD)
Pokhara → Muktinath
Shared Jeep (One Way)
NPR 2,500 – 3,500
USD 19 – 27
Muktinath → Pokhara
Shared Jeep (One Way)
NPR 2,500 – 3,500
USD 19 – 27
Pokhara → Jomsom
Shared Jeep (One Way)
NPR 2,000 – 2,800
USD 15 – 21
Jomsom → Muktinath
Shared Jeep (One Way)
NPR 800 – 1,200
USD 6 – 9
Pokhara to Muktinath by Jeep Rent — Private Vehicle Price
Service
Vehicle Type
Price (NPR)
Price (USD)
Capacity
Pokhara → Muktinath (One Way)
4WD Jeep
NPR 35,000 – 50,000
USD 265 – 380
Up to 7 pax
Pokhara → Muktinath → Pokhara
4WD Jeep
NPR 60,000 – 85,000
USD 450 – 640
Up to 7 pax
Pokhara → Muktinath (Jeep by Car)
SUV / Sedan
NPR 45,000 – 70,000
USD 340 – 530
Up to 4 pax
Jomsom → Muktinath Jeep Fare
Local Jeep
NPR 5,000 – 8,000
USD 38 – 60
Per vehicle
Kathmandu → Muktinath Jeep Fare
4WD Jeep
NPR 80,000 – 1,20,000
USD 600 – 905
Up to 7 pax
The Pokhara to Muktinath by jeep rent price peaks during spring (March–May) and autumn (October–November). Early booking via our Trip Planner guarantees the best Pokhara to Muktinath jeep fare with no last-minute surge pricing. The above rates are NOT included in a full tour package, see the package section below for all-inclusive pricing.
Pokhara to Muktinath Bus, Flight & Helicopter – All Transport Options Compared
Can’t decide between the jeep, bus, flight, or helicopter? Here is the definitive comparison of every way to travel from Pokhara to Muktinath, including the Pokhara to Muktinath bus ticket price, Pokhara to Muktinath flight price, and Pokhara to Muktinath helicopter price:
Transport Mode
Duration
Approx. Cost / Person
Comfort
Best For
Private Jeep (Hi Nepal Treks)
7–8 hrs
USD 50–80 (shared cost)
⭐⭐⭐⭐⭐
Families, couples, groups
Shared Jeep
8–10 hrs
USD 19–27
⭐⭐⭐
Solo, budget travelers
Pokhara–Muktinath Bus
10–12 hrs
USD 8–12 (NPR 1,000–1,500)
⭐⭐
Ultra-budget only
Flight (Pokhara–Jomsom)
~25 min
USD 100–180 + jeep to Muktinath
⭐⭐⭐⭐
Time-limited travelers
Helicopter (Direct)
~45 min
USD 350–500
⭐⭐⭐⭐⭐
Premium / elderly / pilgrims
Bus Note: The Pokhara to Muktinath bus (local service) departs from Baglung Bus Park. The Pokhara to Muktinath bus ticket price is NPR 1,000–1,500 (USD 8–12) per seat. The journey takes 10–12 hours on uncomfortable seats with limited leg room, not recommended for elderly or mobility-impaired travelers.
Flight Note: The Pokhara to Muktinath flight price refers to the Pokhara–Jomsom flight (USD 100–180). From Jomsom, you still need a jeep to Muktinath (NPR 5,000–8,000 per vehicle). Flights are frequently cancelled due to afternoon winds, check our Helicopter Tour Nepal page for direct Muktinath heli options.
Pokhara to Muktinath Tour Package 2025 – Complete Package Overview
Our Pokhara to Muktinath tour package from Hi Nepal Treks is the most complete, value-for-money option for visiting Muktinath Temple from Pokhara. Here is a snapshot of our flagship 3 Nights / 4 Days Muktinath jeep tour package:
Hi Nepal Treks — Flagship Pokhara to Muktinath Jeep Tour Package (3N / 4D)
Package Component
Details
Duration
3 Nights / 4 Days
Transport
Private 4WD Air-Suspension Jeep (Full AC)
Accommodation
3-Star Hotel / Comfortable Lodge (Twin-Sharing)
Meals
Breakfast + Dinner Daily (Half Board — 3B + 3D)
Guide
Licensed English-Speaking Guide (NTB Certified)
Permits Included
ACAP Permit + TIMS Card
Insurance
Trip Insurance (Medical + Emergency Evacuation)
Emergency Support
24/7 On-Trip Emergency Assistance
Pickup / Drop
Hotel Pickup & Drop in Pokhara (Included)
Group Size
2 – 12 Persons (Custom quotes for larger groups)
Pokhara to Muktinath Jeep Tour – 4-Day Detailed Itinerary
Day 1: Pokhara to Tatopani / Ghasa by Jeep – Kali Gandaki Valley Drive
Depart Pokhara at 5:00–5:30 AM in our comfortable 4WD jeep. Drive through Beni (66 km, ~1.5 hrs) – the administrative hub of Myagdi district, and continue along the roaring Kali Gandaki River. Arrive at Tatopani (1,190 m), famous for its natural geothermal hot springs, for a short soak or lunch stop. Continue to Ghasa (2,010 m) for the night. Dinner and an overnight stay at a comfortable lodge.
Distance: Pokhara to Ghasa ~138 km | ~5–6 hours drive
Highlights: Beni Bazaar, Kali Gandaki Gorge (world’s deepest), Tatopani Hot Springs, Dana waterfall
Altitude Gain: Pokhara 822 m → Ghasa 2,010 m
Day 2: Ghasa to Muktinath by Jeep – The Heart of Mustang
Early departure from Ghasa through the dramatic upper Mustang landscape. Drive through Lete, Kalopani, and Marpha, the ‘apple capital of Nepal’, where you can sample fresh apple juice, brandy, and dried apples. Continue through Jomsom (district headquarters, lunch stop and permit check) and the medieval walled city of Kagbeni. Final ascent to Muktinath (3,710 m). Arrive by early afternoon. Visit the sacred Muktinath Temple, all 108 Dharas (holy waterspouts), the Jwala Mai flame, and the adjacent Buddhist monastery. Overnight near the temple.
Distance: Ghasa to Muktinath ~72 km | ~3–4 hours drive
Highlights: Marpha apple orchards, Jomsom town, Kagbeni walled city, Muktinath Temple 108 Dhara, Jwala Mai, Buddhist Gompa
Altitude: Muktinath 3,710 m (acclimatization night recommended)
Interested in a longer exploration of this region? Check out our Upper Mustang Tour Package to extend your journey to Lo Manthang (the Forbidden Kingdom).
Day 3: Muktinath Full Exploration & Pilgrimage Day
Enjoy a full day at Muktinath, one of the most sacred sites in both Hinduism and Buddhism. Start with a sunrise puja at the temple (5:00 AM darshan is most auspicious). Take a holy dip in Rani Pauwa (sacred pond). Explore the 108 bull-headed waterspouts, Shaligram stone fields near Kagbeni, and the Muktinath Monastery (Chumig Gyatsa). Optional activities include horseback riding to the temple or a short hike to Khinga village for panoramic Dhaulagiri and Annapurna views. Return to Jomsom or Marpha for the night.
Spiritual Highlight: Early morning 5:00 AM puja, the most spiritually auspicious time at Muktinath Temple
Optional: Horse riding (NPR 1,500–2,000 per person), Khinga village hike, Upper Mustang day excursion
Day 4: Jomsom / Marpha to Pokhara by Jeep – Return Drive
Depart early morning (5:00–5:30 AM) for the return drive to Pokhara via the same scenic Kali Gandaki Valley route. Stop at Tatopani for hot springs (if not visited Day 1) and at Beni for lunch. Arrive in Pokhara by late afternoon. Hotel drop-off marks the end of your unforgettable Pokhara to Muktinath jeep tour.
Drive Duration: ~7–8 hours (Jomsom to Pokhara)
Highlights: Tatopani hot springs stop, Kali Gandaki river views, Beni lunch break
Muktinath Tour Package from Pokhara with Price – 2025 Cost Breakdown
Below is the complete Pokhara to Muktinath tour package price guide for 2025. All packages are fully inclusive of transport, accommodation, meals, permits, and guide:
Package Tier
Duration
Group Size
Price / Person (USD)
Price / Person (NPR)
Budget Package
3N / 4D
5–7 Persons
USD 180 – 220
NPR 23,000 – 28,000
Standard Package
3N / 4D
3–4 Persons
USD 250 – 320
NPR 32,000 – 42,000
Premium Package
3N / 4D
2 Persons
USD 350 – 450
NPR 45,000 – 58,000
Solo Traveler Package
3N / 4D
1 Person
USD 450 – 550
NPR 58,000 – 71,000
Group Package (8+)
3N / 4D
8+ Persons
Custom Quote
Contact Us
Extended (+ Upper Mustang)
5N / 6D
2–6 Persons
USD 500 – 700
NPR 64,000 – 90,000
The above Pokhara to Muktinath package cost is all-inclusive with no hidden fees. Prices may vary by season. For an exact quote, use our Trip Planner tool or Book directly here. You can also combine this package with our Kathmandu Tour Package for a complete Nepal holiday.
What’s Included & Excluded in the Pokhara to Muktinath Package
What’s Included in the Muktinath Package from Pokhara
Private 4WD jeep transport – Pokhara to Muktinath and return
Accommodation: 3 nights in comfortable twin/double-sharing hotels or lodges
Meals: Breakfast and dinner daily (3 breakfasts + 3 dinners)
ACAP (Annapurna Conservation Area Permit) and TIMS Card fees
NTB-licensed English-speaking tour guide for all 4 days
Hotel pickup and drop in Pokhara (Lakeside area included)
All government taxes, service charges, and VAT
24/7 emergency on-trip support and coordination
Muktinath Temple puja guidance and spiritual itinerary planning
What’s Not Included (Exclusions)
International airfare to/from Nepal
Personal travel insurance (we strongly recommend purchasing your own)
Lunch during the tour (available at local restaurants, ~USD 5–10/meal)
Personal expenses, alcohol, bottled water, phone calls
Tips and gratuities for guides and drivers (discretionary)
Emergency evacuation costs beyond standard first aid
Muktinath Temple from Pokhara – Sacred Significance & What to Expect
Muktinath Temple, the ultimate destination of every Pokhara to Muktinath tour, is one of the 108 Divya Desam (sacred Vishnu temples) in the Hindu world and simultaneously one of the 24 Tantric places (Siddha Peethas) in Tibetan Buddhism. Located at 3,710 m in the Mustang district, it is simultaneously one of the highest and most revered temples on Earth.
Muktinath Highlight
Description
Muktinath Temple (Main Shrine)
Dedicated to Lord Vishnu; known as “Mukti Kshetra” — the place of liberation
108 Holy Waterspouts (Dhara)
108 bull-headed brass waterspouts; bathing in all 108 is believed to grant moksha (salvation)
Jwala Mai (Eternal Flame)
Natural methane gas flame burns above a water spring — fire and water coexisting; sacred to both Hindus and Buddhists
Rani Pauwa (Sacred Pond)
Twin sacred ponds; devotees take ritual dips despite temperatures near freezing
Buddhist Monastery (Chumig Gyatsa)
Ancient Tibetan Buddhist monastery with 108 water springs; visited by Buddhist pilgrims from Nepal, Tibet & Bhutan
Shaligram Stones
Sacred black ammonite fossils from Kali Gandaki River; considered sacred icons of Lord Vishnu
Looking for the trekking approach to Muktinath? Explore our Jomsom Muktinath Trek package, a scenic 7–10 day trekking route through the Annapurna Conservation Area. Alternatively, combine Muktinath with the legendary Annapurna Circuit Trek for the ultimate Himalayan experience.
How to Go to Muktinath from Pokhara – Step-by-Step Guide for First-Time Visitors
Never been to Muktinath? Here is your complete, step-by-step guide on how to go to Muktinath from Pokhara by jeep:
Step 1 – Book Your Pokhara to Muktinath Package: Visit hinepaltreks.com or use our Trip Planner to select your preferred package (private jeep, shared jeep, or full guided tour). Confirm your booking at least 2–3 weeks in advance during peak season.
Step 2 – Obtain Required Permits: You need an ACAP (Annapurna Conservation Area Permit – NPR 3,000 for foreigners) and a TIMS Card (NPR 2,000). Hi Nepal Treks handles both permits on your behalf when you book a full package.
Step 3 – Pokhara Departure (Baglung Bus Park): Shared jeeps depart from Pokhara Baglung Bus Park daily (6:00–7:00 AM). Hi Nepal Treks private packages include hotel pickup at 5:00–5:30 AM.
Step 4 – Drive via Beni and Tatopani: First major stretch (66 km to Beni, then on to Tatopani) takes ~3–4 hours along the Kali Gandaki valley. Stop at Tatopani for hot springs or a quick stretch.
Step 5 – Pass through Marpha and Jomsom: Drive through Marpha (apple orchards) and Jomsom (permit checkpoint + lunch). The Jomsom to Muktinath jeep fare is settled here for onward journeys.
Step 6 – Kagbeni to Muktinath (Final Ascent): From Kagbeni, the jeep climbs a steep 10-km gravel road to Muktinath (3,710 m). Arrive at the temple zone by early afternoon for your pilgrimage.
Best Time for Pokhara to Muktinath Jeep Tour – Season-by-Season Guide
Timing is everything for a successful Muktinath tour. Here is a season-by-season breakdown:
Season
Months
Conditions at Muktinath
Recommendation
Spring
March – May
Clear blue skies, blooming rhododendrons, pleasant temperatures (8–15°C at Muktinath), best mountain visibility
Best Season
Pre-Monsoon
June
Increasingly warm, dusty roads, and occasional early monsoon rain in lower valleys
Good
Monsoon
July – August
Mustang lies in a rain-shadow area (drier), but Tatopani–Ghasa roads may face landslide risks with fewer tourists
Moderate
Autumn
September – November
Post-monsoon clarity, stable weather, and ideal Himalayan views – considered the best overall trekking season
Best Season
Winter
December – February
Heavy snowfall above Jomsom, possible road closures, and freezing temperatures at Muktinath (up to −15°C at night)
Not Recommended
Insider Tip: The Muktinath area sits in the rain shadow of the Annapurna and Dhaulagiri ranges, making it significantly drier than the rest of Nepal even during monsoon season. However, the road between Tatopani and Ghasa passes through high-rainfall zones with landslide risk in July–August. Book a spring or autumn Pokhara to Muktinath package for the safest, most scenic experience.
Essential Travel Tips for Pokhara to Muktinath by Road – What You Must Know
Depart at Dawn: Always leave Pokhara before 5:30 AM. Afternoon winds in Mustang (from noon onwards) create dusty, difficult driving conditions. Our Hi Nepal private jeep packages guarantee 5:00 AM hotel pickup.
Layer Up for Altitude: Muktinath sits at 3,710 m. Pack fleece jackets, thermal base layers, and a windproof outer layer even in summer. Morning and evening temperatures can drop sharply.
Hydrate Aggressively: High altitude causes faster dehydration. Carry minimum 2 litres of water per person. Avoid alcohol the night before and during the ascent.
Acclimatize Wisely: If you are ascending directly from Pokhara (822 m) to Muktinath (3,710 m) in one day, spend at least one night in Jomsom (2,720 m) or Kagbeni (2,810 m) before proceeding. Watch for signs of AMS (altitude mountain sickness).
Carry Nepali Rupees: ATMs are available only in Beni and Jomsom. Carry sufficient cash in NPR for meals, local purchases, and any unplanned expenses above Beni.
Keep Permits Accessible: There are multiple permit checkpoints en route (Beni, Ghasa, Jomsom). Keep your ACAP permit and TIMS card in an easily accessible pocket.
Photography Golden Hours: The Kali Gandaki gorge, Kagbeni, and Muktinath offer stunning photography from 7:00–9:00 AM and 4:00–6:00 PM. Carry charged batteries — cold temperatures drain battery life faster at altitude.
Temple Etiquette: Muktinath is a living sacred site. Remove shoes before entering the temple, dress modestly (shoulders and knees covered), maintain silence in the inner sanctum, and avoid photography during active puja ceremonies.
Extend Your Pokhara Muktinath Tour – Best Nearby Destinations to Visit
Your Pokhara to Muktinath jeep tour can be easily extended to include these incredible nearby destinations. Hi Nepal Treks offers combined packages for all of the following:
Destination
Distance from Muktinath
Key Highlights
Hi Nepal Package
Upper Mustang (Lo Manthang)
~70 km north
Ancient walled kingdom, cave monasteries, Tibetan culture, and restricted Himalayan landscapes
Kathmandu to Muktinath Jeep Fare & Route – Traveling from Nepal’s Capital
Many pilgrims begin their Muktinath journey from Kathmandu. Below is the complete guide to the Kathmandu to Muktinath jeep fare and recommended routes:
Route Option
Distance
Duration
Approx. Cost
Kathmandu → Pokhara (Bus / Car)
~200 km
6–7 hrs
NPR 1,000 – 18,000
Kathmandu → Pokhara (Flight)
~165 km
~30 min
USD 80 – 120
Kathmandu → Muktinath (Full Drive)
~410 km
2 Days
NPR 80,000 – 1,20,000 (Private Jeep)
Kathmandu → Jomsom (Flight) + Jeep
2 Flights
~2.5 hrs total
USD 200 – 300 all-in
Our Recommendation: Fly from Kathmandu to Pokhara (30 minutes, USD 80–120) and then proceed with our Pokhara to Muktinath jeep tour package. This combines a comfortable flight with a breathtaking scenic jeep adventure. Pair this with a Kathmandu city tour package for a full Nepal experience. Check all our Nepal tour packages to plan the perfect itinerary.
Why Book Your Pokhara to Muktinath Jeep Tour with Hi Nepal Treks?
Hi Nepal Treks & Expedition is a Nepal Tourism Board (NTB) certified, government-registered travel company with 20+ years of experience operating Muktinath and Mustang tours from Pokhara. Here is why we are Nepal’s most trusted Muktinath tour package provider:
Our Commitment
What It Means for You
20+ Years of Experience
Decades of Muktinath and Mustang expertise with a strong safety record
NTB-Certified Guides
Every guide is licensed by the Nepal Tourism Board and trained in first aid
No hidden costs — the quoted price is the final price you pay
24/7 Emergency Support
Round-the-clock assistance and direct emergency coordination during your trip
Fully Customizable Itineraries
Flexible travel plans with adjustable stops, pace, and accommodation options
5-Star Verified Reviews
Highly rated by travelers on Google and TripAdvisor with hundreds of positive reviews
Sustainable Tourism Practice
Supporting local Thakali and Tibetan communities along the Muktinath route
Book Your Pokhara to Muktinath Tour by Jeep Today – Start Your Sacred Journey
The Pokhara to Muktinath by jeep is more than a road trip, it is a spiritual quest through some of the most dramatic Himalayan landscapes on Earth. Whether you come as a devout pilgrim, a Himalayan explorer, or a curious traveler, Muktinath will leave an indelible mark on your soul.
At Hi Nepal Treks & Expedition, we are passionate about crafting meaningful Himalayan journeys. Our Muktinath tour package from Pokhara combines the best jeep route, most experienced guides, most comfortable accommodations, and the most competitive Pokhara to Muktinath package cost, all in one seamlessly organized journey.
Frequently Asked Questions – Pokhara to Muktinath Tour by Jeep
What is the exact Pokhara to Muktinath distance by jeep?
The Pokhara to Muktinath distance by jeep is approximately 210 km by road, covering mixed terrain from paved highway (Pokhara–Beni) to gravel mountain roads (Tatopani–Muktinath). The drive takes 7–9 hours one way in a 4WD jeep.
What is the Pokhara to Muktinath by jeep ticket price in 2025?
For a shared jeep, the Pokhara to Muktinath by jeep ticket price is NPR 2,500–3,500 (USD 19–27) per person one way. For a private 4WD jeep, the Pokhara to Muktinath by jeep rent price ranges from NPR 35,000–50,000 (USD 265–380) for the entire vehicle one way. Book now for confirmed pricing.
What is the Pokhara to Muktinath flight price?
The Pokhara to Muktinath flight price (Pokhara to Jomsom leg) ranges from USD 100–180 per person depending on the airline and season. Note: You still need a separate Jomsom to Muktinath jeep fare (NPR 5,000–8,000 per vehicle) after landing in Jomsom. For a direct flight option, see our Helicopter Tour packages.
How much is the Pokhara to Muktinath helicopter price?
The direct Pokhara to Muktinath helicopter price ranges from USD 350–500 per person for a scenic heli-tour. Group helicopter charters are available at fixed rates. Visit our Helicopter Tour Nepal page for current pricing and seat availability.
What is the Jomsom to Muktinath jeep fare?
The Jomsom to Muktinath jeep fare is approximately NPR 5,000–8,000 per vehicle (shared among passengers). This short but steep 28-km segment takes about 1–1.5 hours on a gravel mountain road. Explore the full Jomsom Muktinath package for a trekking-based version of this route.
Is the Pokhara to Muktinath road safe for travel?
Yes — the Pokhara to Muktinath by road journey is safe when conducted in a proper 4WD jeep with an experienced local driver. Hi Nepal Treks uses well-maintained, fully insured 4WD air-suspension jeeps on all our Pokhara to Muktinath jeep tours. Road sections above Tatopani require high-clearance 4WD vehicles — standard sedans and taxis are not recommended past Tatopani.
What permits are required for the Pokhara to Muktinath tour?
Two permits are required: (1) ACAP — Annapurna Conservation Area Permit (NPR 3,000 for foreigners, free for SAARC nationals), and (2) TIMS Card — Trekkers’ Information Management System card (NPR 2,000). Both are automatically included in all Hi Nepal Treks Muktinath tour packages from Pokhara. Use our Trip Planner to get started.
What is the best way to book a Muktinath tour package from Pokhara?
The easiest way to book your Pokhara to Muktinath package is to visit hinepaltreks.com/booking, use our interactive Trip Planner, or contact us via WhatsApp or email. We recommend booking 2–3 weeks in advance during peak seasons (March–May, October–November). We offer instant confirmation and a flexible cancellation policy.
If you are planning a trek to Upper Mustang in 2026, one of your first questions is probably about the cost. And that is fair, this is not a cheap trek. The Upper Mustang trek cost is higher than most other treks in Nepal, and it can be confusing when you see different numbers on different websites.
In this guide, we are going to break down every expense clearly so you know exactly what to expect. No vague ranges, no hidden surprises. Just an honest look at what this trek actually costs in 2026, based on our experience organizing trips to this region at Hi Nepal Treks.
Overview of Upper Mustang Trek Cost in 2026
The total Upper Mustang trek cost in 2026 ranges from approximately USD 1,300 to USD 3,500 per person for a 12 to 17-day itinerary. That is a wide range, and where you land on it depends on your trek style, group size, how you get to Jomsom, and which agency you go with.
A standard trek package with a local agency including permits, a licensed guide, meals, accommodation, and ground transport from Pokhara typically falls between USD 1,500 and USD 2,200 per person. Solo trekkers or those wanting private luxury arrangements will pay toward the higher end.
What matters is understanding where that money goes. So let us break it down piece by piece.
Why Is the Upper Mustang Trek So Expensive Compared to Other Treks?
People are sometimes surprised when they compare the Upper Mustang trekking cost with treks like Annapurna Base Camp or Langtang. Those treks can cost under USD 800 with a guide. So why does Upper Mustang cost two or three times more?
A few reasons. First, Upper Mustang is a government-designated restricted area. Entry requires an expensive special permit that does not apply to open trekking regions. Second, you cannot trek here independently, a licensed guide arranged through a registered trekking agency is mandatory by law. Third, the region is remote. Getting to the trailhead at Jomsom involves either a mountain flight or a long jeep ride from Pokhara. And once you are past Kagbeni, Nepal, everything from food to fuel has to be carried or driven in on rough roads, so teahouse prices are higher than in more accessible areas.
The restricted area permit alone can cost more than some entire treks elsewhere in Nepal. Add mandatory guide fees, remote-area food costs, and transport logistics, and the numbers add up quickly.
Upper Mustang Restricted Area Permit Cost (Updated 2026 Rules)
This is the single biggest permit expense and the one that changed significantly in 2026.
Previously, the Upper Mustang Restricted Area Permit cost a flat USD 500 for 10 days, with an additional USD 50 charged per extra day. Whether you spent 3 days or 10 days in the restricted zone, you paid the same flat fee. That system discouraged shorter itineraries and penalized budget travelers.
Starting in 2025, Nepal’s Department of Immigration switched to a daily rate system. The restricted area permit now costs USD 50 per person per day. You pay only for the actual number of days you spend inside the restricted zone, which begins from Kagbeni onward.
Here is what that means for common itineraries:
8 days inside the restricted zone: USD 400
10 days inside the restricted zone: USD 500
12 days inside the restricted zone: USD 600
15 days inside the restricted zone: USD 750
Another major update for 2026: the old rule requiring a minimum group of two foreign trekkers has been officially removed as of March 2026. Solo trekkers can now obtain the restricted area permit on their own, though a licensed guide is still mandatory. This is a welcome change that eliminates the old practice of paying for a “ghost permit” for a second person who did not exist.
The permit can only be obtained through a registered trekking agency. An online application system launched in 2026 allows agencies to start the process before you arrive in Nepal, with processing typically taking 3 to 7 working days.
ACAP Permit & TIMS Card Cost for Upper Mustang Trek
Since Upper Mustang falls within the Annapurna Conservation Area, you also need the ACAP permit. This is the same permit required for any trek in the Annapurna region, including treks to Annapurna Base Camp and the Annapurna Circuit.
The ACAP permit cost is NPR 3,000 (approximately USD 23 to 30) for foreign nationals. It is valid for the entire duration of your stay within the conservation area, with no daily limit. You can obtain it from the Nepal Tourism Board office in Kathmandu or at the ACAP counter in Pokhara.
You will also need a TIMS (Trekkers’ Information Management System) card, which costs USD 20. It helps authorities track trekker movements for safety and emergency coordination.
So your total permit costs for a 10-day Upper Mustang trek add up to roughly USD 550, the restricted area permit plus ACAP plus TIMS.
Guide and Porter Cost in Upper Mustang (Mandatory Fees Explained)
Hiring a guide is not optional in Upper Mustang, it is a legal requirement for this restricted area. Checkpoints at Kagbeni and Lo Manthang verify permits and guide documentation before letting you pass.
Licensed trekking guide: USD 30–50/day. Covers salary, food, accommodation, and insurance. Higher end for experienced English-speaking guides with local cultural knowledge.
Porter: USD 20–30/day. Includes salary, food, lodging, and insurance. One porter carries bags for two trekkers (up to 20–25 kg). Not mandatory, but highly recommended at this altitude.
Total staff cost (14-day trek): USD 700–1,120 for one guide and one porter. In a group of four, that drops to roughly USD 175–280 per person.
Tips: USD 10–15/day for guides and USD 8–10/day for porters. Customary and appreciated, these folks work hard at high altitude.
A good Upper Mustang guide is more than a navigator. They explain the monasteries in Lo Manthang, the meaning behind prayer walls, and help you connect with the Loba people’s way of life.
Trekking Gear & Equipment Cost: Rent vs Buy in Nepal
You do not need to buy everything new. Most essential gear can be rented cheaply in Kathmandu or Pokhara, and some agencies lend items like sleeping bags and down jackets for free.
Down jacket rental: USD 1–2/day. Essential for cold mornings and evenings above 3,500m.
Sleeping bag rental: USD 1–2/day. Teahouse blankets are not always warm enough, especially near Lo Manthang.
Trekking poles rental: USD 1/day. Helpful on the rocky, uneven terrain of Upper Mustang.
Good trekking boots: USD 80–200 if buying new. This is the one item worth investing in — rent everything else, but wear boots that fit well and are already broken in.
Daypack (25–35L): USD 30–60 if buying. You will carry this daily while your porter handles the main bag.
Power bank: USD 15–30. Saves you USD 2–4 per charge on the trail which pays for itself within a week.
Water purifier or SteriPen: USD 20–40. Reduces bottled water costs and plastic waste.
If you are on a tight budget, renting gear in Thamel (Kathmandu) or Lakeside (Pokhara) keeps this expense under USD 50 for the entire trek. Buying everything new could cost USD 200–400, but most trekkers only need to buy boots and a power bank.
Food and Accommodation Cost in Upper Mustang Teahouses
Accommodation on this trek is in teahouses and lodges run by local families. Standards have improved in recent years, but expect basic twin rooms, shared bathrooms, and limited hot water.
Teahouse room: USD 5–10/night (twin sharing). Rooms are often cheap or free if you eat all meals there, that is the standard system across Nepal trekking lodges.
Food: USD 20–30/person/day for three meals. Menus include dal bhat, noodle soups, momos, fried rice, pancakes, and basic pasta. Variety reduces the further north you go past Lo Manthang.
Combined daily budget: USD 25–40/person/day for food and accommodation together.
One thing to know: everything past Kagbeni costs more than the lower Kali Gandaki Valley or the Annapurna region. Supplies are transported by jeep or mule on rough roads, and that cost gets passed on. A dal bhat that costs NPR 400 in Pokhara might be NPR 700 near Lo Manthang.
Transportation Cost: Kathmandu to Pokhara to Jomsom Breakdown
Getting to the Upper Mustang trailhead involves a few legs of travel, and costs vary depending on how you choose to travel.
Kathmandu to Pokhara:
Tourist bus: USD 10 to 30 (6 to 7 hours)
Domestic flight: USD 80 to 120 (25 minutes)
Private jeep: USD 150 to 200
Pokhara to Jomsom:
Flight: USD 120 to 180 one way (20 minutes, weather-dependent)
Jeep: USD 30 to 70 one way (8 to 10 hours on rough roads)
Most trekkers either fly one way and take the jeep the other, or jeep both ways to save money. Flights to Jomsom are scenic but notoriously unreliable, wind cancellations are common, especially in the afternoon. If you fly, always keep a buffer day in your schedule.
From Jomsom, you walk to Kagbeni on the first trekking day. That is where the restricted zone and the real Upper Mustang trail begins, following the ancient trade route along the Kali Gandaki Valley toward Lo Manthang.
Upper Mustang Trek Cost Breakdown Table (Real Example 2026)
Here is a practical cost breakdown for a standard 14-day Upper Mustang trek in 2026, assuming two trekkers sharing costs where applicable:
Expense
Estimated Cost (USD per person)
Restricted Area Permit (10 days × $50/day)
$500
ACAP Permit
$25–30
TIMS Card
$20
Licensed Guide (14 days × $35/day, split by 2)
$245
Porter (14 days × $25/day, split by 2)
$175
Accommodation (14 nights × $7/night)
$100
Food (14 days × $25/day)
$350
Kathmandu to Pokhara (bus)
$15–30
Pokhara to Jomsom (jeep one way)
$40–70
Jomsom to Pokhara (flight return)
$120–180
Tips for guide and porter
$100–150
Extras (hot showers, charging, snacks)
$100–200
Estimated Total
$1,790–$1,950
This is a mid-range estimate for two trekkers. Solo trekkers will pay more because guide and porter fees are not shared. Groups of four or more will pay less per person. Fees may vary according to seasons and places.
Key Factors That Affect Your Total Upper Mustang Trek Cost
Not every trekker pays the same price for Upper Mustang. Here are the main things that move the number up or down:
Group size: The single biggest factor. Guide, porter, and jeep costs split across more people. A group of four can save 20–30% per person compared to going solo.
Trek duration: With the new daily permit rate (USD 50/day), fewer days in the restricted zone means lower permit fees. A 10-day trek saves USD 200 over a 14-day trek in permits alone.
Transport choice: Flying to Jomsom costs USD 120–180 one way. The jeep costs USD 30–70. Choosing jeep both ways saves USD 150–250 per person.
Season: Peak season (April–May, September–November) has the highest prices. Shoulder months like late March or late November can bring 10–15% discounts on packages.
Agency choice: International operators often mark up prices because they outsource to local agencies. Booking directly with a reputable local Nepal trekking agency usually gives the same service at a lower cost.
Trek style: Budget group treks, standard packages, and private luxury treks all have very different price points, from USD 950 to USD 2,500+.
Budget vs Standard vs Luxury Upper Mustang Trek (Price Comparison)
Not everyone has the same budget, and that is fine. Here is how the three main trekking styles compare for Upper Mustang.
Budget Trek (USD 1,200–1,500 per person) This works best for groups of four or more trekkers. You take the jeep both ways between Pokhara and Jomsom, share a single guide, eat simple meals, and stay in basic teahouses. You still pay the same permit fees, but you save on transport and staff costs. Expect a 12 to 14-day itinerary with fewer rest or exploration days.
Standard Trek (USD 1,500–2,200 per person) The most common option. You get a private guide, a porter, comfortable teahouse accommodation, three meals a day, and usually one flight leg to Jomsom. Most agency packages fall in this range and include all permits, meals, and ground transport. This is what most trekkers choose and it gives a good balance of comfort and value.
Private or Luxury Trek (USD 2,500–3,500+ per person) This includes a private guide, a porter, the best available teahouses, flights both ways to Jomsom (or even a helicopter segment), and extra exploration days around Lo Manthang, Choser Cave, and Dhakmar. Some luxury options include a jeep tour for part of the route. This is ideal for trekkers who want maximum comfort and flexibility.
Here a quick summary glance:
Trek Style
Estimated Cost (USD per person)
Budget group trek
USD 1,200 – 1,500
Standard package
USD 1,500 – 2,200
Private luxury trek
USD 2,500 – 3,500+
Hidden & Extra Costs in Upper Mustang Trek You Should Know
Even on an all-inclusive package, there are expenses that show up on the trail. Budget an extra USD 15 to 25 per day for these:
Hot showers are not free in most teahouses. Expect to pay NPR 300 to 500 (USD 2 to 4) per shower, and they are not available everywhere beyond Lo Manthang.
Charging your phone or camera costs NPR 200 to 500 (USD 1.50 to 3.50) per charge. Bring a power bank, it pays for itself in two days.
Hot drinks add up. A cup of tea or coffee runs NPR 150 to 300 (USD 1 to 2), and you will drink a lot of tea at altitude.
Wi-Fi is spotty and costs NPR 200 to 400 where available. Do not count on stable connectivity once you pass Kagbeni
Travel insurance is essential and not usually included in trek packages. A policy covering high altitude trekking and helicopter evacuation costs USD 100 to 200 for a 15 to 20-day trip. Do not skip this, a helicopter evacuation from Upper Mustang without insurance can cost thousands of dollars.
Monastery donations are customary though voluntary. Tours of the monasteries in Lo Manthang and along the trail are typically free, but small donations are appreciated and go toward preservation.
Gear rental in Kathmandu or Pokhara runs USD 1 to 2 per item per day for things like down jackets, sleeping bags, and trekking poles.
Nepal visa on arrival costs USD 30 for 15 days or USD 50 for 30 days.
Smart Tips to Reduce Your Upper Mustang Trek Budget
A few practical ways to keep your costs reasonable without cutting corners on safety or experience.
Travel in a group. This is the single most effective way to reduce your per-person cost. Permit fees are fixed and individual, but guide fees, porter fees, and jeep costs split across more people. A group of four can save 20 to 30 percent compared to solo travelers.
Take the jeep instead of flying. The jeep ride from Pokhara to Jomsom saves USD 80 to 130 per person each way compared to the flight. It is longer and rougher, but reliable, and many trekkers actually enjoy the drive through the Kali Gandaki Valley.
Trek in shoulder season. Late March or late November can bring package discounts of 10 to 15 percent, though weather becomes less predictable. The main season runs from April to May and September to November.
Book with a local Nepal trekking agency. International operators often mark up prices significantly because they outsource to local agencies anyway. Booking directly with a reputable local company often gives you the same (or better) service at a lower price.
Bring a power bank and water purifier. These two items will save you daily charging fees and bottled water costs on the trail, and reduce plastic waste too.
Keep your itinerary realistic. With the new daily permit rate, you only pay for the days you actually spend in the restricted zone. If you can complete your trek in 10 days instead of 14, you save USD 200 in permit fees alone.
What’s Included vs Excluded in Upper Mustang Trek Packages
This is where a lot of confusion happens. Two agencies might quote you very different prices, and it often comes down to what is actually covered. Before comparing numbers, make sure you are comparing the same things.
What most standard packages include:
Upper Mustang Restricted Area Permit
ACAP permit and TIMS card
Licensed trekking guide for the full duration
Teahouse accommodation (twin sharing) during the trek
Three meals a day on the trail (breakfast, lunch, dinner)
Ground transport from Pokhara to Jomsom (usually jeep one way)
Travel insurance (essential, must cover high-altitude trekking and helicopter evacuation)
Personal trekking gear and clothing
Hot showers, device charging, and Wi-Fi on the trail
Drinks beyond basic water and meal-included tea
Snacks, bottled drinks, and alcoholic beverages
Porter service (included in some packages, extra in others)
Flight from Pokhara to Jomsom (if you want to fly instead of jeep)
Tips for guide and porter
Personal expenses and monastery donations
Emergency evacuation costs (covered by insurance)
Is the Upper Mustang Trek Worth the Cost in 2026?
This is the question everyone eventually asks. And the honest answer is: yes, but only if you know what you are going for.
Upper Mustang is not the trek for people chasing mountain views alone. You will see Dhaulagiri, Nilgiri, and the Annapurna range, but the real draw is the landscape and culture beyond Kagbeni. The terrain shifts from green river valleys to a high-altitude desert that looks more like Tibet than Nepal.
Lo Manthang, the walled capital of the former Kingdom of Lo, is unlike any other place on a Nepal trek. You will walk through 15th-century monasteries, see Buddhist murals being restored by hand, and meet people living a way of life that has barely changed in centuries. The Tiji Festival, if you time your trek right, is one of the most extraordinary cultural events in the Himalayas.
The permit fee keeps visitor numbers low. On most days during your trek, you will see very few other trekkers. That kind of solitude is rare in Nepal and increasingly hard to find anywhere in the world.
If you have done the Everest Base Camp trek or the Annapurna Circuit and want something completely different, something quieter, stranger, and more culturally immersive, Upper Mustang is perfect for you. The Upper Mustang trek cost is higher, but so is the reward.
Conclusion
The Upper Mustang trek cost in 2026 is not small, but it is more transparent and flexible than it has ever been. For a standard 14-day trek with a local agency, most trekkers should budget between USD 1,500 and USD 2,200 per person, including permits, guide, food, accommodation, and ground transport. Add another USD 200 to 400 for extras, tips, and insurance.
If you are looking for help planning your Upper Mustang trek, feel free to reach out to us at Hi Nepal Treks. We have been organizing treks to this region for years, and we are always happy to answer questions and help you plan a trip that fits your budget and interests.
FAQs
How much does the Upper Mustang trek cost in total?
The total Upper Mustang trek cost in 2026 ranges from USD 1,300 to USD 3,500 per person depending on your group size, trek style, and duration. A standard 14-day trek with a local agency typically costs between USD 1,500 and USD 2,200 per person, including permits, guide, food, accommodation, and transport from Pokhara.
How much is the Upper Mustang Restricted Area Permit in 2026?
The restricted area permit now costs USD 50 per person per day. You pay only for the days you spend inside the restricted zone, which starts from Kagbeni. For a 10-day trek in the restricted area, the permit costs USD 500. This replaced the old flat USD 500 fee for 10 days.
Can I trek Upper Mustang solo in 2026?
Yes. As of March 2026, the old two-person minimum rule has been officially removed. Solo trekkers can now obtain the restricted area permit individually. However, you still must hire a licensed trekking guide through a registered agency, independent trekking without a guide is not permitted in this restricted area.
What is the ACAP permit cost for Upper Mustang?
The ACAP permit costs NPR 3,000, which is approximately USD 23 to 30 for foreign nationals. You will also need a TIMS card for USD 20. Both are required in addition to the restricted area permit.
Is Upper Mustang more expensive than the Annapurna Circuit?
Yes, significantly. The Annapurna Circuit does not require a restricted area permit, and you can trek it independently without a guide if you choose. The Upper Mustang trek cost is higher mainly because of the expensive restricted area permit, mandatory guide requirement, and the remote logistics of getting supplies to teahouses beyond Kagbeni
What is the cheapest way to do the Upper Mustang trek?
The most affordable approach is to join a group of four or more trekkers, take the jeep both ways between Pokhara and Jomsom instead of flying, eat simple meals, and trek during shoulder season. A budget group trek can bring the cost down to around USD 1,200 to 1,500 per person.
How much should I budget for food and drinks on the Upper Mustang trail?
Plan for roughly USD 20 to 30 per person per day for three meals. Add another USD 5 to 10 per day for tea, coffee, snacks, and bottled water. Food prices increase the further north you go from Kagbeni toward Lo Manthang because of transportation costs in this remote area.
What extra costs should I prepare for beyond the trek package?
Common extra expenses include hot showers (USD 2 to 4), device charging (USD 1.50 to 3.50), Wi-Fi, snacks, monastery donations, gear rental, travel insurance (USD 100 to 200), Nepal visa fees, and tips for your guide and porter. Budget an additional USD 15 to 25 per day for these on-trail extras.
Pokhara is one of the best places to start trekking in Nepal. This beautiful lakeside city is close to the Annapurna region , so many popular trails are easy to reach from here. If you are looking for the best treks from Pokhara, you will find both short and long routes that fit different time, budget, and fitness levels.
One reason travelers love Pokhara is that it feels easy and relaxed. Before your trek, you can stay near Phewa Lake, prepare your gear, meet your guide, and enjoy the peaceful city atmosphere. After the trek, Pokhara is also a perfect place to rest. This makes it a great base for many trekking routes from Pokhara, especially for travelers who want a smooth and comfortable start.
For beginners or travelers with limited time, there are many short treks from Pokhara. Dhampus Australian Camp, Ghandruk, and Poon Hill are some of the most popular choices. These treks are not too long, but they still offer beautiful mountain views, village walks, green hills, and local culture. On clear days, you can see peaks like Annapurna, Machhapuchhre, Hiunchuli, and Dhaulagiri.
If you want a bigger mountain journey, there are also many long treks from Pokhara. Mardi Himal, Annapurna Base Camp, Annapurna Circuit, Jomsom Muktinath , and Upper Mustang are great options for trekkers who want more days on the trail. These routes take you deeper into the Himalayas, with changing landscapes, peaceful villages, high viewpoints, and rich local culture.
Whether you want an easy 2-day hike or a long adventure in the mountains, Pokhara trekking packages can be planned around your travel style. The best treks from Pokhara are popular because they are scenic, flexible, and full of real Nepal experiences. From short village trails to famous Himalayan routes, Pokhara is the perfect starting point for your next trek.
Why Pokhara Is the Best Starting Point for Trekking in Nepal?
If you are planning a trek in Nepal, Pokhara is one of the easiest and most enjoyable places to begin. It is close to the Annapurna region, so many popular trekking routes from Pokhara start with only a short drive to nearby trailheads like Nayapul, Phedi, Kande, and Ghandruk.
This is why Pokhara trekking is loved by both beginners and experienced trekkers. Short treks like Poon Hill, Dhampus, Australian Camp, and Ghandruk are great for first-time trekkers, while longer routes like Annapurna Base Camp, Mardi Himal, Annapurna Circuit, Jomsom Muktinath, and Upper Mustang are perfect for bigger adventures.
Pokhara also makes trek preparation simple. Around Lakeside, you can find hotels, cafés, restaurants, trekking shops, guides, transport services, and travel agencies. You can relax by Phewa Lake, check your gear, arrange permits, and get ready for the mountains without feeling rushed. This comfort is one reason Pokhara is known as the best trekking hub in Nepal.
Another great thing about trekking from Pokhara is that the city itself is part of the experience. Before or after your trek, you can enjoy activities in Pokhara like boating on Phewa Lake, paragliding, watching sunrise from Sarangkot, visiting the World Peace Pagoda, exploring Davis Falls, or simply relaxing in the Lakeside area.
With easy access, peaceful lakeside vibes, good transport, many hotels, and some of the best Annapurna treks from Pokhara, this city is more than just a starting point. It is the perfect place to begin and end your Himalayan trekking journey.
Short Treks from Pokhara for Beginners
You don’t need weeks of free time or serious mountain experience to trek in Nepal. Some of the best short treks from Pokhara take just two to five days and still reward you with incredible views, warm village stays, and a real feel of the Himalayas. These easy treks from Pokhara are ideal for first-time trekkers, families with kids, students, couples, and anyone traveling on a tight schedule.
Here are the most popular beginner-friendly treks in Nepal that start from Pokhara:
Dhampus Australian Camp Trek (1–2 days) – The easiest option on this list. A gentle walk through rice paddies and small Gurung villages with close-up views of Annapurna South and Fishtail Peak. Perfect for families or anyone who wants a quick mountain escape without too much effort.
Ghandruk Trek (2–3 days) – Takes you to one of the most beautiful hill villages in the Annapurna region. You walk through rhododendron forests, cross suspension bridges, and stay in traditional stone houses. Short but feels like a proper mountain experience.
Ghorepani Poon Hill Trek (4–5 days) – The classic beginner trek in Nepal. The sunrise from Poon Hill, with over 20 Himalayan peaks glowing in front of you, is one of the most unforgettable moments you can have on a short trek. Well-marked trail, comfortable teahouses, and manageable for most fitness levels.
Mohare Danda Trek (3–4 days) – A quieter, less crowded alternative to Poon Hill with equally stunning panoramic views. Feels more off the beaten path and is quickly becoming a favorite among trekkers who prefer peace over popularity.
All these short treks from Pokhara can be done year-round, with autumn and spring being the best seasons. Trailheads are just a short drive from Pokhara’s lakeside, so you’re never far from comfort.
Long Treks from Pokhara for Experienced Trekkers
If short treks aren’t enough and you want to go deeper into the Himalayas, the long treks from Pokhara are where the real adventure begins. These routes take you through high passes, remote valleys, ancient villages, and landscapes that change completely from one day to the next.
Here are the top Annapurna trekking routes and adventure treks from Pokhara for experienced hikers:
Annapurna Base Camp Trek (7–12 days) – The most iconic trek in the region. You walk through bamboo forests, terraced farmland, and alpine meadows before reaching the base camp, which sits in a massive natural amphitheater surrounded by towering peaks. Challenging but doable for anyone who’s reasonably fit.
Annapurna Circuit Trek (12–21 days) – The big one. A full loop around the Annapurna massif, crossing the Thorong La Pass at 5,416 meters. The landscape shifts from lush green valleys to dry high-altitude desert, and the culture changes from Hindu lowlands to Tibetan Buddhist highlands. Widely considered one of the greatest long-distance treks in the world.
Jomsom Muktinath Trek (7–10 days) – Follows the Kali Gandaki gorge, the deepest gorge on earth, into a dry and dramatic landscape that feels like a different country. Muktinath is a sacred site for both Hindus and Buddhists, adding a spiritual dimension to the trek.
Upper Mustang Trek (10–14 days) – A restricted area that was closed to outsiders until 1992. Think desert landscapes, ancient cave monasteries, walled towns, and Tibetan culture that’s barely changed in centuries. Requires a special permit but worth every bit of the effort and cost.
Khopra Danda Trek (5–7 days) – A newer route that’s gaining serious popularity among experienced trekkers who want fewer crowds. Offers panoramic views of Dhaulagiri, Annapurna, and Nilgiri, plus a side trip to the sacred Khayer Lake sitting above 4,500 meters.
These adventure treks from Pokhara each offer something different, high altitude, deep culture, wild terrain but they all go far beyond the ordinary. If you’re exploring long trekking packages in Nepal and want a trip that truly stays with you, these are the routes to consider.
Best Trekking Routes from Pokhara – Quick Comparison
A simple side-by-side look at the most popular short and long treks from Pokhara, Nepal. This table helps you choose the right route based on your time, fitness level, trekking experience, and travel interest.
Short Treks from Pokhara – Beginner-Friendly
Trek Name
Duration
Difficulty
Max Elevation
Best For
Main Highlights
Dhampus Australian Camp Trek
1–2 days
Easy
2,060 m
Families, beginners
Rice terraces, Gurung villages, Annapurna and Machhapuchhre views
Ghandruk Trek
2–3 days
Easy
1,940 m
Couples, culture lovers
Stone village, rhododendron forest, suspension bridges
Kali Gandaki Gorge, Muktinath Temple, Mustang landscape
Upper Mustang Trek
10–14 days
Challenging
3,840 m
Adventure seekers, history lovers
Restricted area, cave monasteries, Lo Manthang, desert valleys
Annapurna Circuit Trek
12–21 days
Challenging
5,416 m
Long-distance trekkers
Thorong La Pass, diverse landscapes, Hindu and Buddhist culture
Easy Treks from Pokhara for Families and First-Time Trekkers
These family-friendly treks in Nepal share a few things in common, short walking hours (usually 4 to 5 hours a day), lower altitude so there’s no serious risk of altitude sickness, warm teahouse accommodation with beds and hot meals, and stunning mountain views without the extreme physical challenge.
Here are the best options for first-time trekking in Nepal:
Dhampus Australian Camp Trek (1–2 days) – The gentlest trek you can do from Pokhara. The trail passes through terraced rice fields and small Gurung settlements with direct views of Annapurna South and Machhapuchhre. Walking hours are short, the path is easy to follow, and kids enjoy it just as much as adults. A great choice if you only have a day or two to spare.
Ghandruk Trek (2–3 days) – A slightly longer walk that takes you to one of the prettiest hilltop villages in the Annapurna region. The trail goes through rhododendron forests and across suspension bridges, and the village itself has traditional stone houses, local museums, and incredible mountain views from every angle. Comfortable for families and older travelers.
Ghorepani Poon Hill Trek (4–5 days) – The most popular easy trek from Pokhara and a classic first-time trekking experience. The sunrise from Poon Hill, with a panorama of over 20 Himalayan peaks, is something you’ll remember forever. The trail has well-spaced teahouses, so you’re never far from a rest stop, a warm drink, or a place to sleep. Moderate fitness is enough.
Ghorepani Poon Hill Trek from Pokhara
If there’s one trek that defines first-time trekking in Nepal, it’s this one. The Ghorepani Poon Hill Trek from Pokhara is one of the most popular short treks in the country and once you see the sunrise from Poon Hill, you’ll understand why.
The trek usually takes 4 to 5 days and is suitable for beginners with a decent level of fitness. Here’s what makes it special:
Poon Hill Sunrise – You wake up early, climb a short hill in the dark, and watch over 20 Himalayan peaks light up as the sun rises. Annapurna, Dhaulagiri, Machhapuchhre, Nilgiri — all of them, stretched across the horizon. It’s one of those moments that stays with you.
Rhododendron Forests — During spring, the trail passes through forests full of blooming red and pink rhododendrons. Even outside spring, the dense forest sections are peaceful and beautiful.
Gurung and Magar Villages – You walk through traditional hill villages where daily life hasn’t changed much in decades. Stone houses, prayer flags, terraced fields, and friendly locals who greet you along the way.
Panoramic Mountain Views – Beyond Poon Hill, you get views of the Annapurna and Dhaulagiri ranges from multiple points along the trail. The scenery changes with every hour of walking.
Teahouses are well-spaced, the trail is clearly marked, and you don’t need any prior trekking experience. For a short trek that delivers big, this one is hard to beat.
Mardi Himal Trek from Pokhara
The Mardi Himal Trek from Pokhara is one of those routes that quietly became a favorite among trekkers who want big mountain views without the crowds. It’s a short trek in Annapurna that packs in more than you’d expect for a 4 to 6 day walk.
Here’s why it stands out:
Close Mountain Views – You get incredibly close views of Machhapuchhre (Fishtail Peak), Mardi Himal, and Annapurna South. At the high camp, the mountains feel like they’re right in front of you, no telephoto lens needed.
Ridgeline Walk – The final section of the trek follows a narrow ridge with open views on both sides. It’s one of the most scenic stretches of trail you’ll find anywhere in the Annapurna region.
Peaceful Forest Trails – The lower sections pass through quiet rhododendron and bamboo forests with very few other trekkers around. If you like walking in silence, this trail delivers.
Less Crowded – Unlike Poon Hill or ABC, the Mardi Himal route still feels uncrowded. You’ll share teahouses with a handful of people instead of a crowd.
It’s the best Himalayan view trek from Pokhara for anyone who wants something short, scenic, and a little off the main trail. Moderate fitness is recommended for the steeper sections near the top.
Dhampus Australian Camp Trek from Pokhara
Looking for the shortest and easiest trek near Pokhara? The Dhampus Australian Camp Trek is it. This is a 1 to 2 day walk that’s perfect for beginners, families with kids, older travelers, and anyone who only has a day or two to spare but still wants a taste of the Himalayas.
What you can expect:
Beautiful Annapurna Views – From Australian Camp, you get clear views of Annapurna South, Machhapuchhre, and Hiunchuli. The mountain panorama is surprisingly impressive for such a short trek.
Peaceful Villages – The trail passes through Dhampus and surrounding settlements where life moves slowly. Stone houses, kitchen gardens, chickens wandering around, it’s a glimpse of rural Nepal at its simplest.
Forest Trails – Easy walking through shaded forest paths with birds and butterflies. Nothing strenuous, nothing technical, just a pleasant walk in the hills.
Comfortable Walking – Total walking time is around 3 to 4 hours each way. The altitude stays low, and the path is wide and well-maintained. You don’t need special gear or experience.
If you’re in Pokhara and want to get into the mountains without committing to a longer trek, this is the perfect option. You can leave in the morning and be back by the next afternoon.
Ghandruk Trek from Pokhara
The Ghandruk Trek from Pokhara takes you to one of the most charming hilltop villages in the Annapurna region. Ghandruk is a traditional Gurung village perched on a ridge with sweeping views of Annapurna South, Machhapuchhre, and Hiunchuli. It’s a short Annapurna trek that’s as much about culture as it is about mountains.
Here’s what makes this cultural trek in Nepal worth doing:
Traditional Gurung Village – Ghandruk has stone-paved streets, slate-roofed houses, a small museum showcasing Gurung history, and a warm community feel. Walking through the village is like stepping back in time.
Mountain Views – The views from Ghandruk are some of the best you’ll get on a 2 to 3 day trek. Machhapuchhre looks enormous from here, and the sunsets over the Annapurna range are unforgettable.
Easy Trekking Trail – The trail is well-marked and manageable for most fitness levels. You cross suspension bridges, walk through terraced farmland, and pass through forests full of rhododendrons and oaks.
Good for Everyone – Beginners, families, couples, and culture lovers all enjoy this trek. The walking hours are short, the teahouses are comfortable, and the village has a warmth that makes you want to stay longer.
If you want a short trek that combines real mountain views with genuine cultural experience, Ghandruk is one of the best choices near Pokhara.
Khopra Danda Trek from Pokhara
The Khopra Danda Trek from Pokhara is one of the best offbeat treks from Pokhara for anyone who wants mountain views without the crowds. While most trekkers head to Poon Hill or ABC, this route takes you to Khopra Ridgequieter, less commercialized, and equally stunning.
What makes it worth choosing:
Khopra Ridge Views – From the ridge, you get a wide panorama of Dhaulagiri, Annapurna South, Nilgiri, and the surrounding peaks. The viewpoint is open and uncrowded, often you’ll have it to yourself.
Khayer Lake Side Trip – An optional hike from Khopra takes you to Khayer Lake, a sacred high-altitude lake sitting above 4,500 meters. It’s a challenging but rewarding add-on for those with the energy and time.
Community Lodges – The trek is run through community-based tourism, meaning your stay directly supports local villages. The lodges are simple but clean, and the food is home-cooked.
Local Villages and Forests – The trail passes through traditional settlements, dense oak and rhododendron forests, and open meadows. The landscape changes constantly and keeps things interesting.
Fewer Trekkers – This is the big draw. If you’ve done the popular routes and want something quieter, or if you just prefer trekking without crowds, Khopra Danda delivers that experience.
It’s a 5 to 7 day trek that suits experienced hikers and anyone looking for a peaceful, community-supported trekking experience in the Annapurna region.
Annapurna Base Camp Trek from Pokhara
The Annapurna Base Camp Trek from Pokhara is one of the most famous treks in Nepal and for good reason. The ABC Trek takes you straight into the heart of the Annapurna Sanctuary, a natural amphitheater surrounded by some of the highest peaks in the world. It’s a classic Annapurna trek that belongs on every serious trekker’s list.
Here’s what you’ll experience on the trail:
The Annapurna Sanctuary – The base camp sits at 4,130 meters inside a massive glacial basin. You’re surrounded on all sides by Annapurna I, Annapurna South, Hiunchuli, Machhapuchhre, and Gangapurna. The scale of it is hard to describe until you’re standing there.
Machhapuchhre Base Camp – Before reaching ABC, you stop at MBC, a beautiful campsite with jaw-dropping views of Fishtail Peak. Many trekkers say this spot is just as memorable as base camp itself.
Changing Landscapes – The trail takes you through lowland rice paddies, dense bamboo forests, rhododendron groves, and finally into the alpine zone above the tree line. Every day looks different from the last.
Mountain Villages and Hot Springs – Along the way, you pass through Gurung villages, cross rivers on suspension bridges, and can stop at natural hot springs in Jhinu Danda to soak tired legs.
Rivers and Waterfalls – The Modi Khola river follows much of the trail, and waterfalls tumble down from the cliffs during the wetter months.
The trek takes 7 to 12 days depending on your pace and route. Moderate fitness is needed, but you don’t need technical climbing skills. Teahouse accommodation is available the entire way.
Annapurna Circuit Trek from Pokhara
The Annapurna Circuit Trek from Pokhara is one of Nepal’s greatest long trekking routes, a full loop around the Annapurna massif that takes you through landscapes so different from each other it feels like crossing multiple countries in a single trek.
Here’s what to expect:
Thorong La Pass (5,416 m) – The highest point of the trek and the moment everything builds toward. Crossing Thorong La is physically demanding but deeply rewarding. On a clear day, the views from the top are extraordinary.
Diverse Landscapes – You start in lush subtropical valleys with rice paddies and waterfalls, climb through temperate forests and alpine meadows, cross the high pass, and descend into the dry, desert-like terrain of Mustang. No other trek in Nepal gives you this much variety.
Cultural Shift — The lower villages are Hindu, with colorful temples and busy market towns. As you climb higher, the culture shifts to Tibetan Buddhist, monasteries, prayer wheels, chortens, and wind-swept villages with flat-roofed stone houses.
Villages and Valleys – Manang, Pisang, Jomsom, Marpha, each stop along the circuit has its own character. Marpha is famous for apple orchards and apple brandy. Manang is a popular acclimatization stop with stunning surroundings.
Mountain Viewpoints – Views of Annapurna, Dhaulagiri, Manaslu, Nilgiri, Tilicho Peak, and many others appear at different points throughout the trek.
The full circuit takes 12 to 21 days depending on side trips and pace. It’s best suited for experienced trekkers with good fitness. Planning and acclimatization are key, especially around the Thorong La crossing.
Jomsom Muktinath Trek from Pokhara
The Jomsom Muktinath Trek from Pokhara is a Mustang trekking route that combines dramatic mountain scenery with deep cultural significance. It follows the Kali Gandaki Valley, the deepest gorge in the world into a landscape that shifts from green hills to dry, windswept desert.
What makes this cultural trek in Nepal stand out:
Kali Gandaki Valley – Walking through the gorge is an experience in itself. The valley sits between the Annapurna and Dhaulagiri massifs, and the scale of the surrounding mountains is enormous.
Muktinath Temple – The trek ends at Muktinath, a sacred site for both Hindus and Buddhists. Pilgrims travel here from across South Asia to visit the temple, the eternal flames, and the 108 water spouts. It adds a spiritual layer to the whole journey.
Jomsom and Marpha – Jomsom is the administrative center of Mustang with a small airstrip and a windy, high-altitude feel. Marpha, just a short walk away, is one of the prettiest villages on the trail, whitewashed houses, narrow stone alleys, and some of the best apple pie in Nepal.
Desert-Like Scenery – As you move north, the greenery fades and the landscape turns dry and dramatic. It feels like a completely different country from the Pokhara side.
Trekking and Culture Combined – This route suits travelers who want both physical activity and cultural immersion. The villages, monasteries, and sacred sites along the way give the trek meaning beyond the scenery.
The trek takes around 7 to 10 days and is moderate in difficulty. It’s a great choice for anyone who wants to explore the Mustang region without committing to the longer Upper Mustang route.
Upper Mustang Trek from Pokhara
The Upper Mustang Trek from Pokhara takes you into one of Nepal’s most restricted and least visited trekking regions. Upper Mustang was closed to outsiders until 1992, and it still feels like stepping into a different world, a high-altitude desert with Tibetan culture, ancient monasteries, and landscapes you won’t find anywhere else in Nepal.
Here’s what to know:
Lo Manthang – The highlight of the trek is reaching Lo Manthang, a walled medieval city that served as the capital of the former Kingdom of Lo. Inside the walls you’ll find royal palaces, old monasteries, and narrow lanes where life has changed very little over the centuries.
Desert-Like Landscapes – Forget green valleys and forests. Upper Mustang is dry, rugged, and wind-carved, red and ochre cliffs, deep canyons, barren plateaus, and cave systems carved into cliff faces. It looks more like the high deserts of Tibet than anything you’d expect in Nepal.
Tibetan-Influenced Culture – The people, language, food, and religion here are strongly Tibetan. You’ll see prayer flags everywhere, visit centuries-old gompas, and eat Tibetan bread and butter tea in local homes.
Ancient Caves and Monasteries – The region is full of sky caves, some thousands of years old and remote monasteries with original murals and artwork still intact.
Restricted Area Permit Required – Upper Mustang is a restricted area, and you need a special permit (currently $500 for 10 days) to enter. You must trek with a licensed agency and guide. This keeps visitor numbers low and the experience exclusive.
The trek takes 10 to 14 days and is best for experienced trekkers and cultural explorers. The altitude isn’t extreme by Himalayan standards (max around 3,840 m), but the terrain is rugged and remote.
Mohare Danda Trek from Pokhara
The Mohare Danda Trek from Pokhara is a quiet, community-based trek in the Annapurna region that’s quickly gaining attention among trekkers who want to skip the crowds. It’s an offbeat trek from Pokhara that offers stunning views, warm local hospitality, and a peaceful trail with very few other trekkers.
Why it’s worth considering:
Sunrise Views – The sunrise from Mohare Danda viewpoint is spectacular, a wide panorama stretching from Dhaulagiri to Annapurna to Machhapuchhre. Some trekkers say it rivals Poon Hill, but without the crowd.
Community Lodges – This is a community trek in Nepal, meaning the lodges are locally owned and operated. Your stay directly supports the villages along the route. The lodges are simple, clean, and the home-cooked food is excellent.
Local Villages – The trail passes through small hill settlements where you can see everyday rural life up close, farming, weaving, cooking over wood fires. The people are warm and genuinely happy to see visitors.
Forest Trails – You walk through dense rhododendron, oak, and pine forests that feel untouched and quiet. In spring the flowers are incredible. The rest of the year the shaded paths offer cool, pleasant walking.
A Real Alternative – If you’ve already done Poon Hill or just prefer a less-trodden trail, Mohare Danda gives you a similar experience with more solitude. It’s a 3 to 4 day trek that’s suitable for most fitness levels.
For trekkers who value peace over popularity, this is one of the best short treks near Pokhara.
Best Time for Treks from Pokhara
Timing matters when it comes to trekking in Nepal. The mountains don’t change, but the weather, visibility, and trail conditions shift dramatically with the seasons. Picking the right time can mean the difference between clear Himalayan panoramas and days of walking through fog and rain.
Autumn (September – November) – This is the best time for trekking from Pokhara, and most experienced trekkers will tell you the same. The monsoon has just ended, so the air is clean, the skies are clear, and the mountains look sharp and close. Temperatures are comfortable during the day, trails are dry, and the hillsides are still green from the rains. October and November are the peak months expect more trekkers on popular routes, but the conditions are hard to beat.
Spring (March – May) – The second-best season for Annapurna treks and a favorite for many. The weather is warm and stable, and the rhododendron forests along trails like Poon Hill and Ghandruk explode with red and pink blooms. March and April are ideal. May gets warmer at lower altitudes, but higher trails stay pleasant. Visibility is generally good, though occasional afternoon haze can roll in.
Winter (December – February) – Good for short, low-altitude treks like Dhampus, Australian Camp, and Ghandruk. The skies are often crystal clear and the mountain views can be the best of the year. But higher routes get seriously cold, some teahouses close, and snow can block passes like Thorong La. If you stick below 3,000 meters and pack warm layers, winter trekking from Pokhara can be surprisingly rewarding.
Monsoon (June – August) – The toughest season. Heavy rain, leeches on the trail, slippery paths, clouds blocking mountain views for days at a time. Most trekkers avoid this period. Some rain-shadow areas like Upper Mustang and Jomsom are still doable during monsoon since they sit behind the Himalayan rain barrier, but everywhere else gets wet and difficult.
If you have the flexibility to choose, aim for October–November or March–April. That’s when Pokhara trekking is at its absolute best, clear skies, comfortable temperatures, and the Himalayas on full display.
Trek Difficulty – Easy, Moderate, and Challenging Routes
Not every trek from Pokhara demands the same level of fitness or experience. Some are gentle walks through villages with mountain views. Others take you above 5,000 meters across high passes. Knowing what you’re signing up for helps you pick the right route and enjoy it properly.
Here’s how the main treks from Pokhara break down by difficulty:
Easy – Great for beginners, families, and first-time trekkers
Dhampus Trek (1–2 days) – Flat to gentle uphill, short walking hours, low altitude. Feels more like a countryside walk with Himalayan views than a serious trek.
Australian Camp (1–2 days) – Similar to Dhampus, easy trail through farmland and forest. You can do it in a single day if you start early.
Ghandruk Trek (2–3 days) – Slightly longer with some uphill sections, but nothing that requires trekking experience. The trail is well-maintained and the village is beautiful.
Moderate — Needs basic fitness but no technical skills
Ghorepani Poon Hill Trek (4–5 days) – The most popular moderate trek. Some steep uphill sections, especially the climb to Ghorepani, but teahouses are well-spaced and the pace is manageable.
Mardi Himal Trek (4–6 days) – Steeper than Poon Hill in the upper sections with a ridge walk that requires steady footing. The altitude reaches around 4,500 meters, so you’ll feel it.
Mohare Danda Trek (3–4 days) – Moderate effort with forest trails and gradual climbs. Less demanding than Mardi Himal but still a proper trek.
Khopra Danda Trek (5–7 days) – The Khayer Lake side trip pushes this into the harder end of moderate. The main route is steady, but the lake sits above 4,500 meters and the path is steep.
Challenging — For experienced trekkers with good fitness
Annapurna Base Camp Trek (7–12 days) – Long days of walking, steep stone staircases, and altitude up to 4,130 meters. Not technical, but you need endurance and the ability to handle altitude.
Annapurna Circuit Trek (12–21 days) – The full circuit is a serious commitment. Crossing Thorong La Pass at 5,416 meters is physically demanding, and the trek covers a huge range of terrain and altitude over two to three weeks.
Upper Mustang Trek (10–14 days) – The altitude isn’t extreme, but the terrain is rugged, the region is remote, and the distances between stops can be long. It also requires a restricted area permit and a licensed guide.
A simple rule: if you’ve never trekked before, start with something easy and work your way up. If you’re fit and have some hiking experience, the moderate routes will challenge you just enough. And if you want the full Himalayan experience with high passes and long days, the challenging routes are where the real adventure lives.
Accommodation and Meals on Pokhara Trekking Routes
Teahouse trekking in Nepal is simple, comfortable, and one of the best parts of the journey. It gives you a chance to enjoy local hospitality, warm meals, and a friendly mountain atmosphere after a full day of walking.
What Is Teahouse Trekking in Nepal?
Teahouses are small mountain guesthouses run by local families. They provide basic accommodation, simple meals, hot drinks, and a place to relax after a long day on the trail.
For most Pokhara trekking routes, teahouse accommodation is the standard option. It is not luxurious, but it is practical, affordable, and gives trekkers a closer look at local mountain life.
Accommodation on Pokhara Trekking Routes
Most teahouse rooms are simple and clean. You usually get a private twin-sharing room with a bed, pillow, mattress, and blanket. Some teahouses have attached bathrooms, while others have shared toilets and washing areas.
The rooms are basic, and the walls can be thin. Heating is usually not available inside the bedrooms. Most trekkers spend the evening in the dining hall, where there is often a stove to keep the room warm.
On popular routes like Poon Hill Trek, Ghandruk Trek, Mardi Himal Trek, and Annapurna Base Camp Trek, teahouses are found regularly along the trail. This makes it easier to plan each night’s stop without carrying camping equipment.
Meals on the Trek
Food on Pokhara trekking routes is simple, filling, and made for trekkers. Most teahouses have similar menus, so you will quickly know what to expect.
Dal Bhat
Dal bhat is the most popular meal on the trail. It usually includes rice, lentil soup, vegetables, curry, and pickle. Many teahouses offer free refills, which makes it a great option for long trekking days.
It is filling, affordable, and gives you the energy you need to keep walking. Trekkers often say, “Dal bhat power, 24 hour,” and after a few days on the trail, you will understand why.
Other Food Options
Teahouse menus usually include:
Noodle soup
Fried rice
Fried noodles
Pasta
Momos
Potatoes
Pancakes
Eggs
Toast
Chapati
Tibetan bread
Spring rolls
Lower-altitude villages usually have more choices. As you climb higher, the menu becomes smaller because food supplies are harder to carry up the trail.
Breakfast
Breakfast is usually simple but enough to start the day. Common options include toast with eggs, pancakes, porridge, Tibetan bread, chapati with honey or jam, tea, and coffee.
Most trekkers eat breakfast early before starting the walk. A hot drink in the morning feels especially good when the weather is cold.
Tea, Coffee, and Drinking Water
Tea and coffee are available in almost every teahouse. You can usually order black tea, milk tea, lemon tea, ginger tea, mint tea, hot lemon, or coffee.
Bottled water is sold along the trail, but the price increases as you go higher. To save money and reduce plastic waste, carry a reusable water bottle and use purification tablets, drops, or a water filter.
Permits Required for Trekking from Pokhara
You can’t just show up and start walking, you’ll need a couple of permits first. Don’t worry, it’s not complicated. If you’re booking with Hi Nepal Treks, we sort out all the permits for you. But it’s still good to know what you’re carrying and what it costs.
ACAP Permit – This is the Annapurna Conservation Area Permit, and you need it for pretty much every trek in the region, Poon Hill, ABC, Annapurna Circuit, Mardi Himal, Ghandruk, Khopra Danda, Mohare Danda, all of them. It costs NPR 3,000 (about USD 20–23) for foreign trekkers and NPR 1,000 for SAARC nationals. The money goes toward trail upkeep and conservation.
TIMS / e-TIMS Card – This is a trekker registration system. Nepal has been shifting to an electronic version with QR codes that get scanned at checkpoints. It costs around NPR 2,000–3,000 (USD 15–23). The rules around TIMS have changed a few times on some routes it’s strictly checked, on others not so much. We keep track of what’s needed so you don’t have to figure it out yourself.
Upper Mustang Restricted Area Permit – This one’s different. Upper Mustang is a restricted zone, so you need a special permit on top of ACAP. It costs USD 50 per day, that’s USD 500 for 10 days. You also need to trek with a licensed agency and a minimum of two trekkers. It’s the priciest permit in Nepal, but that’s part of what keeps Upper Mustang uncrowded and special.
Mandatory Guide – Since 2023, every foreign trekker in Nepal needs a licensed guide. No exceptions, no solo trekking allowed. All our packages at Hi Nepal Treks come with a government-licensed guide, so this is already covered when you book with us.
Roughly what you’ll spend on permits:
Standard Annapurna treks (Poon Hill, ABC, Mardi Himal, etc.) around USD 35–45 per person total
Upper Mustang around USD 535–545+ per person for 10 days
A few things worth knowing:
Carry printed copies. Checkpoints along the trail will ask to see your permits. Some remote spots don’t have internet to scan QR codes, so paper copies save you trouble.
Don’t trust old info. Nepal’s permit rules have changed multiple times in recent years. A blog post from 2022 might tell you something completely different from what’s required now. We stay updated on the latest rules so your trek is sorted from the start.
We handle everything. When you book with Hi Nepal Treks, permits are included in your package. You send us your passport copy and photos, we do the rest. No office visits, no queues, no confusion.
That’s basically it. A small bit of admin that takes a few hours in Pokhara, or zero hours if you let us do it for you.
Guide and Porter for Treks from Pokhara
Having the right people with you on the trail makes a big difference. A good guide for trekking doesn’t just show you the way, they make the whole experience better.
Here’s why most trekkers hire a guide and porter:
Navigation: Trails in the Annapurna region are mostly well-marked, but junctions can be confusing, especially in fog or rain. A local guide knows every turn, every shortcut, and every backup route. You won’t waste time guessing which path to take.
Safety: Your guide watches for signs of altitude sickness, keeps track of weather changes, and knows what to do if something goes wrong. On longer treks like ABC or the Annapurna Circuit, that kind of experience matters. Since 2023, hiring a licensed guide is mandatory for all foreign trekkers in Nepal.
Local Culture: A guide who grew up in the mountains can tell you things no guidebook will, stories behind the villages, meaning of the prayer flags, why certain festivals are happening, what that plant on the trail is used for. It turns a walk into something much deeper.
Permits and Logistics: Your guide helps with checkpoint registration, teahouse bookings, and any communication with locals along the way. If there’s a language gap, they bridge it. Less hassle for you.
Porters: Walking 5 to 7 hours a day is tough enough without a 15 kg bag on your back. A porter carries your heavy luggage so you can trek with just a daypack. You walk lighter, enjoy more, and your knees will thank you at the end of the trip.
Supporting Local Jobs: When you hire a local guide or porter, that money goes straight into the community. Many guides and porters come from the same mountain villages you’ll be walking through. It’s one of the most direct ways tourism helps people in rural Nepal.
At Hi Nepal Treks, all our guided treks from Pokhara come with experienced, government-licensed guides who speak English and know the Annapurna region inside out. Porter service in Nepal can be added to any package, we make sure our porters are fairly paid, properly equipped, and treated well.
Packing List for Trekking from Pokhara
Whether you are heading out for a quick day hike to Sarangkot or a multi-week expedition on the Annapurna Circuit, having the right gear can make or break your experience. This packing list for trekking from Pokhara covers everything a beginner or seasoned trekker needs to stay comfortable, safe, and prepared on the trail.
Clothing
Moisture-wicking base layers (t-shirts and long-sleeve tops)
Lightweight trekking pants (convertible zip-off pants work great)
Warm fleece or down jacket for cold mornings and higher elevations
Waterproof rain jacket with a hood
Thermal underwear for treks above 3,000 meters
Comfortable underwear and hiking socks (merino wool recommended)
Lightweight daypack (20–30 liters for short treks, 50–65 liters for longer ones)
Trekking poles (reduce strain on knees, especially on descents)
Dry bags or zip-lock pouches for keeping electronics and documents dry
Notebook and pen for journaling
Tip for beginners: You do not need to buy everything before you arrive. Pokhara’s Lakeside area is packed with trekking gear shops where you can buy or rent jackets, sleeping bags, trekking poles, and backpacks at reasonable prices.
Safety Tips for Trekking from Pokhara
Walk at a steady pace: Whether you are doing short treks from Pokhara or longer routes, walk slowly and avoid rushing on uphill trails.
Drink enough water: Staying hydrated is important during trekking in Nepal, especially on warm days and higher altitude routes.
Be careful with altitude: Some Pokhara trekking routes reach high elevations, so rest properly and tell your guide if you feel headache, dizziness, nausea, or unusual tiredness.
Check the weather daily: Weather in the mountains can change quickly, so always carry a rain jacket, warm layers, and a windproof jacket.
Follow your trekking guide: A licensed guide for trekking from Pokhara helps with trail safety, permits, route planning, weather updates, and emergency support.
Wear proper trekking shoes: Good trekking shoes are important for stone steps, forest trails, muddy paths, and downhill sections.
Carry warm clothing: Even easy treks from Pokhara can feel cold in the morning, evening, and higher viewpoints.
Pack basic first aid: Carry personal medicine, plasters, pain relief, water purification tablets, and altitude medicine if advised by a doctor.
Stay on marked trails: Avoid shortcuts and do not walk alone in unfamiliar areas, especially on remote trekking trails in Nepal.
Following these simple trekking safety tips from Pokhara helps make your journey safer, easier, and more enjoyable. Whether you choose an easy beginner trek or a longer Himalayan route, good preparation makes your Pokhara trekking experience better.
How to Choose the Best Trek from Pokhara
Choosing the best trek from Pokhara depends on your time, budget, fitness level, and travel season. Pokhara has trekking routes for everyone, from easy beginner hikes to longer Himalayan adventures.
Know your fitness level: If you are a beginner, start with short and easy trekking routes. If you want more adventure, Mardi Himal, Annapurna Base Camp, or Khopra Danda are better choices.
Plan your budget: Short treks are more affordable because they need fewer days, meals, and accommodation. Longer treks cost more because of extra trekking days, permits, guides, and porter services.
Choose the right season: Spring and autumn are the best seasons for trekking from Pokhara because the weather is clearer and mountain views are better. Winter is good for lower routes, while Upper Mustang is suitable even during monsoon.
Decide your travel style: You can choose a guided trek from Pokhara for safety and comfort, or a simple teahouse trek if you want a more flexible and budget-friendly experience.
The best Pokhara trekking route is the one that matches your time, comfort, and interest. Whether you want a short scenic hike or a longer Himalayan journey, Pokhara has a trek that fits your travel plan.
Follow Your Interests
What excites you most about trekking? Your answer points to the right trail.
Mountain views:Poon Hill for a classic Annapurna sunrise, Mardi Himal for an intimate high-camp experience, or Annapurna Base Camp for an amphitheater of towering peaks.
Cultural immersion:Ghandruk and the Annapurna Circuit pass through Gurung and Thakali villages where you can experience local hospitality, traditional food, and centuries-old customs.
Off-the-beaten-path adventure:Khopra Danda offers solitude and a sacred glacial lake, while Upper Mustang feels like stepping into a different world entirely with its Tibetan-influenced landscape and ancient cave monasteries.
Quick escape from the city: Dhampus, Australian Camp, and Sarangkot are all reachable within a few hours from Pokhara and give you a taste of the mountains without a major time commitment.
Final Thoughts
Pokhara is one of the best starting points for trekking in Nepal, with routes for every type of traveler. From short treks from Pokhara like Dhampus Australian Camp, and Ghandruk to longer Himalayan adventures such as Mardi Himal, Annapurna Base Camp, and Annapurna Circuit, there is a trail for every time, budget, and comfort level.
With the right planning, trekking from Pokhara can be safe, scenic, and truly memorable. For a smooth and well-organized trip, plan your trek with Hi Nepal Treks and let our team help you choose the right route, arrange guides, permits, transport, accommodation, and customize the itinerary based on your travel style.
Ready to Book Your Trek from Pokhara?
Plan your perfect trek from Pokhara with Hi Nepal Treks. We arrange short and long trekking routes with guide, porter, permits, transport, accommodation, and customized itinerary support.
Frequently Asked Questions – Best Treks from Pokhara
What are the best treks from Pokhara?
The best treks from Pokhara include Ghorepani Poon Hill, Ghandruk Trek, Mardi Himal Trek, Annapurna Base Camp Trek, Khopra Danda Trek, and Annapurna Circuit. These routes offer beautiful mountain views, local villages, and classic Annapurna trekking experiences.
What is the best short trek from Pokhara?
The best short trek from Pokhara is usually the Ghorepani Poon Hill Trek or Ghandruk Trek. Both are beginner-friendly and offer amazing views of Annapurna, Machhapuchhre, and Dhaulagiri.
What is the easiest trek from Pokhara?
Dhampus, Australian Camp, and Ghandruk are some of the easiest treks from Pokhara. These routes are perfect for beginners, families, and travelers with limited time.
What is the best long trek from Pokhara?
The best long treks from Pokhara include Annapurna Base Camp, Annapurna Circuit, Khopra Danda, and Upper Mustang. These treks are better for travelers who want deeper Himalayan scenery, culture, and adventure.
How much does trekking from Pokhara cost?
The cost of trekking from Pokhara depends on the route, duration, permits, guide, porter, transport, meals, and accommodation. Short treks are more budget-friendly, while longer treks and restricted-area routes cost more.
Do I need permits for treks from Pokhara?
Yes, most Annapurna trekking from Pokhara requires permits such as the Annapurna Conservation Area Permit. Some routes may also need extra permits depending on the area, especially restricted regions like Upper Mustang.
Do I need a guide for trekking from Pokhara?
A guide is highly recommended for safety, navigation, permits, local culture, and emergency support. For longer or remote trekking routes from Pokhara, hiring a licensed guide is a smart choice.
Can beginners do treks from Pokhara?
Yes, beginners can enjoy many short treks from Pokhara, including Dhampus, Australian Camp, Ghandruk, and Ghorepani Poon Hill. These routes are scenic, manageable, and suitable for first-time trekkers.
So, you have finally booked that dream Nepal trek, congratulations! Whether you are heading to Everest Base Camp, tracing the golden rhododendron forests on the Annapurna Circuit, or tackling the remote Manaslu Circuit, what you pack can make or break the entire adventure.
Trekking in Nepal in 2026 demands smart, lightweight, weather-proof packing. You will face scorching valley heat one morning and sub-zero ridge winds the next. Forget something critical and you could find yourself in a remote teahouse paying five times the price for a spare headlamp, or worse, cutting your trek short due to a preventable altitude-related issue.
This expert-crafted Nepal Trek Packing List 2026 covers everything: clothing layers, trekking gear, permits, medications, electronics, and proven money-saving tips, all backed by over 20 years of Himalayan guiding experience from our team at Hi Nepal Travels & Treks.
Why Your Packing List Matters More Than You Think?
Nepal’s trekking trails span elevations from sub-tropical jungles at 800 m to glacial passes above 5,400 m. There are no online deliveries at Namche Bazaar. Forget a quality rain cover and you are in serious trouble when the afternoon monsoon rolls in over the Khumbu Valley.
The right gear does more than keep you comfortable, it keeps you safe. Altitude sickness, hypothermia, and dehydration are the most common reasons trekkers are evacuated from Himalayan trails, and all three are largely preventable with proper preparation.
Nepal Trekking Seasons 2026 – How Season Affects Your Kit
Img Src: Mountain Mart Treks
Your season determines your entire kit strategy. Pack for the conditions you will face, not just the trail name.
Season
Months
Packing Focus
Spring (Prime)
March – May
Light layers, full rain gear, SPF 50+
Summer / Monsoon
June – August
Heavy waterproofs, gaiters, leech socks
Autumn (Prime)
September – November
Layering system, windproof jacket
Winter
December – February
Expedition sleeping bag, heavy down jacket
Spring (March–May) and autumn (September–November) are the twin prime windows for Nepal trekking in 2026. Stable skies, clear mountain views, and moderate temperatures make these the most popular seasons. Winter trekkers should treat kit requirements as expedition-level — temperatures at Everest Base Camp can drop to -20°C overnight.
Browse our full range of Nepal Trekking Packages to find a departure that aligns with your 2026 travel window.
The Complete Clothing Packing Checklist
Clothing is the most critical component of your Nepal trek packing list. The golden rule is the three-layer system: base layer (moisture management), mid-layer (insulation), and outer layer (wind and waterproof protection). Never use cotton, wet cotton is dangerously cold and extremely slow to dry.
Base Layers
Moisture-wicking trekking shirts — 3x (merino wool or synthetic; cotton is strictly off the list)
Long-sleeve thermal base top — 2x (merino wool excels: odour-resistant and warm even when damp)
Trekking trousers / zip-off pants — 2x (zip-off versions are ideal for variable valley-to-ridge temperatures)
Lightweight shorts — 1x (for lower elevation days and teahouse downtime)
Trekking base-layer leggings — 1x (merino or synthetic)
Trekking underwear — 4–5x (merino or synthetic quick-dry)
Warm trekking socks — 4x (merino wool; Darn Tough and Smartwool are consistently top-rated)
Thin liner socks — 2x (worn under thick socks to prevent blisters)
Insulation & Mid-Layers
Fleece jacket — 1x (250-weight fleece recommended for high-altitude nights)
Down or synthetic insulated jacket — 1x (critical above 3,500 m; goose down is lightest but loses warmth when wet)
Warm fleece or thermal trousers — 1x (for cold camp evenings and early-morning summit starts)
Outer / Shell Layers
Waterproof hardshell jacket with hood — 1x (Gore-Tex or equivalent; non-negotiable for monsoon season or high-pass crossings)
Waterproof hardshell trousers — 1x
Head, Hands & Feet
Warm beanie hat — 1x (wool or fleece)
Sun hat / wide-brim hat — 1x (UV radiation increases ~4% for every 300 m of altitude)
Lightweight balaclava — 1x (essential for passes above 5,000 m)
Neck gaiter / buff — 1x
Lightweight gloves — 1x pair
Warm insulated gloves or mittens — 1x pair (for high camps and sub-zero morning starts)
Waterproof trekking boots — 1 pair (ankle support essential; break them in for 3–4 weeks before travel)
Camp sandals or Crocs — 1 pair (essential foot recovery after long summit days)
Gaiters — 1 pair (highly recommended for monsoon routes and snowy high passes)
Critical Boot Rule: NEVER break in new trekking boots on the Himalayan trail. Blisters are the most common complaint on all Nepal treks and are 100% preventable. Walk in your boots for at least 3–4 weeks before departure.
Trekking Gear & Equipment
Backpacks
Day pack — 25–35 L (what you carry each day; your porter carries your main duffel)
Main duffel bag — 60–80 L (soft-sided only — hard cases cannot be loaded on pack animals or porters)
Rain cover for day pack — 1x (verify inclusion; aftermarket covers fit most packs perfectly)
Trekking Poles
Trekking poles are non-optional above 4,000 m. Research shows they reduce knee-joint loading by up to 25% on steep descents, provide critical balance on slippery moraine, and help regulate breathing pace on long climbs. Choose lightweight collapsible aluminium or carbon-fibre models with anti-shock tips.
Headlamp & Navigation
Headlamp — 1x minimum (300+ lumens; Black Diamond Spot and Petzl Actik are trail-proven)
Spare batteries or USB-rechargeable model — pair with a fully charged power bank
Offline trail maps — download Maps.me or Gaia GPS with Nepal trail overlays before departure
Other Essential Gear
Trekking watch with altimeter and barometer — altitude tracking aids AMS prevention
Lightweight dry bags — 2–3x (protect electronics and documents inside your pack on wet days)
Duct tape — small roll (repairs boots, poles, backpacks, and treats blisters in emergencies)
Lightweight multi-tool or pocket knife — 1x
Padlocks — 2x (for teahouse rooms and main duffel luggage)
Sleeping Bag & Shelter Guide
Most Nepal teahouse treks provide blankets, but always carry your own sleeping bag for hygiene and warmth security. The guide below applies to spring and autumn 2026 trekking:
Sleeping bag liner — 1x (adds 5-8 deg C warmth and maintains bag hygiene; great lightweight option for summer treks)
Inflatable camping pillow — 1x (optional but a genuine comfort upgrade on multi-week routes)
Compression sack — always compress your sleeping bag to maximise pack space
Documents, Permits & Money
Missing permits result in checkpoint turnarounds. Getting this section right is non-negotiable.
Travel Documents
Passport — valid for at least 6 months beyond your return date
Nepal visa — available on arrival at Kathmandu’s Tribhuvan International Airport or via the Nepal e-Visa portal
Travel insurance documents — printed and digital copies; mountain rescue helicopter coverage is essential
2x spare passport-size photos — permit offices frequently request these
Emergency contact card — printed and stored separately from your passport
Nepal Trekking Permits 2026
Permit requirements that updated in 2024-2025 remain in effect for 2026. Your registered trekking agency arranges all permits, but here is a quick reference:
TIMS Card (Trekkers’ Information Management System) — required for most standard trails; issued in Kathmandu or Pokhara
Annapurna Conservation Area Permit (ACAP) — required for Annapurna, Mardi Himal, and Poon Hill treks
Sagarmatha National Park Permit — required for the Everest Base Camp
Manaslu Restricted Area Permit — must be arranged through a TAAN registered agency; cannot be self-arranged
Upper Mustang Restricted Area Permit — NPR 50,000 (~USD 375) for 10 days; updated $50 permit option available from 2026
Our team at Hi Nepal Travels & Treks handles all permit coordination as part of every booked package. Use our Trip Planner to receive a full permit breakdown for your chosen trail.
Money & Budget on the Trail
Currency: Nepalese Rupee (NPR) — approximately 1 USD = 135 NPR in 2026
ATMs: Available in Lukla, Namche Bazaar, Pokhara, and Kathmandu; unreliable on remote routes
Carry minimum USD 500–800 cash for a 2-week trek (permits, tips, meals, emergencies)
Credit cards are rarely accepted beyond Kathmandu and Pokhara city centres
Divide your cash — keep emergency funds in a different location from your main wallet at all times
Health, First Aid & Altitude Sickness Kit
This section is the most underestimated by first-time Himalayan trekkers. Health preparedness is the single greatest factor separating a transformative trek from an emergency evacuation.
Altitude Sickness Prevention Kit
Acute Mountain Sickness (AMS) affects approximately 50% of trekkers at Everest Base Camp altitude. It is caused by ascending too rapidly, not by fitness level. Preparation is the solution:
Diamox (Acetazolamide) 250 mg — discuss with your doctor before departure as preventative and treatment; not suitable for everyone
Pulse oximeter — small finger-clip device measuring blood-oxygen saturation; a reading below 85% at altitude is a medical warning
Ibuprofen or Paracetamol — for altitude-related headaches and fever management
Dexamethasone — emergency AMS escalation medication; carry only on medical advice; your guide manages deployment
Golden Rule: The most important altitude sickness tool is not medication — it is the rule ‘Climb high, sleep low.’ Never increase sleeping altitude by more than 500 m per day above 3,500 m. Every Hi Nepal Treks itinerary is specifically designed around this principle with built-in acclimatisation days.
First Aid Kit Essentials
Blister treatment — Compeed hydrocolloid patches or moleskin (non-negotiable; purchase before leaving home)
Wound care — antiseptic wipes, betadine solution, antibiotic cream such as Neosporin
Bandages — assorted sizes plus elastic bandage for ankle sprain management
Oral Rehydration Salts (ORS) — critical for altitude and diarrhoea recovery; carry 10+ sachets minimum
Water purification — SteriPen UV purifier or iodine tablets; never drink untreated stream water
Loperamide (Imodium) — traveller’s diarrhoea management; essential in teahouse environments
Antihistamines — Cetirizine (non-drowsy) for allergic reactions
Lip balm with SPF — high-altitude lips crack and bleed rapidly without consistent protection
Eye drops — dust and high-UV exposure dry eyes significantly on exposed ridges and passes
Medical tape and scissors
Digital thermometer
For serious mountain emergencies, Hi Nepal Treks provides helicopter rescue flight coordination. Confirm your travel insurance explicitly covers helicopter evacuation from altitude, costs can reach USD 3,000–6,000 without coverage.
Electronics & Communication
Smartphone — downloaded offline maps, emergency contacts, camera; store in a dry bag inside your pack
Power bank — 20,000 mAh minimum (teahouses charge NPR 200–400 per device; power cuts common above Namche Bazaar)
Universal travel adapter — Nepal uses Type C and Type D sockets
Camera or action camera — GoPro is ideal for trail footage; protect from dust with a hard case
Spare memory cards — 2x 128 GB minimum
Noise-cancelling earphones — long teahouse evenings and acclimatisation rest days are far more enjoyable with them
Satellite communicator — Garmin inReach Mini recommended for Manaslu Circuit, Kanchenjunga, and all remote routes
Local SIM card — NTC or Ncell; purchase at Kathmandu or Pokhara airport for affordable data and calls
Charging AlertAbove Namche Bazaar on the Everest trail and above Chomrong on the Annapurna route, reliable electricity becomes scarce. Pre-charge all devices in Kathmandu or Pokhara the evening before you set out, and ensure your power bank is fully charged.
Food, Water & Hygiene
Trail Snacks
Nepal’s teahouses serve three meals per day. However, high-energy snacks are essential for long summit-push mornings when teahouses are hours apart:
Energy bars — Clif Bars or locally available Tibetan bread with peanut butter
Nuts and dried fruit mix — excellent calorie-to-weight ratio for high-altitude snacking
Dark chocolate — rapid energy source and a genuine morale booster above 5,000 m
Instant oatmeal sachets — ideal for very cold early starts on high passes
Electrolyte drink tablets — Nuun or High5; rehydration at altitude is critically important and often overlooked
Water Safety
Never drink untreated water on any Nepal trail. Even clear-looking mountain streams can carry Giardia and other serious waterborne pathogens:
Reusable 1 L water bottle — Nalgene or Hydrapak (BPA-free and trail-durable)
Collapsible water bottle — 0.5 L extra for long ridge days without water sources
SteriPen UV purifier or Sawyer Squeeze filter — primary purification; iodine tablets as backup
Insulated water bottle — prevents water from freezing at altitude during winter and early spring
Hygiene & Toiletries
Biodegradable soap and shampoo (leave-no-trace principle applies throughout all Nepal trekking areas)
Hand sanitiser — 2x 100 ml bottles; use before every meal and after every toilet stop on the trail
Wet wipes / baby wipes — 2 packs minimum (your shower substitute on remote routes without hot water)
Microfibre towel — quick-drying, ultralight, and compact
Toilet paper — carry your own supply; teahouses charge per sheet above Namche Bazaar
Feminine hygiene products — bring a complete supply as these are not reliably available above major trail hubs
Trail-Specific Packing Guides
Everest Base Camp Trek Packing List 2026
The Everest Base Camp Trek (14 days) reaches 5,364 m and is the coldest standard teahouse trek in Nepal. Kit requirements are near-expedition standard.
Sleeping bag rated to -20 deg C comfort (non-negotiable for the Khumbu region)
Expedition-weight down jacket — essential from Namche Bazaar onwards
Diamox prescription — discuss with your GP at least 4 weeks before departure
Trekking poles with snow baskets
Gaiters — for snowy sections above Lobuche and on the Kala Patthar (5,644 m) ascent
Annapurna Base Camp Trek Packing List 2026
The Annapurna Base Camp Trek (10–12 days) peaks at 4,130 m in a spectacular glacial amphitheatre surrounded by 8,000 m giants.
Sleeping bag rated to -10 deg C comfort
Waterproof jacket and trousers — rain on lower forested sections is frequent year-round
Gaiters — for the Machapuchare Base Camp snow section
Merino base layers — 2x minimum
Camp sandals for warm Chhomrong village evenings
Annapurna Circuit Trek Packing List 2026
The iconic Annapurna Circuit Trek (19 days) crosses Thorong La Pass at 5,416 m. Kit requirements parallel EBC-level.
All EBC-level cold-weather kit applies above Manang
Zip-off trousers — essential; sub-tropical valleys one day, high-alpine snow the next
Extra cash for Manang acclimatisation day activities and Muktinath temple visits
Manaslu Circuit Trek Packing List 2026
The Manaslu Circuit Trek (14 days) is Nepal’s most remote teahouse circuit, crossing Larkya La Pass (5,160 m). Satellite communication is essential here.
Garmin inReach satellite communicator — strongly recommended for all trekkers on this route
Full cold-weather kit equivalent to EBC requirements
Extra trail snacks — teahouse food quality and selection drops significantly above Samdo
Ghorepani Poon Hill & Mardi Himal Packing List
For shorter, lower-altitude trails like Ghorepani Poon Hill and Mardi Himal Trek, your kit is significantly lighter and more flexible:
Sleeping bag to -5 to -10 deg C is sufficient
Light down jacket is adequate; no expedition-weight gear required
Day pack only for Poon Hill — porter not required on this popular short route, Rain jacket — afternoon showers are common year-round in the Annapurna foothills
What NOT to Pack for Nepal Trekking?
Overpacking is one of the most common and costly mistakes on Himalayan trails. Every unnecessary kilogram compounds with every step at altitude. Leave these at home:
Cotton clothing of any kind — wet cotton causes rapid heat loss and takes hours to dry; genuinely dangerous at altitude
Hard-shell suitcases or wheeled luggage — impossible to load on porters or pack animals on Himalayan trails
Expensive jewellery or valuables — leave in your hotel safe in Kathmandu or Pokhara
Full-size toiletry bottles — always decant into 100 ml travel-size containers
Hardback books — download Kindle versions; every gram compounds at high altitude
More than two pairs of footwear — trekking boots and camp sandals is the optimum combination
Laptop — a lightweight tablet is sufficient unless you are a digital nomad with specific work requirements
Expert Packing Tips from Our Himalayan Guides
Weigh your pack before departure. Day pack target: 7–10 kg. If over 10 kg, something must be removed.
Organise by section using colour-coded stuff sacks or dry bags — one for clothing, one for medical, one for electronics. You will locate items in seconds on the trail.
Rent what you can in Kathmandu or Pokhara. Sleeping bags (NPR 300–500/day), trekking poles (NPR 200/day), and down jackets are available in Thamel and Lakeside — far cheaper than flying bulky gear internationally.
Test all electronics the evening before departure. Power bank fully charged, headlamp with fresh batteries, camera memory cards cleared and formatted.
Label everything with your full name and emergency contact number in case of loss on the trail.
Keep your passport, permits, and emergency cash in a waterproof neck wallet worn under your base layer at all times. This is the single most important security measure on any Nepal trek.
Ready to turn this packing list into a real adventure? Use our free Nepal Trip Planner or Book your Nepal trek now – we handle permits, certified guides, porters, accommodation, and airport transfers so you focus entirely on the mountains.
Ready to Pack? Let Hi Nepal Treks Handle the Rest
Your Nepal Trek Packing List 2026 is complete. Every item you need for a safe, comfortable, and truly extraordinary Himalayan adventure is right here. Now the only step left is to book the trek itself.
At Hi Nepal Travels & Treks, our certified Pokhara-based guides, with over 20 years of hands-on Himalayan experience, manage every detail: permits, certified TAAN-registered guides, experienced porters, teahouse accommodation, airport transfers, and emergency protocols. Whether this is your first Poon Hill dawn or your long-awaited Everest Base Camp moment, we have a trail and a team ready for you.
Frequently Asked Questions
How heavy should my pack be for a Nepal trek?
Your day pack (carried by you each day on the trail) should target 7–10 kg. Your main duffel (carried by a porter) can be up to 20 kg. Hiring a porter not only protects your knees and energy reserves, it directly supports local Himalayan livelihoods and is one of the most meaningful contributions you can make as a visitor.
Can I buy trekking gear in Nepal?
Absolutely. Kathmandu’s Thamel district and Pokhara’s Lakeside area are two of the world’s most concentrated trekking gear markets. Quality replica and genuine branded gear is available at most shops. Renting sleeping bags and poles here is significantly cheaper than checking bulky equipment on international flights.
Do I need a sleeping bag for teahouse treks?
Yes, always carry your own sleeping bag. Teahouses do provide blankets, but sleeping bags guarantee hygiene, warmth consistency, and comfort, especially above 4,000 m where blanket provision and thickness can be unpredictable.
Is a porter compulsory in Nepal?
No, but strongly recommended for treks above 4,000 m. A porter carries your main duffel (up to 20 kg) for approximately USD 20–25 per day including their accommodation and meals. This keeps you significantly lighter, faster, and substantially reduces the risk of knee and ankle injuries on steep ascents and descents.
What are the best trekking boots for Nepal?
Waterproof, mid-to-high ankle-support boots are the ideal choice. Trail-proven models include the Salomon X Ultra 4, Scarpa Zodiac Plus GTX, and La Sportiva Ultra Raptor II. Most critically, wear your chosen boots for at least 3–4 weeks before arriving in Nepal. Blisters from unbroken-in boots are the number-one cause of early trek turnarounds.
Can I rent trekking gear from Hi Nepal Treks?
Yes. Hi Nepal Travels & Treks can arrange sleeping bag and trekking pole rental for all booked clients. Enquire via our booking page when confirming your trek itinerary.
Is travel insurance mandatory for Nepal trekking?
Travel insurance covering trekking above 5,000 m and helicopter evacuation is absolutely essential, not optional. Without it, a single high-altitude helicopter rescue can cost USD 3,000–6,000 entirely out of pocket. Policies from World Nomads, True Traveller, and IMG Global are widely used and recommended among Himalayan trekkers.
Where can I find adventure activities in Nepal besides trekking?
If you are planning a visit to Pashupatinath Temple, one of the first things to check is the Pashupatinath Temple opening hours. The temple follows separate morning and evening visiting hours, with a break in the middle of the day.
Pashupatinath is located on the banks of the Bagmati River in Kathmandu and is one of the most important Hindu temples in Nepal. But you do not need to spend an entire day here. For most visitors, 2–4 hours is enough to explore the temple complex and nearby areas at a comfortable pace.
Here is what you need to know about Pashupatinath Temple timings, the best time to visit, entry rules, Aarti, and getting there.
Pashupatinath Temple Opening Hours
The current visiting hours listed for Pashupatinath Temple are:
Visiting period
Opening hours
Morning
4:00 AM – 12:00 PM
Evening
5:00 PM – 9:00 PM
The temple closes between 12:00 PM and 5:00 PM for rituals and other temple activities.
So, if you are searching for the Pashupatinath Temple opening time, the morning opening time is 4:00 AM.
If you are looking for the Pashupatinath Temple closing time, the morning session ends at 12:00 PM, while the evening session ends at 9:00 PM.
Because temple activities and visiting arrangements can change, it is worth checking the latest local information before making a special trip around a particular ritual or festival.
What Time Is Best to Visit Pashupatinath Temple?
The best time depends on what you want to experience.
Early morning, around 4:00–6:00 AM, is a good choice if you want a quieter visit and want to see the temple during its morning rituals. The early hours also avoid the stronger daytime heat.
Evening, around 5:00–7:00 PM, works well if you want to experience the atmosphere around the Bagmati River and the evening rituals.
If your main goal is simply to explore the complex, avoid arriving around the middle of the day. Apart from being warmer, this falls within the temple’s midday closure.
For many visitors, early morning or early evening is more practical than visiting around midday.
Pashupatinath Temple Aarti Timings
Aarti is one of the important experiences for visitors interested in the religious side of Pashupatinath.
The temple has morning rituals after opening, while the evening period is associated with rituals and Aarti around the Bagmati River.
The exact timing of individual rituals can vary, particularly during festivals and special occasions. If seeing a particular Aarti is the main reason for your visit, check the day’s local schedule rather than relying only on a general timetable.
The evening Aarti is especially visible from the Bagmati River area, where visitors can observe the ceremony from the permitted viewing areas.
Where Is Pashupatinath Temple?
Pashupatinath Temple is in Kathmandu, Nepal, on the banks of the Bagmati River.
The main complex is located along Pashupati Nath Marg, around 5 km from Thamel. Tribhuvan International Airport is also relatively close, making Pashupatinath an easy place to visit either before a flight or shortly after arriving in Kathmandu.
If you are staying in Thamel, a taxi is generally the simplest option. Depending on traffic, the journey can take around 20–30 minutes.
Who Can Enter Pashupatinath Temple?
There is an important distinction between visiting the Pashupatinath Temple complex and entering the main temple.
Non-Hindu visitors can explore parts of the wider complex and see areas around the temple, including the Bagmati River and surrounding shrines. However, the main temple and inner sanctum are restricted to Hindus.
This is important to know before visiting because you may see photographs of the temple’s interior online that are not accessible to every visitor.
Rather than trying to enter restricted areas, visitors can explore the permitted parts of the complex and observe the temple’s architecture, shrines, ghats and religious activities respectfully.
Pashupatinath Temple Entry Fee and Tickets
The current guide information lists the following entry arrangements:
SAARC visitors: NPR 1,000
Other foreign visitors: NPR 1,500
Hindu pilgrims: Free
Children under 10: Free
Tickets are available at the entrance according to the current information.
Because fees and entry arrangements can change, especially around major festivals, check the latest information before your visit.
What Can You See at Pashupatinath?
Pashupatinath is much larger than the main temple building. The surrounding complex contains numerous shrines, religious spaces and areas connected with Hindu traditions.
Some of the main things to see include:
The Main Pashupatinath Temple
The main temple is built in the traditional pagoda style and is dedicated to Lord Shiva in the form of Pashupatinath, meaning “Lord of All Living Beings.”
Although non-Hindus cannot enter the main temple, its exterior and surrounding area can still be viewed from permitted locations.
Bagmati River and Ghats
The Bagmati River runs alongside the temple complex and is an important part of Pashupatinath’s religious life.
The ghats are also used for Hindu cremation ceremonies. If you see a cremation taking place, give the family and mourners space. This is not a tourist performance, and photography should be avoided in sensitive areas.
Smaller Shrines and Temples
The wider Pashupatinath area contains many smaller shrines and religious structures. You do not need to visit every one of them to understand the importance of the complex.
Walking through the permitted areas is often the best way to experience the scale of the site.
Sadhus
Sadhus can often be seen around Pashupatinath. They are Hindu ascetics associated with religious traditions and pilgrimage.
If you want to photograph someone, ask first rather than assuming that a camera automatically gives you permission.
Dress Code and Visitor Rules
There is no complicated dress code for exploring the permitted parts of the complex, but modest clothing is the safest choice.
Keep your shoulders and knees reasonably covered and avoid wearing clothing that would be inappropriate in a religious site.
A few basic rules will make your visit easier:
Remove your shoes where required.
Keep your voice low around religious areas.
Do not touch religious objects or the temple structure without permission.
Do not photograph restricted areas.
Avoid photographing cremation ceremonies.
Do not litter.
Follow instructions from temple authorities and security staff.
Respect worshippers, priests and families using the ghats.
The simplest approach is to treat Pashupatinath as an active religious site rather than just another historical attraction.
How Long Do You Need at Pashupatinath Temple?
For most visitors, 2–4 hours is enough.
If you only want to see the main areas and the Bagmati River, you can spend less time. If you want to walk through more of the complex, visit nearby shrines and observe the rituals, allow closer to three or four hours.
You can also combine Pashupatinath with other nearby Kathmandu attractions.
Boudhanath Stupa is a practical addition to the same outing, while Guhyeshwari Temple is close to the Pashupatinath complex.
If you are planning a wider Kathmandu visit, you can also see our Kathmandu tour options to build the temple visit into your travel plans.
Best Time of Year to Visit Pashupatinath
Pashupatinath can be visited throughout the year, but the experience changes with the season.
Spring: March to May
Spring generally brings warmer weather and can be a comfortable period for exploring Kathmandu. Expect more visitors as the season progresses.
Monsoon: June to August
The monsoon brings rain to Kathmandu. The rain can make walking around the complex less convenient, but visitors who do not mind wet weather may find the area less crowded.
Autumn: September to November
Autumn is one of the most popular periods to travel around Nepal. The weather is generally favorable, but popular attractions such as Pashupatinath can be busy.
Winter: December to February
Winter mornings in Kathmandu can be cold, especially if you arrive around the 4:00 AM opening. The daytime can be more comfortable for visitors who prefer avoiding the cold early hours.
If you are choosing purely for convenience, autumn and spring are good overall periods, while the best time of day is usually early morning or early evening.
Visiting Pashupatinath During Maha Shivaratri
Maha Shivaratri is one of the biggest occasions at Pashupatinath.
The temple attracts large numbers of Hindu pilgrims and sadhus during the festival, creating an atmosphere very different from an ordinary day.
If you are visiting specifically for Maha Shivaratri, expect:
Very large crowds
Long waiting periods
Increased security and crowd management
Limited convenience compared with an ordinary temple visit
Heavy demand for accommodation and transport
It is worth planning well ahead rather than treating the festival like a normal sightseeing day.
How to Reach Pashupatinath Temple
From Thamel, a taxi is the easiest option for many visitors. The journey generally takes around 20–30 minutes depending on traffic.
From Tribhuvan International Airport, Pashupatinath is only a short drive away, making it a convenient stop around your arrival or departure.
Local buses also operate toward the Pashupati area, although they can be less straightforward for visitors unfamiliar with Kathmandu.
If you are travelling with a group or planning several Kathmandu attractions in one day, arranging private transportation can be more convenient.
Can You Combine Pashupatinath With a Nepal Trek?
Yes. Pashupatinath is in Kathmandu, so it is easy to visit before or after a trek.
Many travellers arrive in Kathmandu, spend time exploring the city’s cultural sites, and then continue toward their trekking destination.
If you are planning a trip to the Everest, Annapurna or Manaslu regions, you can use your Kathmandu stay to visit Pashupatinath without adding a separate long-distance journey.
For travellers who prefer to arrange transportation, accommodation and trekking together, Hi Nepal Travels & Treks can help organize the different parts of a Nepal trip.
FAQs
What time does Pashupatinath Temple open?
Pashupatinath Temple opens at 4:00 AM during the morning visiting period.
What are the Pashupatinath Temple timings?
The listed visiting hours are 4:00 AM to 12:00 PM and 5:00 PM to 9:00 PM.
Is Pashupatinath Temple open all day?
No. The temple has a midday closure between 12:00 PM and 5:00 PM.
What is the best time to visit Pashupatinath Temple?
Early morning and early evening are generally the most useful times to visit. Early morning is particularly suitable if you want to experience the temple during its opening rituals.
Can non-Hindus enter Pashupatinath Temple?
Non-Hindus cannot enter the main temple and inner sanctum, but they can visit permitted parts of the wider complex.
How long does it take to visit Pashupatinath Temple?
Plan around 2–4 hours if you want enough time to explore the main areas without rushing.
Can I take photos at Pashupatinath?
Photography is possible in permitted areas, but restrictions apply around sensitive religious spaces and cremation areas. Always follow signs and local instructions.
What should I wear to Pashupatinath Temple?
Wear modest clothing that covers your shoulders and knees. Comfortable clothing and shoes that are easy to remove are practical for a temple visit.
Plan Your Visit Around the Temple Timings
Pashupatinath is not a place where you need to rush through a long sightseeing checklist. Check the Pashupatinath Temple opening hours first, choose whether you prefer the morning or evening session, and give yourself a couple of hours to explore the complex respectfully.
If you want to see the morning rituals, arrive early. If you are more interested in the atmosphere around the Bagmati River and evening ceremonies, the evening session may suit you better.
And if Pashupatinath is only one part of your Nepal trip, it is easy to fit the temple into a wider Kathmandu visit before heading toward the mountains.