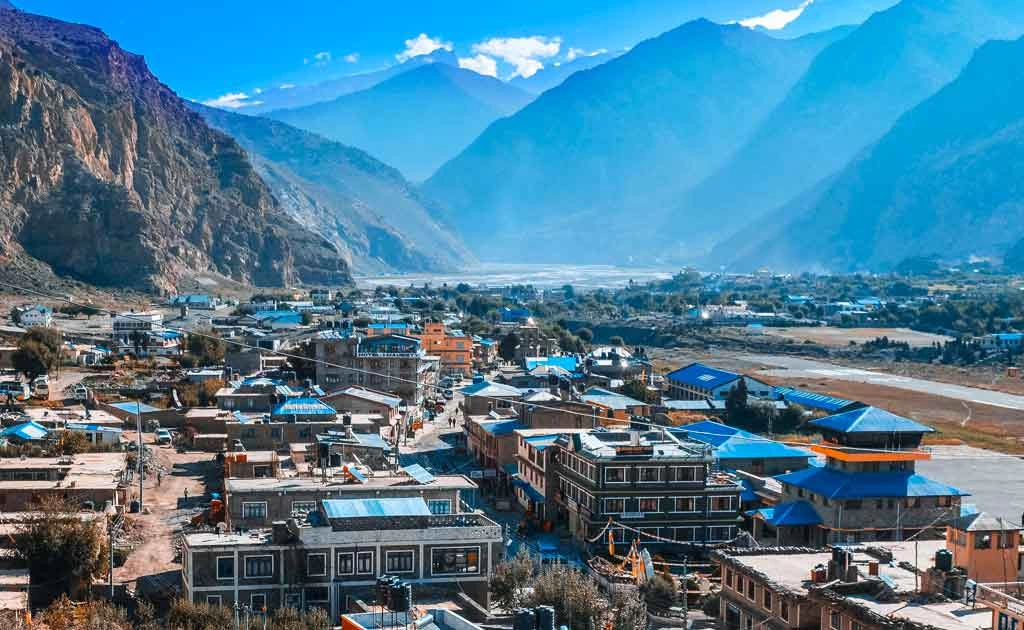
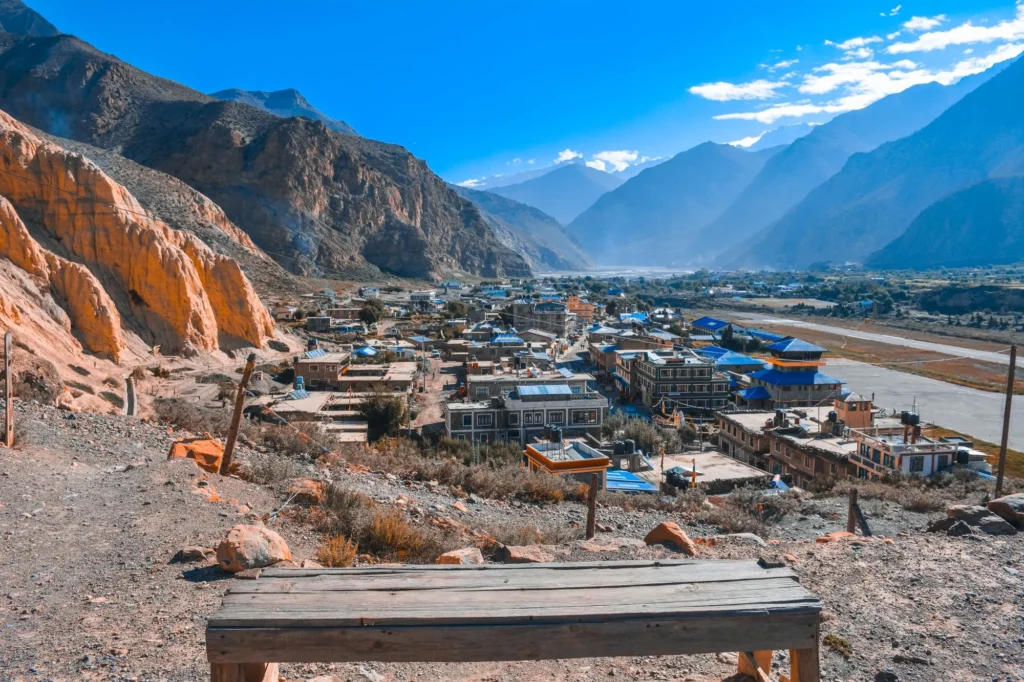
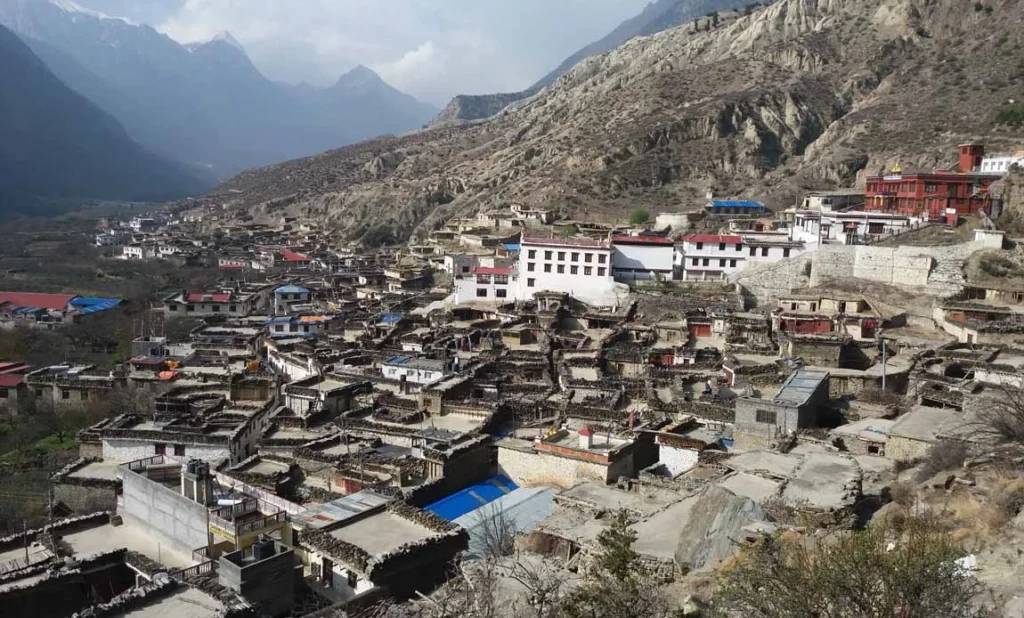
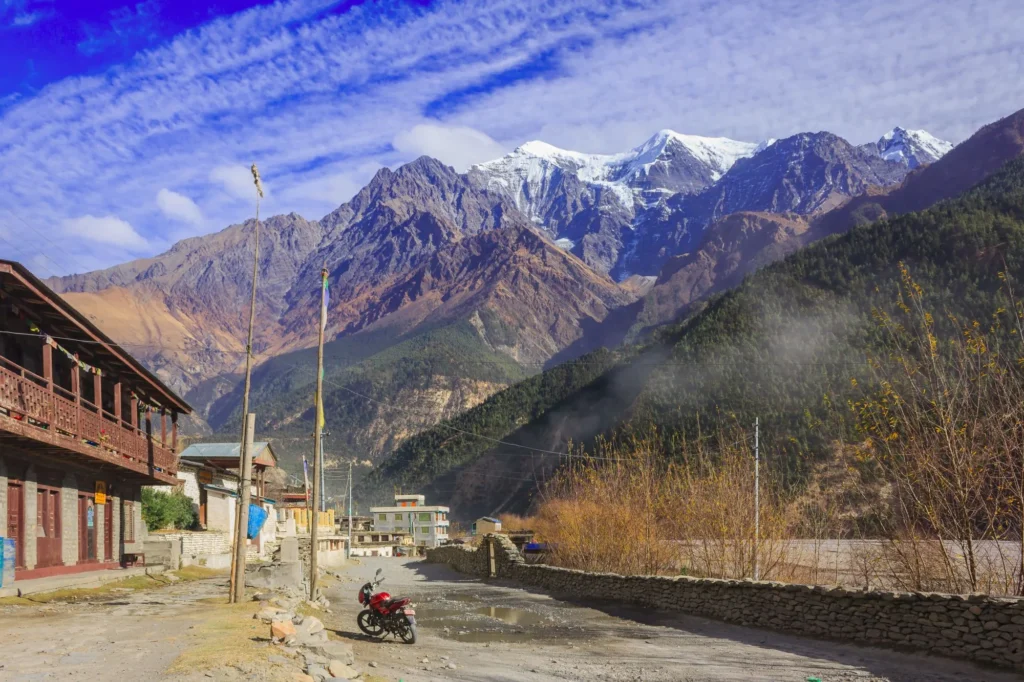
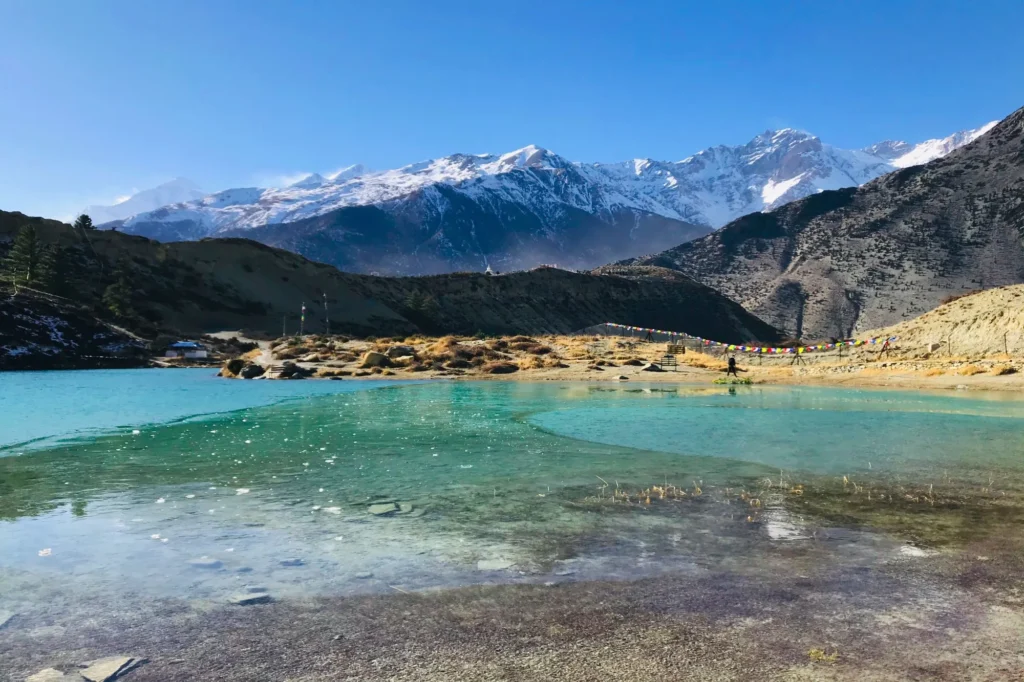
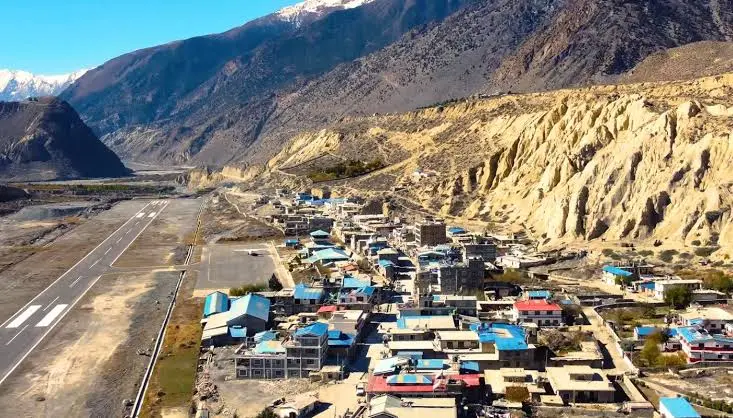
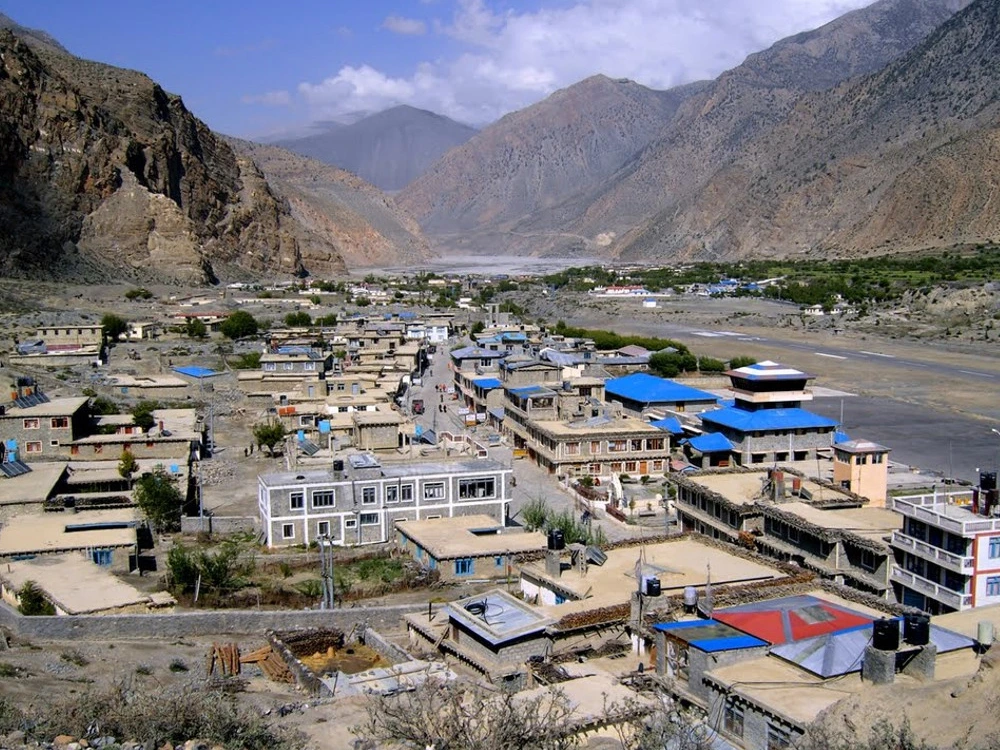
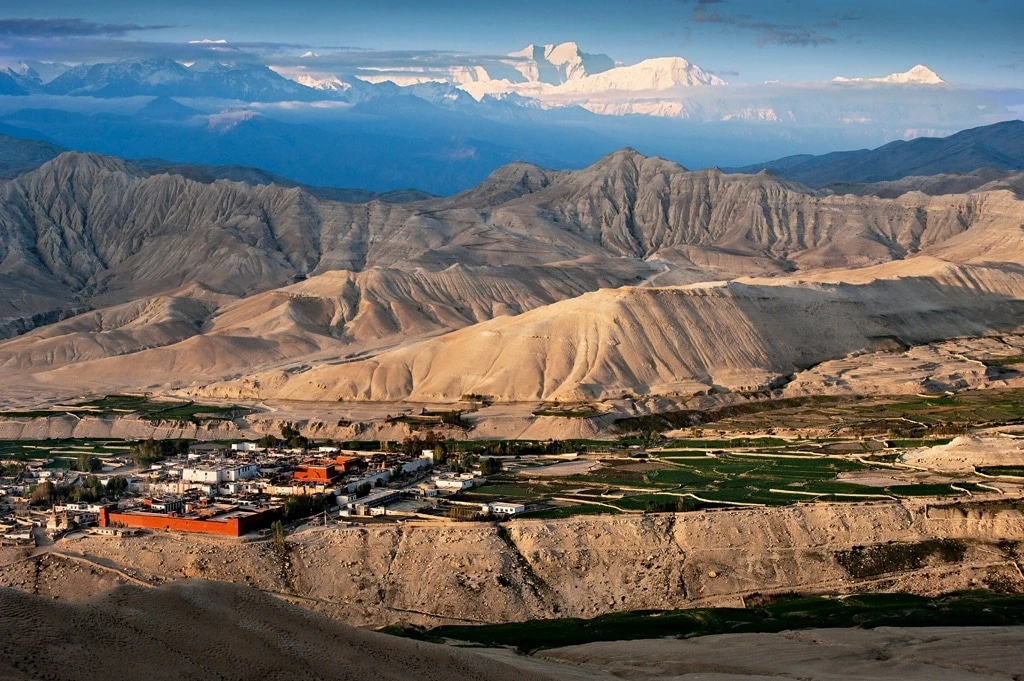
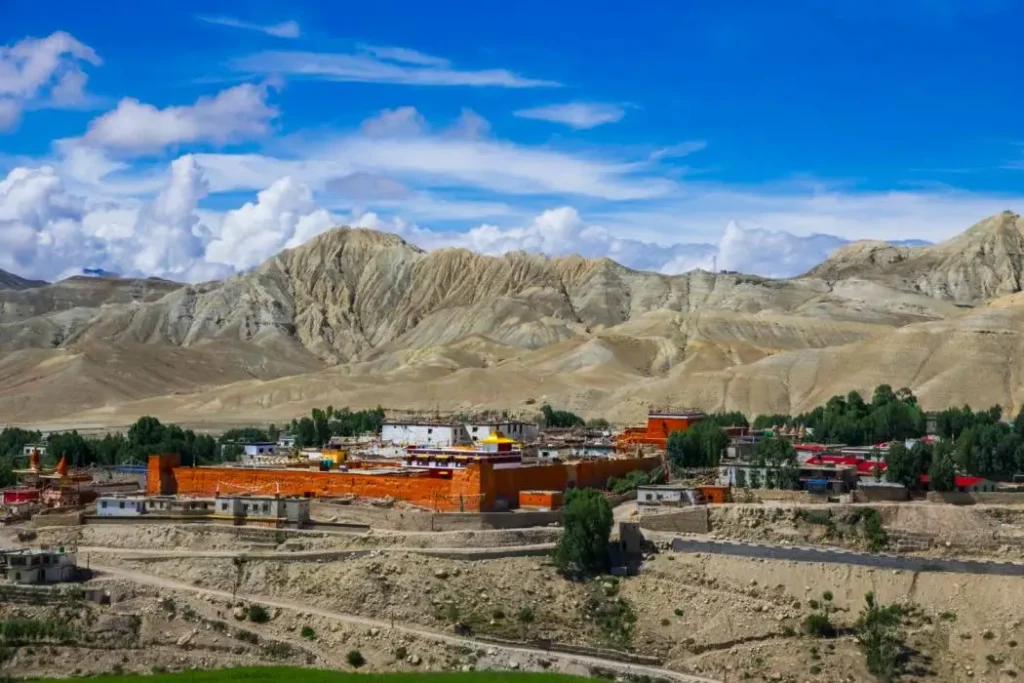
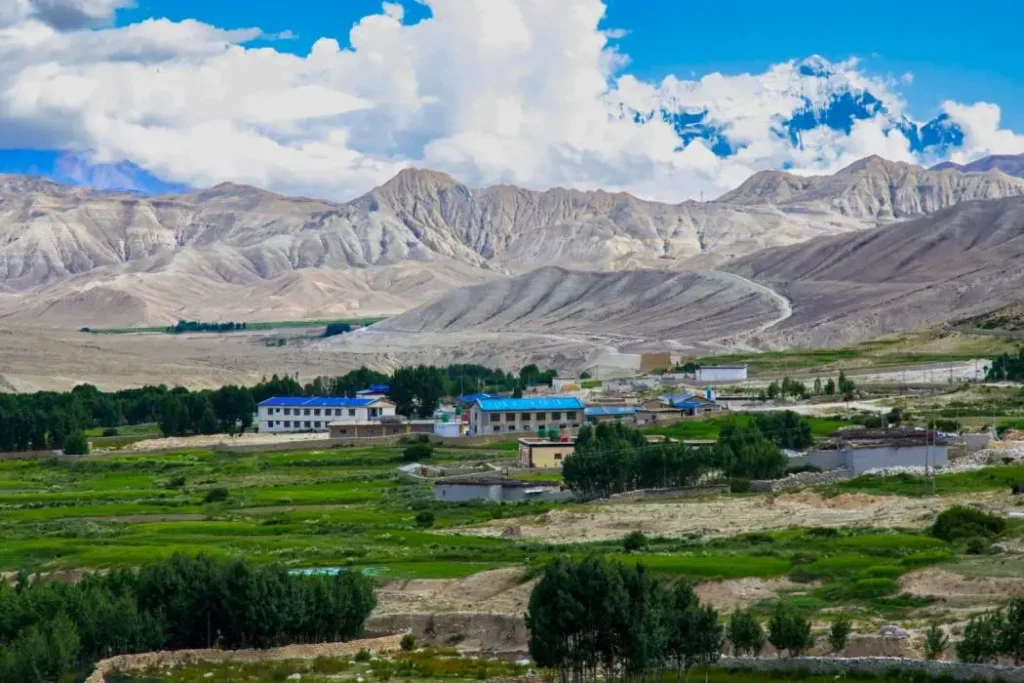
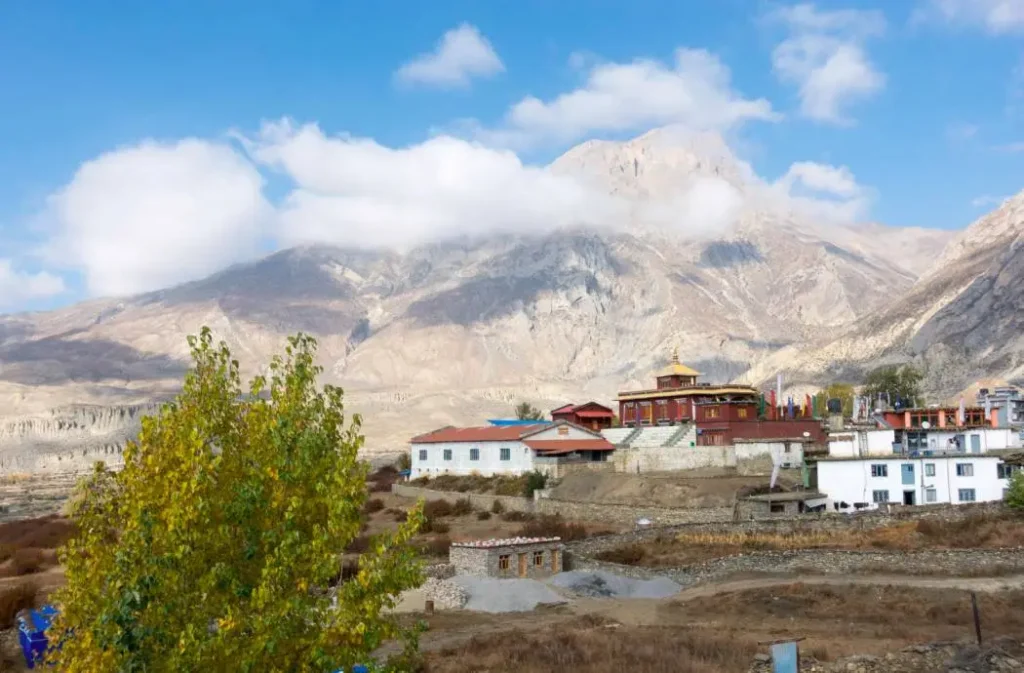
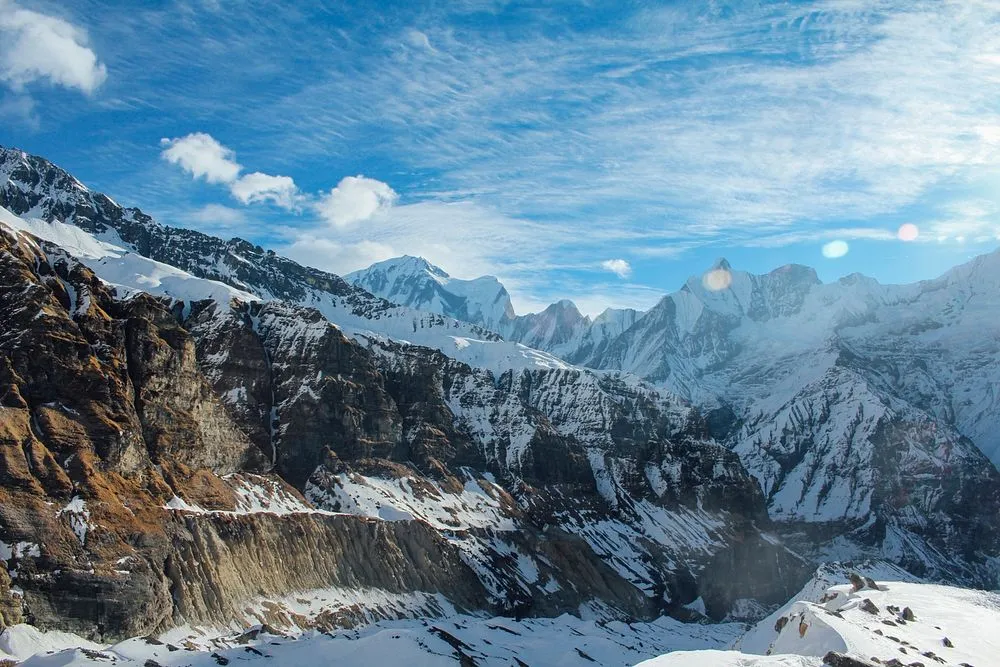
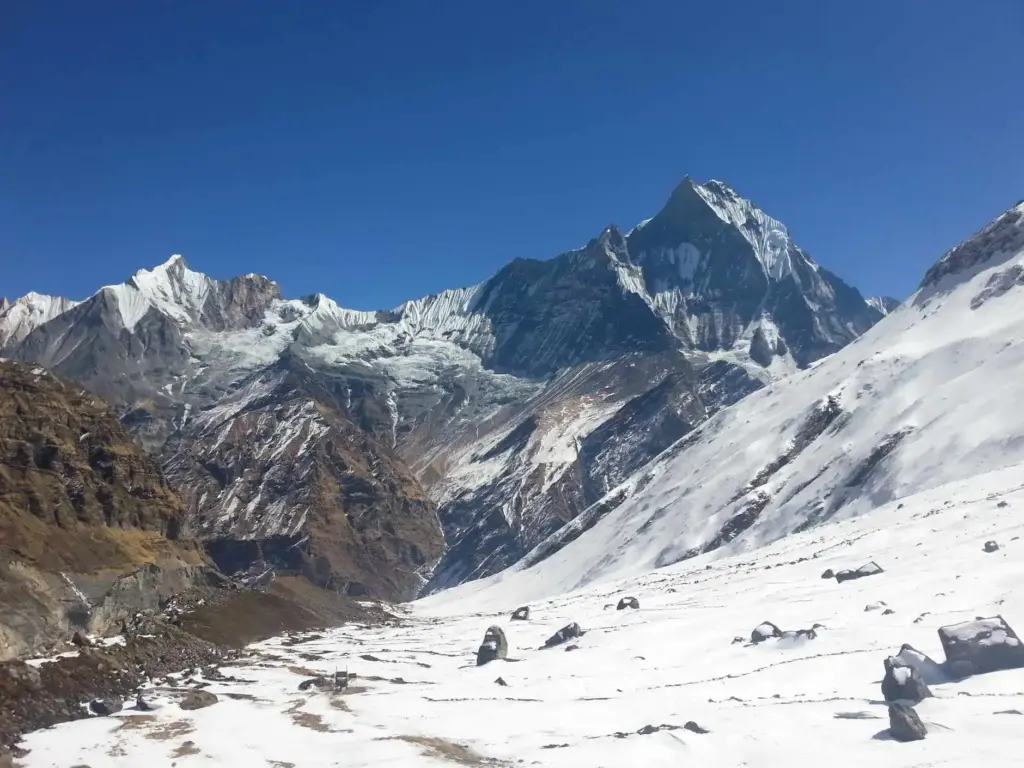
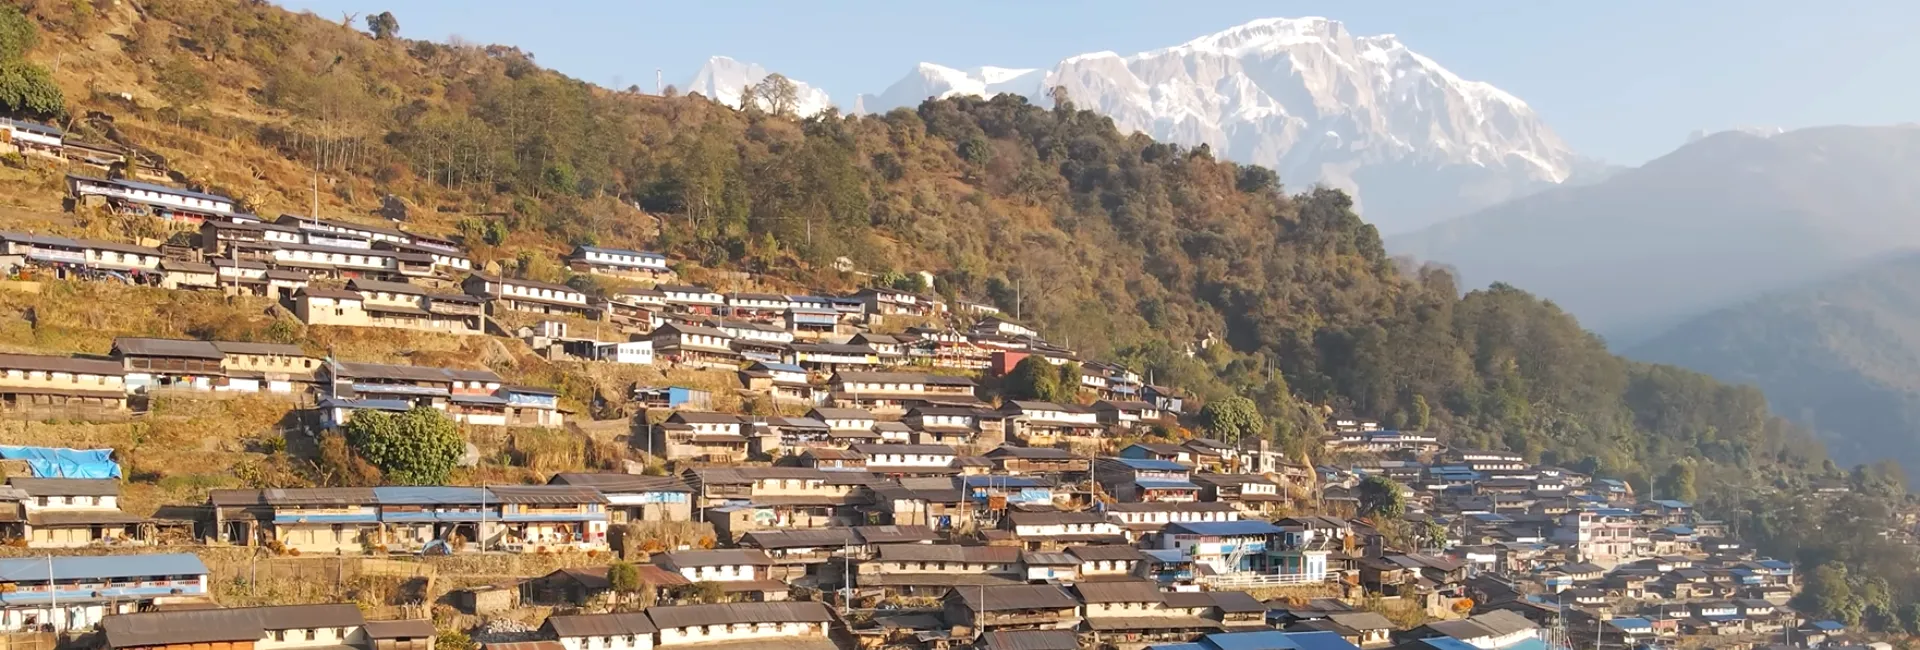
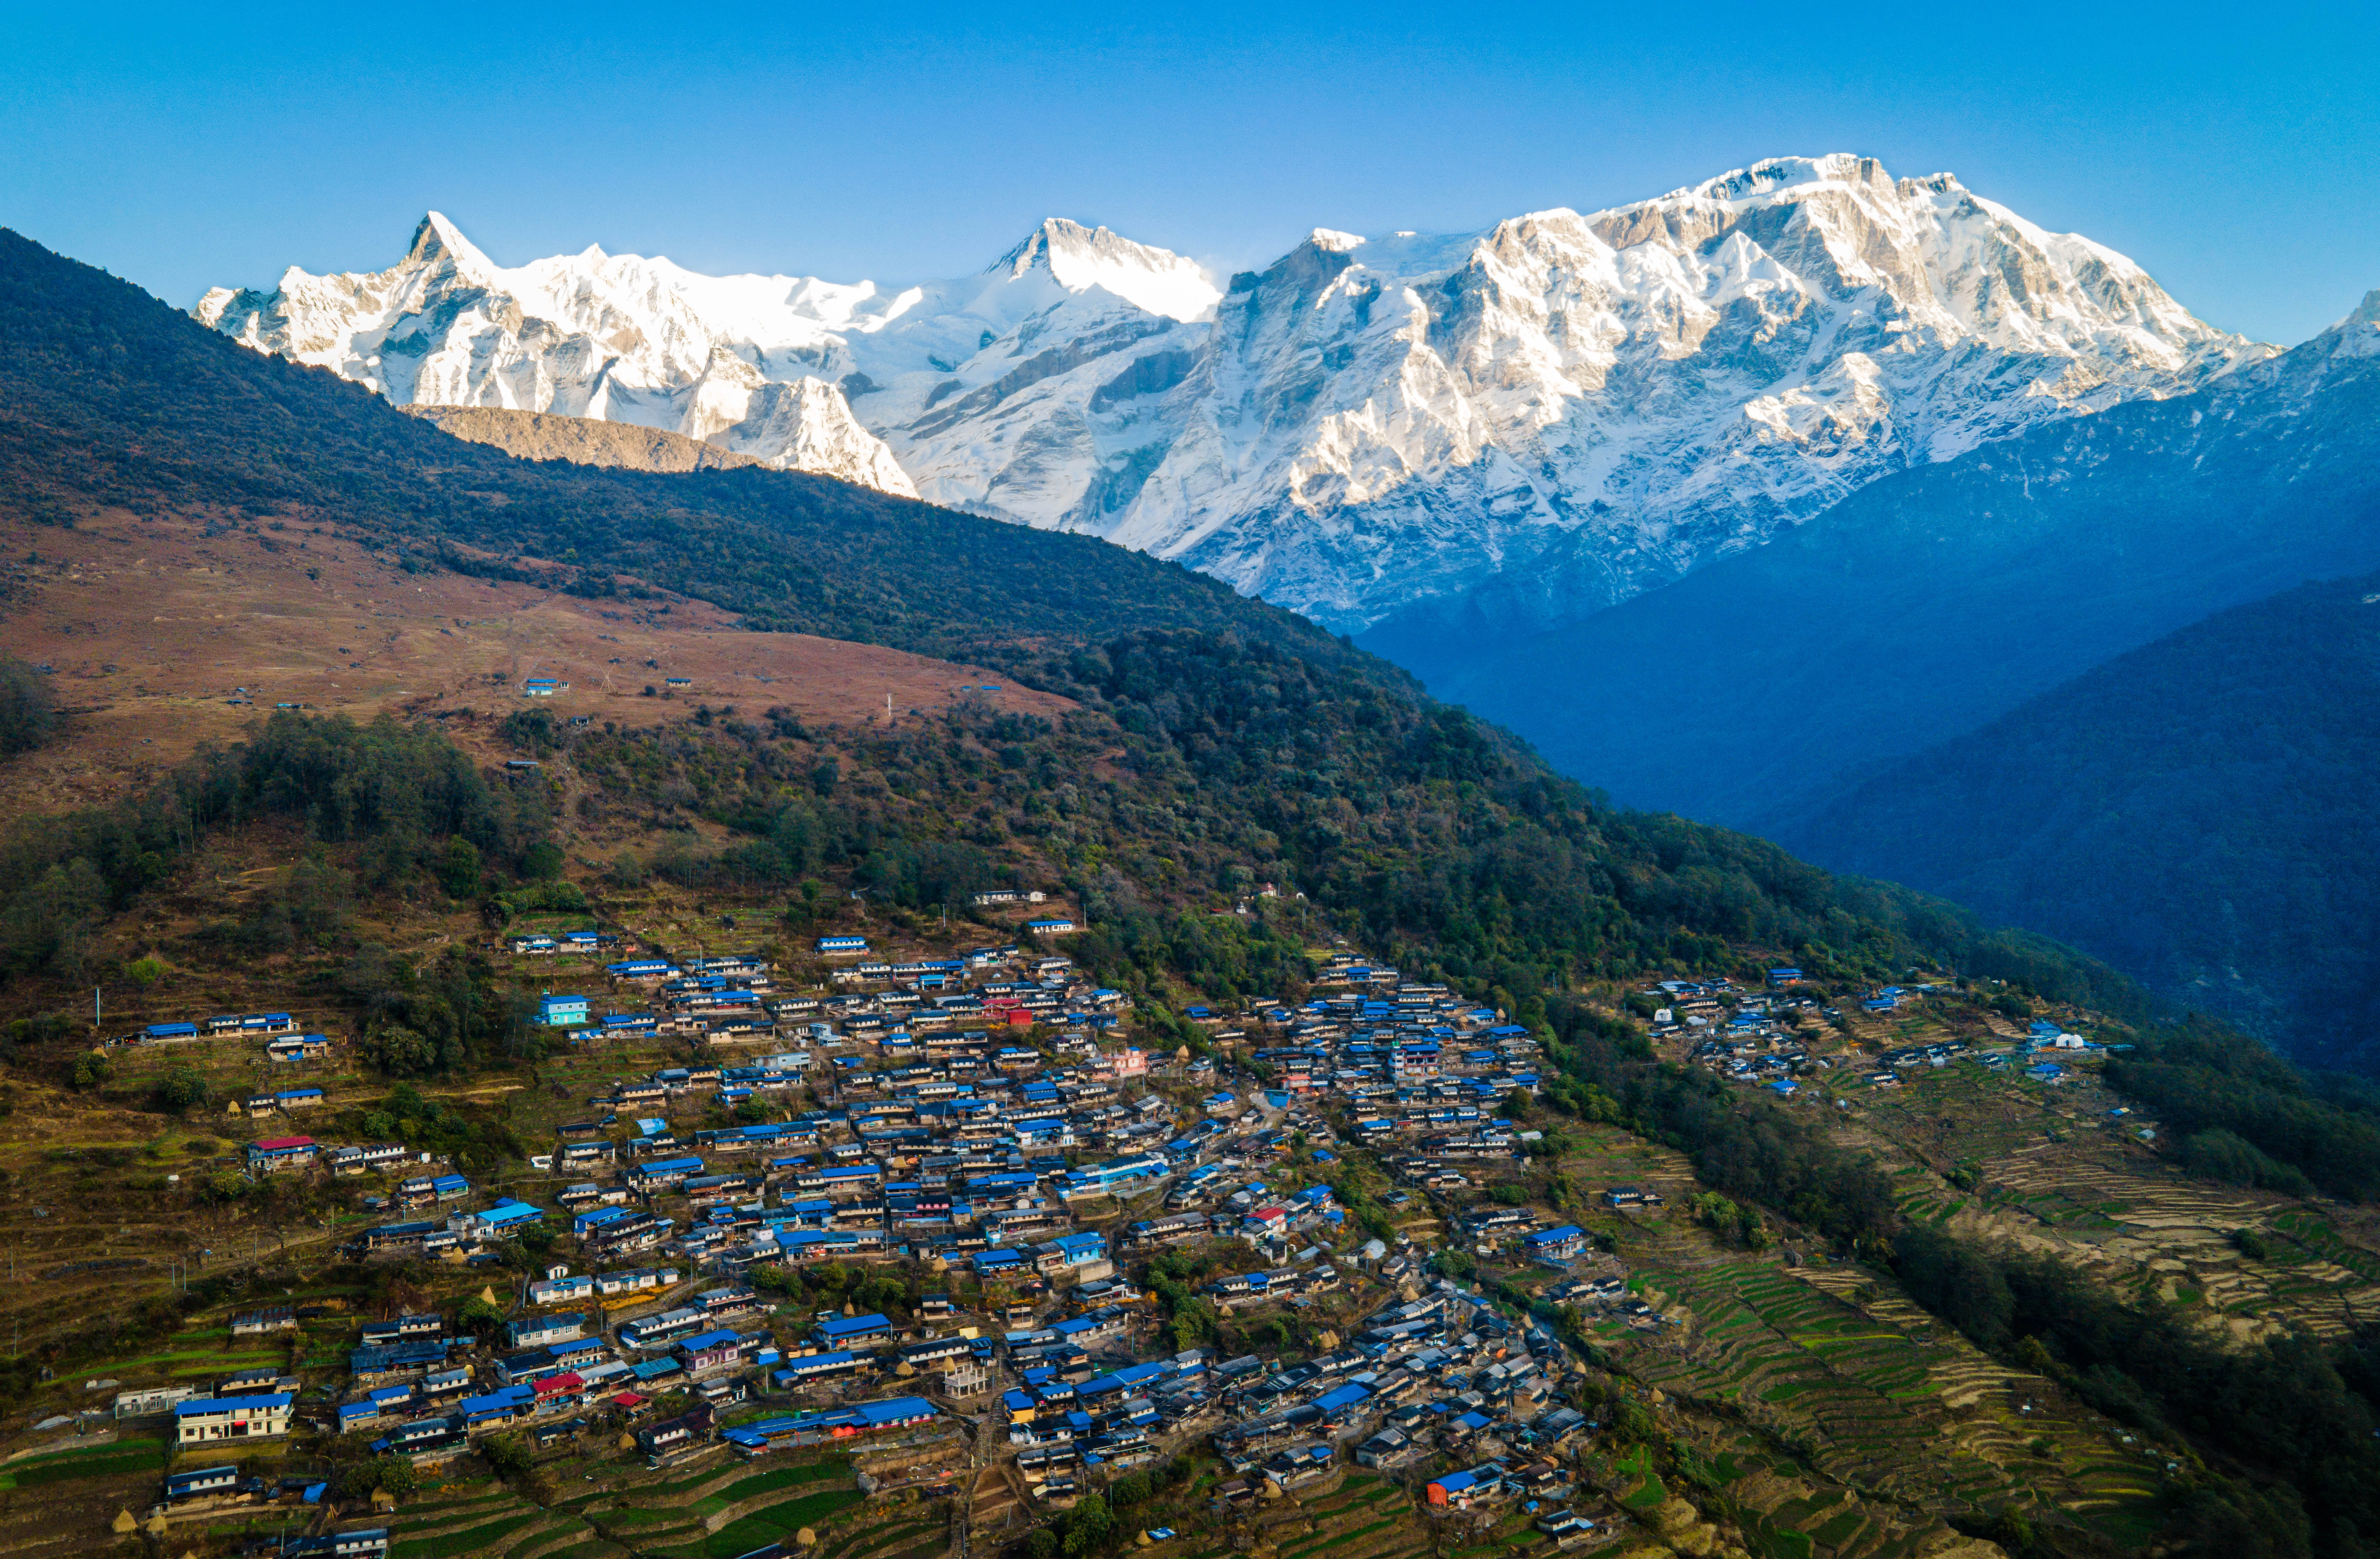
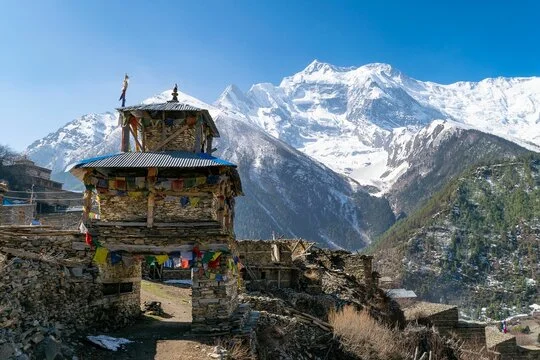
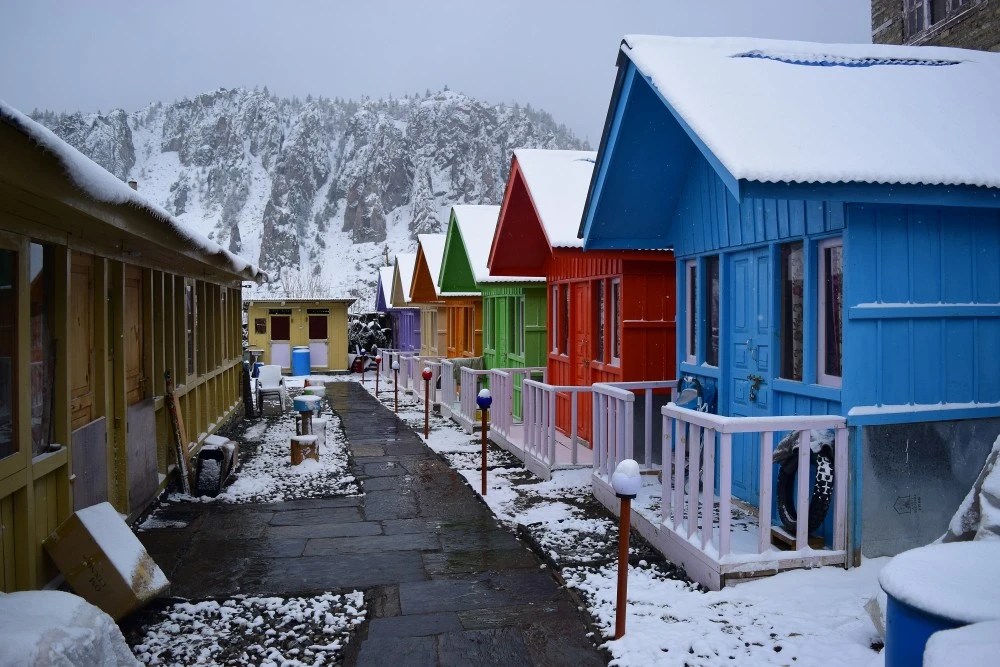
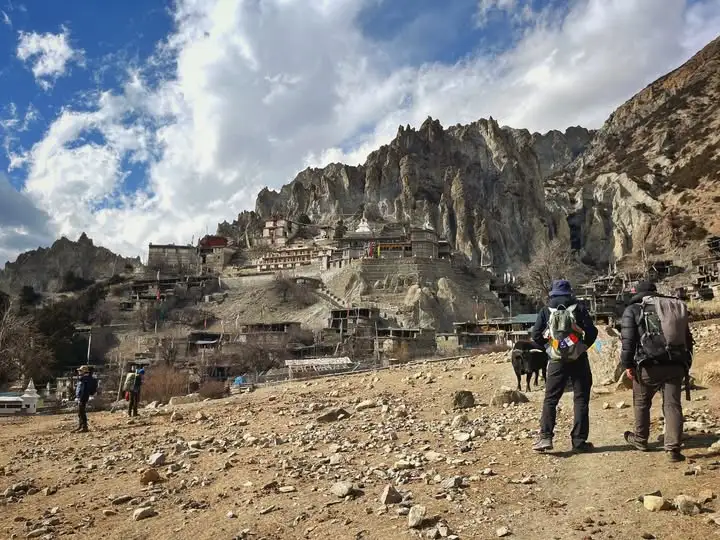
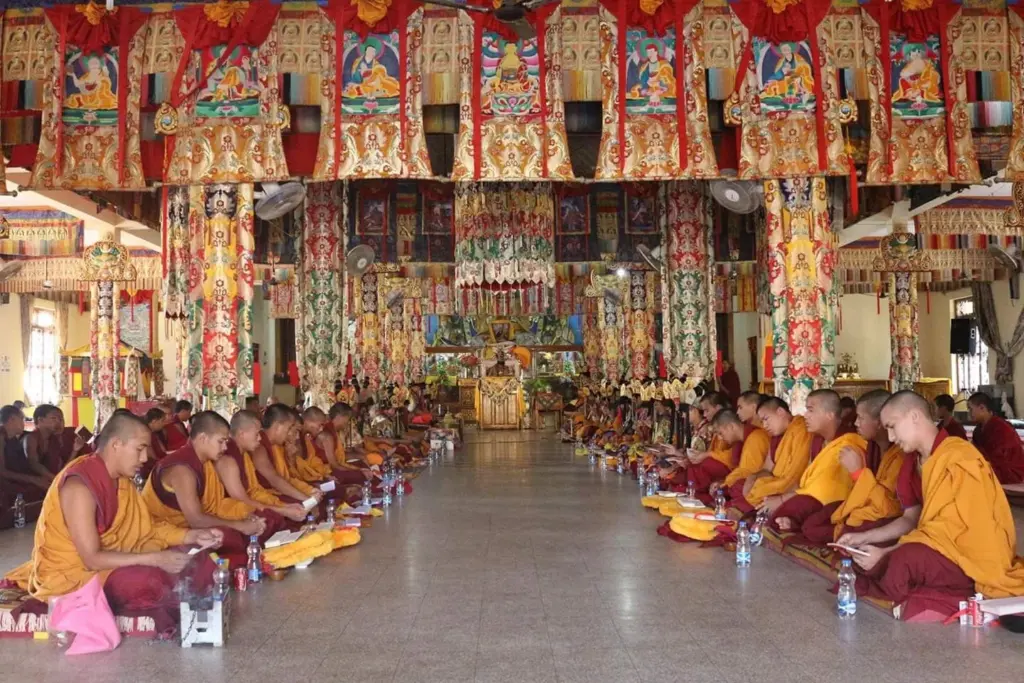
Jomsom is one of those Himalayan towns that can seem like a simple stop on a trekking map, until you understand where it sits.
Located in the Kali Gandaki Valley of Mustang, Jomsom connects several of Nepal’s most distinctive travel experiences. Trekkers completing the Annapurna Circuit pass through the area after crossing Thorong La, while travelers heading toward Upper Mustang use Jomsom as a major transport and logistical base.
The town also provides access to nearby places such as Marpha, Tukuche, Kagbeni and Muktinath, making it much more than an overnight stop.
For travelers planning a Mustang adventure, Jomsom is particularly important because it provides the transition between the greener lower Kali Gandaki Valley and the dry, high-altitude landscapes farther north.
This Jomsom travel guide explains where Jomsom is, how to reach it, its role in the Annapurna Circuit and Upper Mustang, what you can do here, the best time to visit, permits, transportation, accommodation, altitude considerations, and practical tips for planning your journey.
Planning tip: Jomsom works best as a connecting point rather than a destination you rush through. Depending on your itinerary, spending a night here can make the journey to Upper Mustang, Muktinath or the Annapurna region considerably more comfortable.
Himalayan valley, dry mountains and Trans-Himalayan terrain
Protected area
Annapurna Conservation Area
The Nepal Tourism Board identifies Jomsom as an important access point for Mustang and notes that Jomsom has an airport serving travelers heading into the Mustang region.
Where Is Jomsom, Nepal?
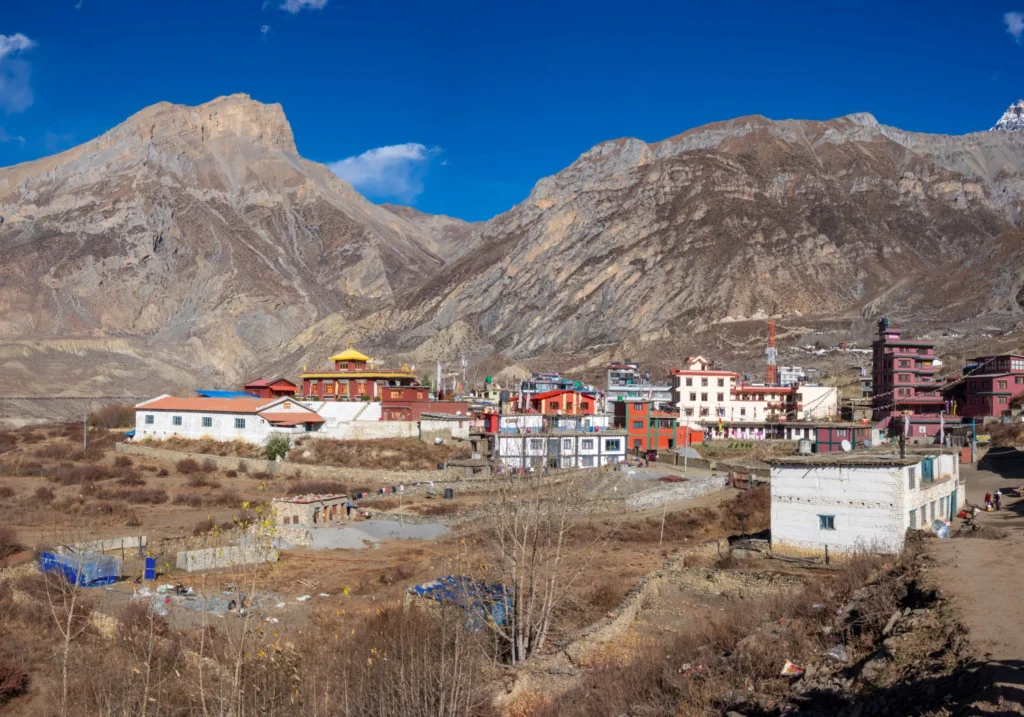
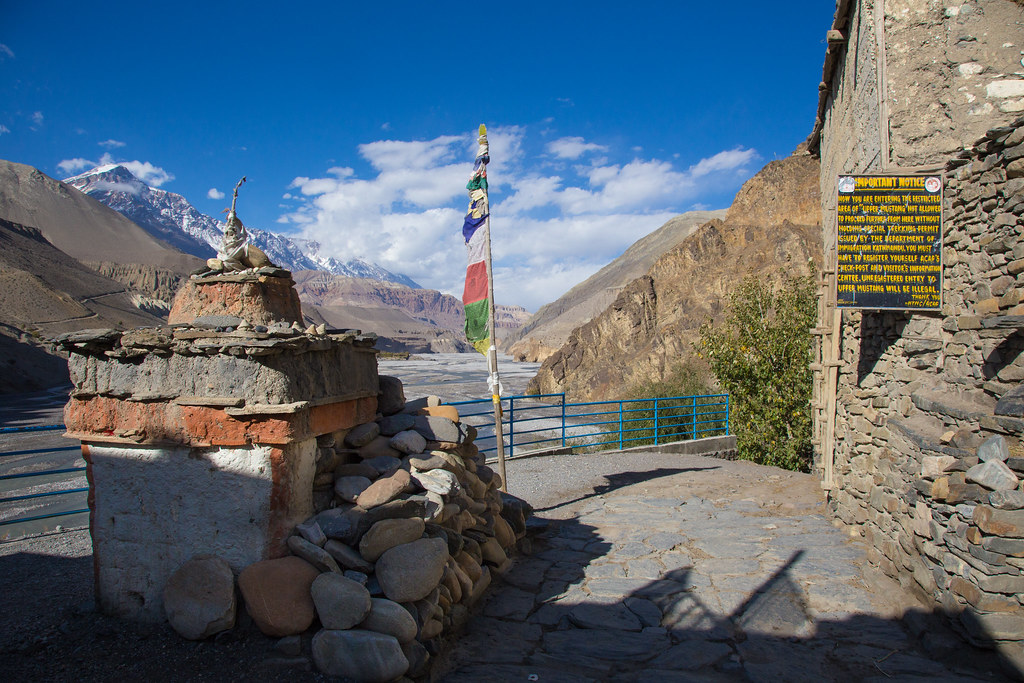
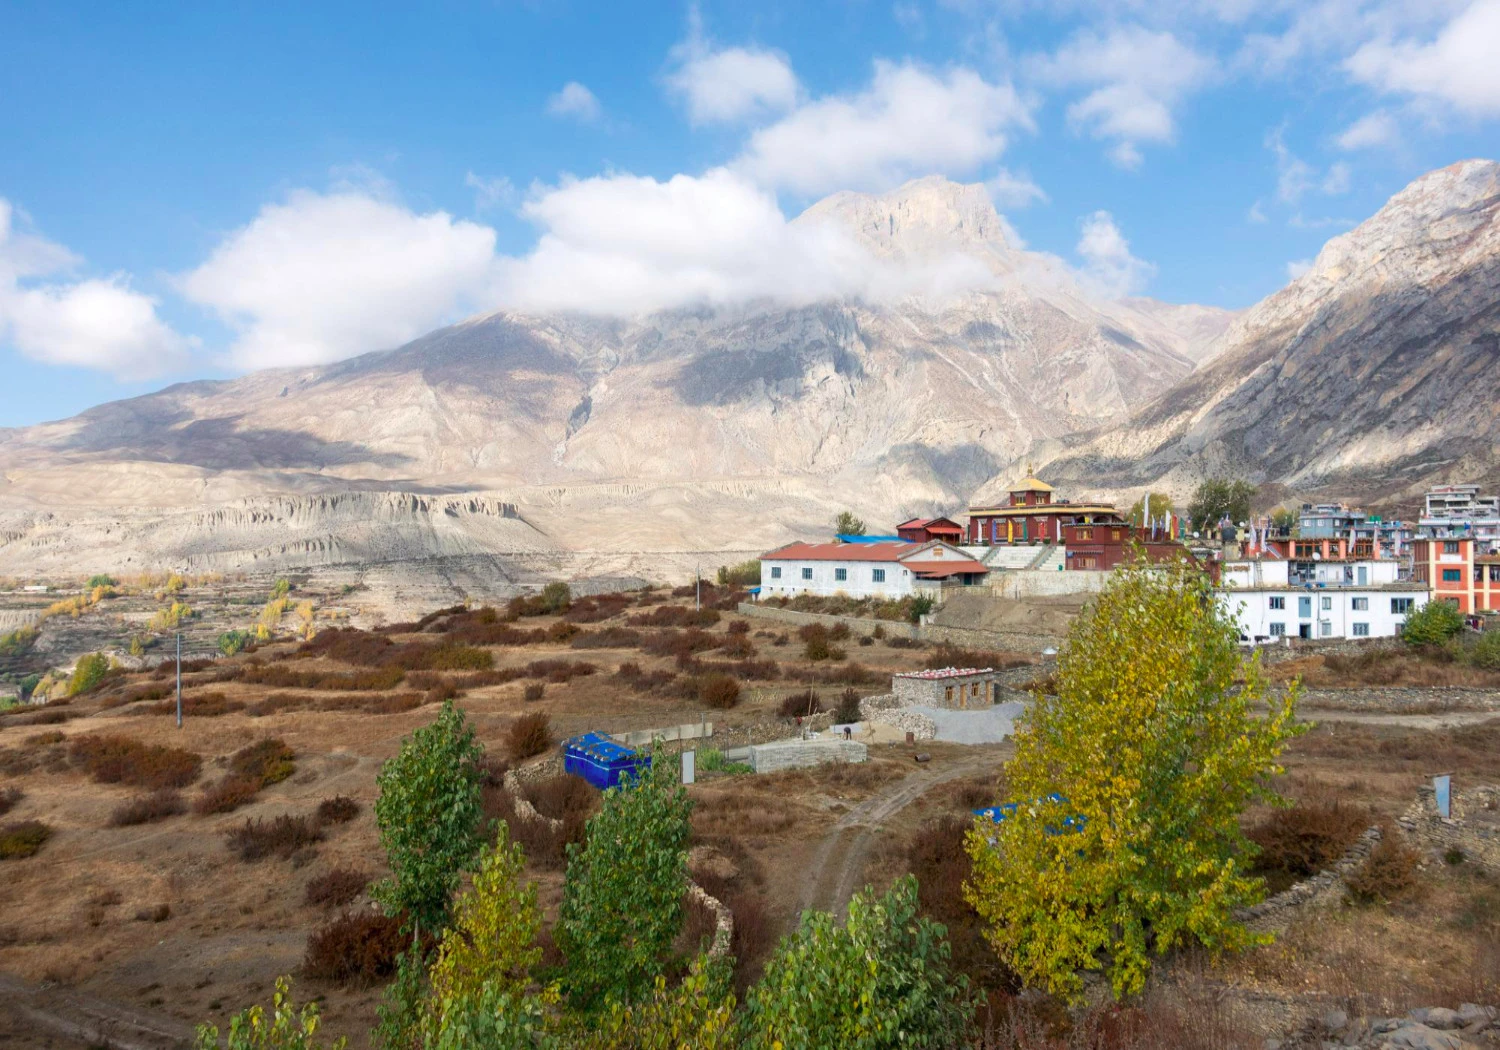
Jomsom is located in Mustang District in north-central Nepal, along the Kali Gandaki River.
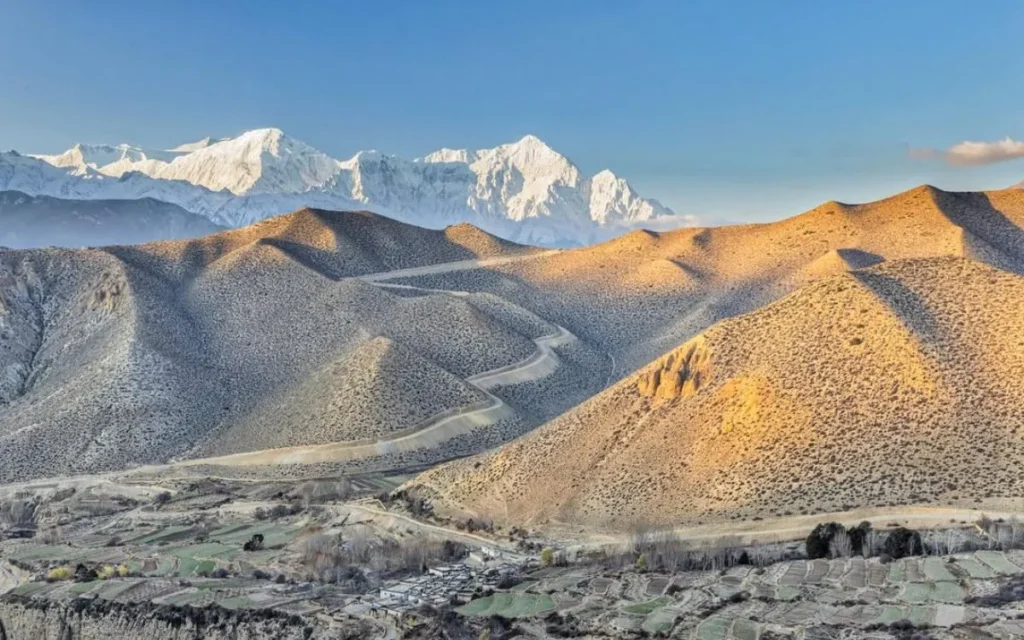
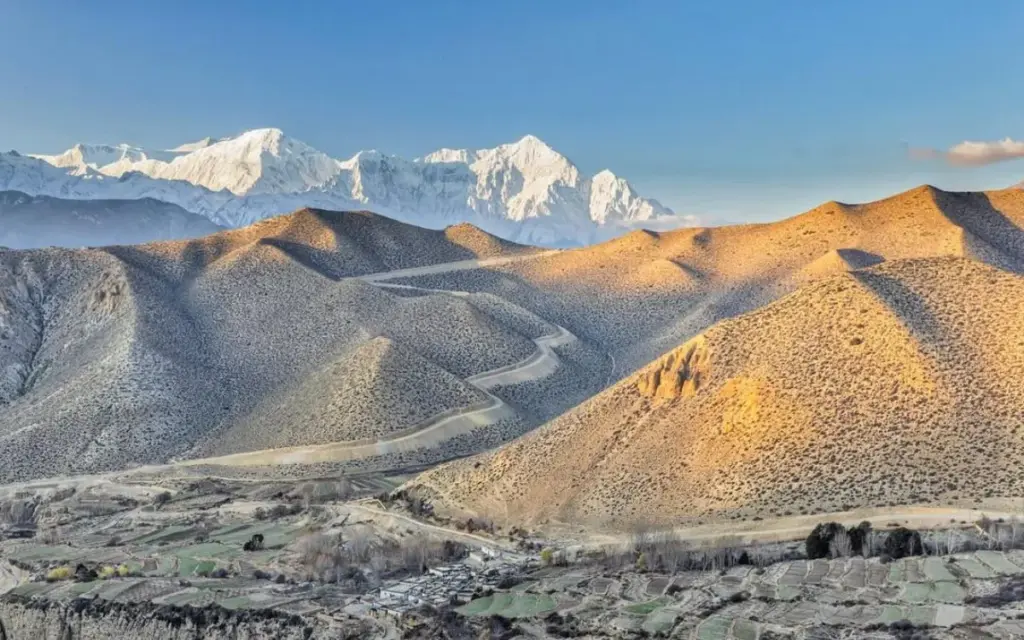
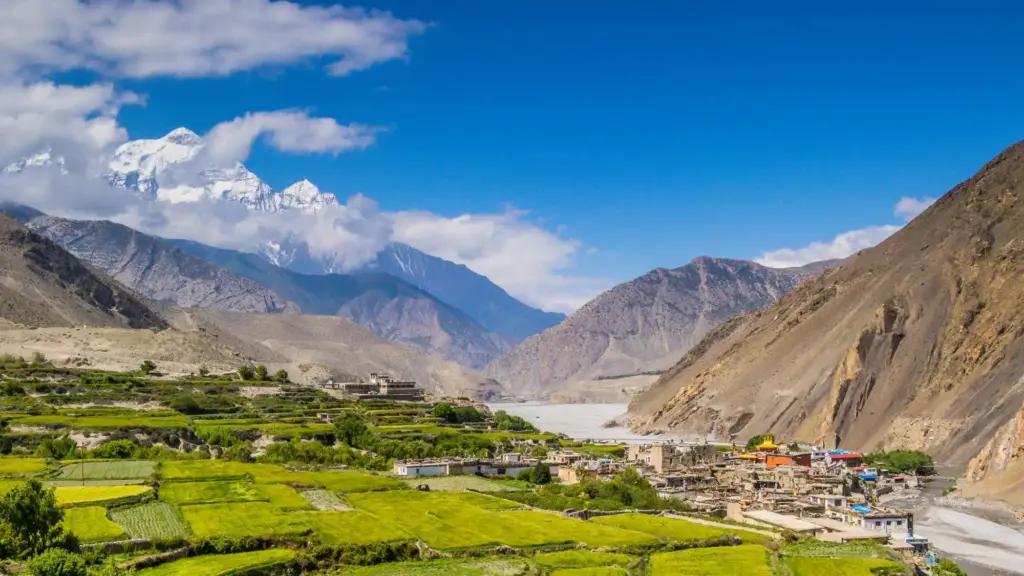
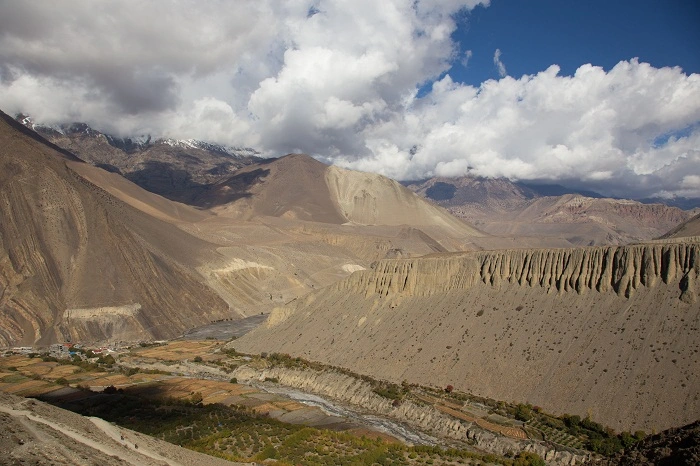
Geographically, it sits in a fascinating transition zone. To the south are the greener valleys and villages associated with the lower Annapurna region. Moving north, the environment becomes increasingly dry and rugged as the Kali Gandaki corridor approaches the rain-shadow landscapes of Mustang.
This location explains why Jomsom is so important for trekking and overland travel.
From Jomsom, travelers can:
Continue toward Kagbeni and Upper Mustang
Travel toward Muktinath
Explore the traditional villages of Marpha and Tukuche
Continue along routes associated with the Annapurna Circuit
Return toward Pokhara by road or flight
The town therefore functions as a practical crossroads between several major Himalayan routes.
Why Is Jomsom Important for the Annapurna Circuit?
Jomsom has long been associated with the western section of the Annapurna Circuit.
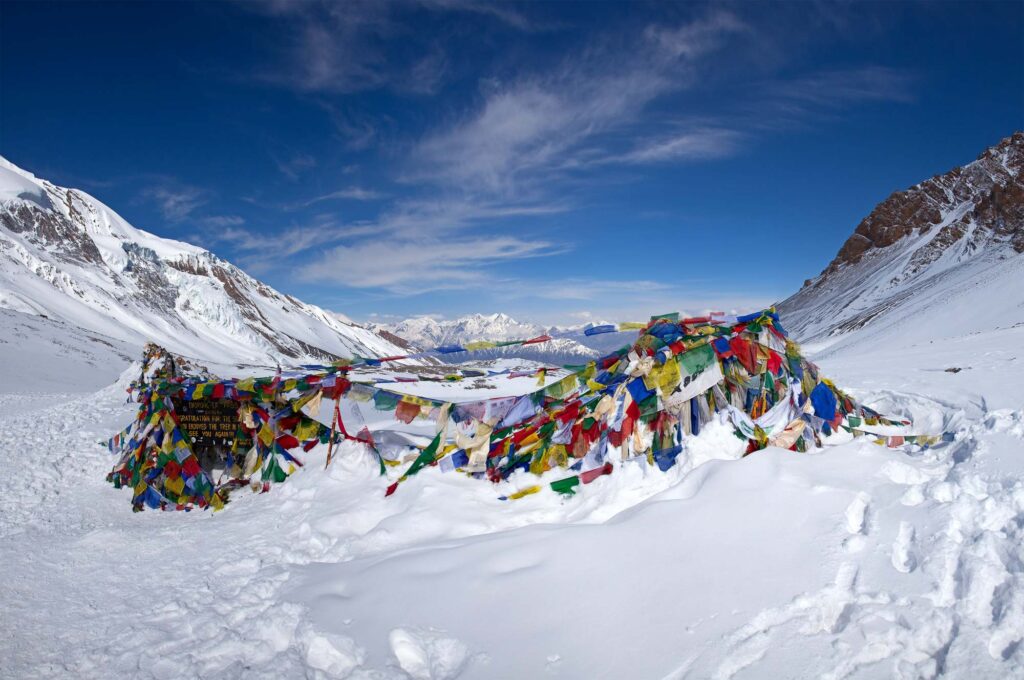
The classic Annapurna Circuit crosses the Thorong La Passbefore descending toward Muktinath and eventually reaching the Kali Gandaki Valley. From this side of the route, Jomsom becomes one of the principal settlements and transport points.
Muktinath is part of the Annapurna Circuit route, which passes through Manang and Thorong La before reaching Muktinath and Jomsom.
For trekkers, Jomsom can therefore represent the end of a demanding high-mountain section, or the beginning of a journey farther north.
Jomsom on the Annapurna Circuit
A typical route through this part of the region may include:
Exact itineraries vary because modern road access has changed how travelers approach and leave the region.
For trekkers who want to experience more of the traditional trail, sections of the route can still be walked rather than simply driven.
Jomsom and Upper Mustang: What Is the Connection?
Jomsom is often described as a gateway to Upper Mustang because it is one of the main access points for journeys heading north through the Kali Gandaki Valley.
However, there is an important distinction:
Jomsom is the regional transport and service hub; Kagbeni is the key gateway/checkpoint before entering the Upper Mustang restricted area.
That distinction matters when planning permits and itineraries. Travelers generally continue from Jomsom toward Kagbeni before entering the restricted Upper Mustang area.
So, if your trip combines the Annapurna Circuit with Upper Mustang, Jomsom is where the two travel experiences effectively converge.
How to Get to Jomsom
There are two principal ways to reach Jomsom:
By air
By road
Your best option depends on your budget, schedule, weather tolerance and whether you want to experience the journey itself.
1. Pokhara to Jomsom by Flight
Flying from Pokhara to Jomsom is the quickest conventional way to reach the town.
The flight follows the Kali Gandaki Valley and provides spectacular mountain scenery when weather conditions allow.
However, travelers should understand that mountain flights are weather-dependent.
Morning conditions are generally more favorable, while strong valley winds can affect operations later in the day. Therefore, it is wise to avoid building an important international-flight connection around a same-day Jomsom flight.
Practical advice: If your itinerary includes a Jomsom flight, leave some flexibility for weather-related delays.
2. Pokhara to Jomsom by Road
Jomsom is also accessible by road from Pokhara through the Kali Gandaki corridor.
The overland journey passes through changing landscapes and settlements, including areas around:
Road conditions can vary depending on weather, construction and seasonal conditions.
The road option takes considerably longer than flying, but it can be a better choice for travelers who:
Want more flexibility
Are traveling with a private group
Want to stop at villages along the route
Prefer overland travel
Are carrying more luggage
Want to combine several Mustang attractions in one journey
Best Things to Do in Jomsom
Jomsom itself is relatively compact, but its surroundings offer plenty of reasons to slow down.
1. Walk Along the Kali Gandaki
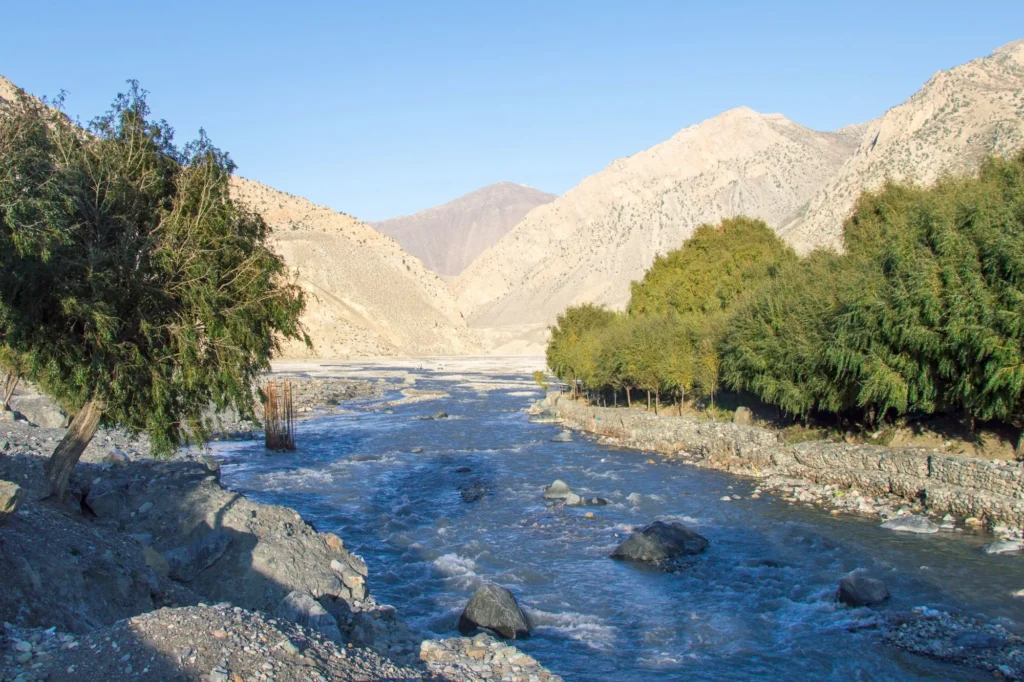
The Kali Gandaki is one of the defining features of the region.
A walk around the river valley provides an immediate sense of the landscape: wide riverbeds, dry slopes, dramatic mountains and the distinctive wind that moves through the valley.
Early morning is usually a more comfortable time for walking.
2. Explore Jomsom’s Local Culture
Jomsom is not simply a transportation point. Spend some time observing everyday life, visiting local shops and interacting respectfully with residents.
The wider Mustang region reflects a mixture of Himalayan and Tibetan-influenced cultural traditions, visible in architecture, religious practices, monasteries, food and village life.
Responsible travel matters here. Avoid treating villages as photo sets; ask permission before photographing people or religious ceremonies.
3. Visit Marpha
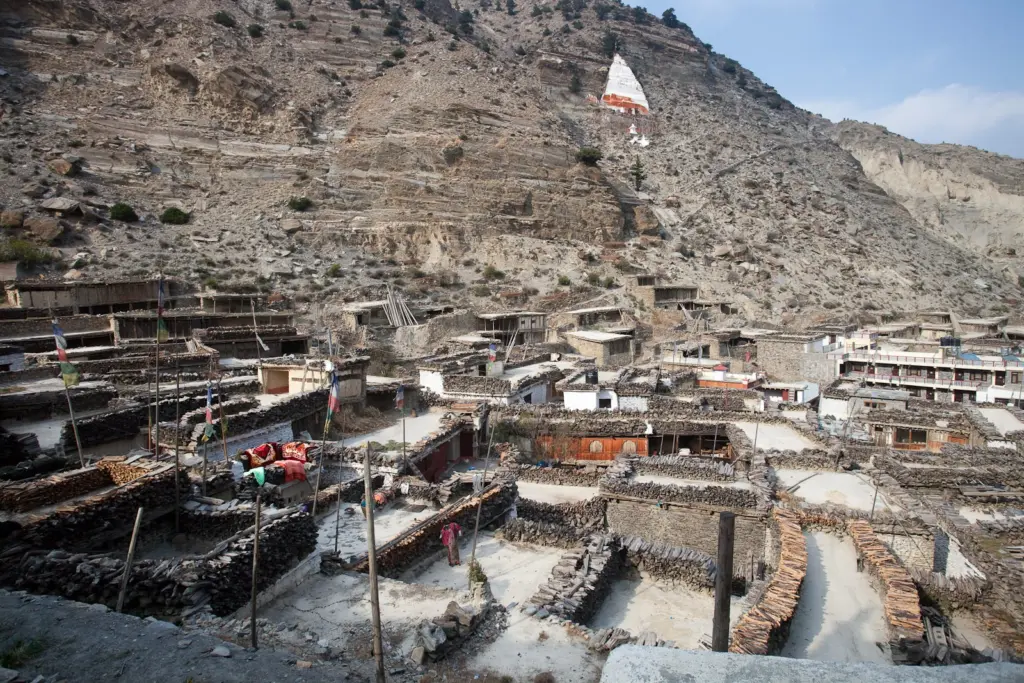
Marpha is one of the most popular stops near Jomsom. The village is known for its traditional stone-and-whitewashed architecture, apple orchards and mountain atmosphere.
It makes an excellent stop before or after Jomsom, particularly for travelers traveling overland. If your schedule allows, consider spending time rather than simply stopping for a quick photograph.
4. Explore Tukuche
Tukuche lies farther south along the Kali Gandaki Valley. The village has historically been associated with trade through the valley and offers another opportunity to experience the architecture and culture of the region.
For travelers interested in the history of Himalayan trade routes, the Jomsom–Marpha–Tukuche corridor is particularly interesting.
5. Continue Toward Muktinath
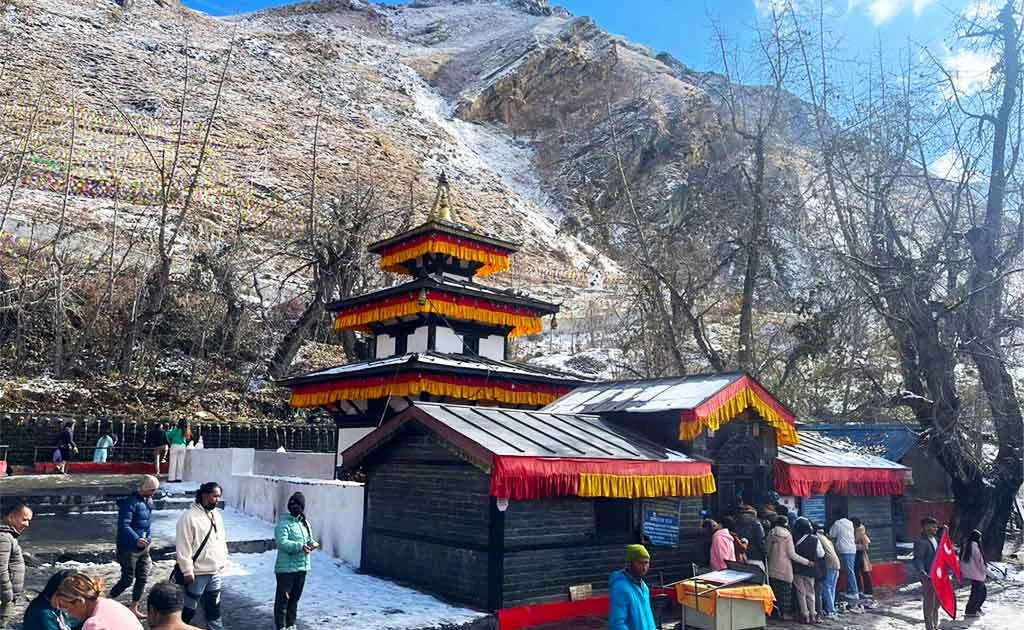
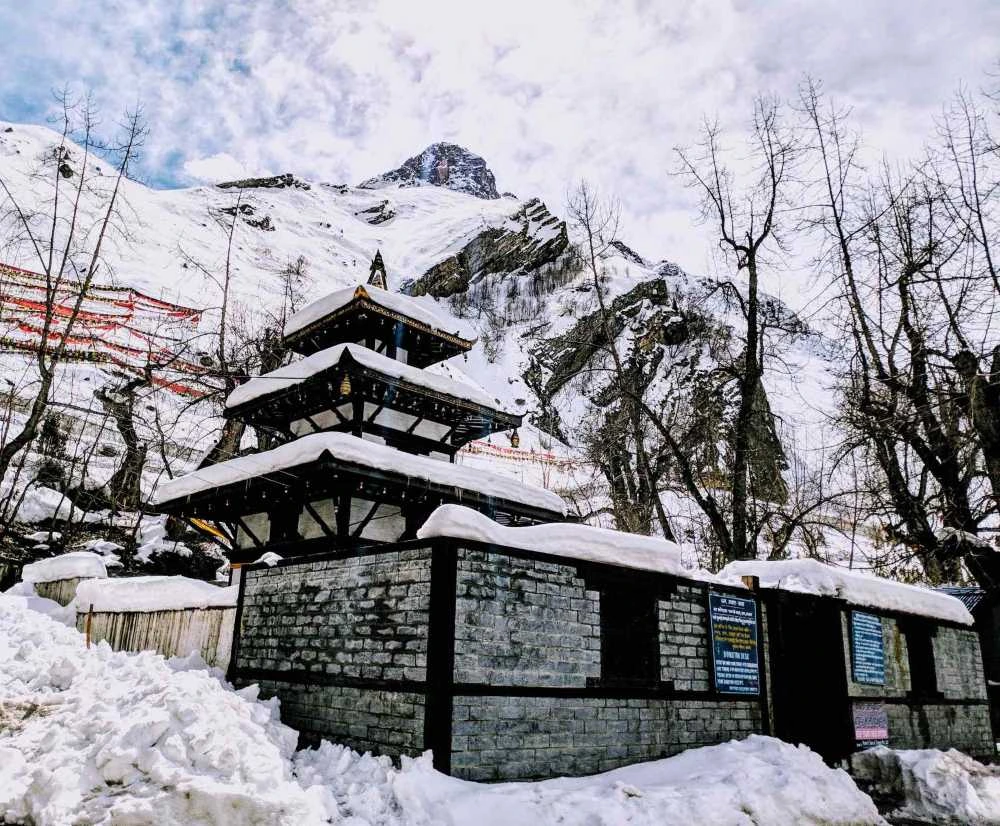
Muktinath is one of Nepal’s most significant pilgrimage destinations and is sacred to both Hindus and Buddhists.
The Nepal Tourism Board places Muktinath at roughly 3,800 metres and describes its religious significance, including the temple, 108 water spouts and the Jwala Mai shrine.
For trekkers, Muktinath is also closely connected with the Annapurna Circuit. From Jomsom, travelers can continue toward Muktinath by road or on foot depending on the itinerary.
Jomsom to Upper Mustang: What the Journey Looks Like
If your goal is Upper Mustang, Jomsom is usually not the final destination.
The exact itinerary varies depending on whether you are trekking, driving by jeep, or combining walking and transportation.
The landscape changes progressively as you move north.
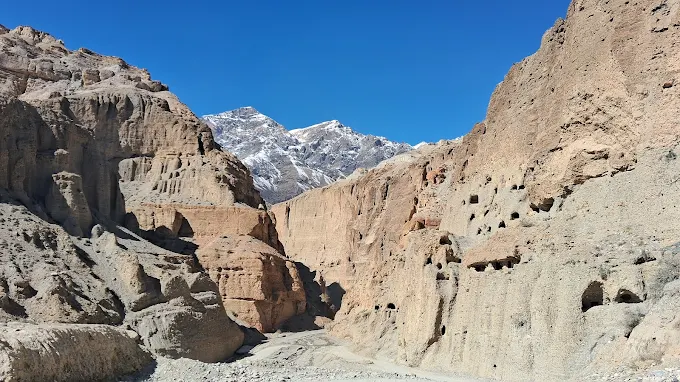
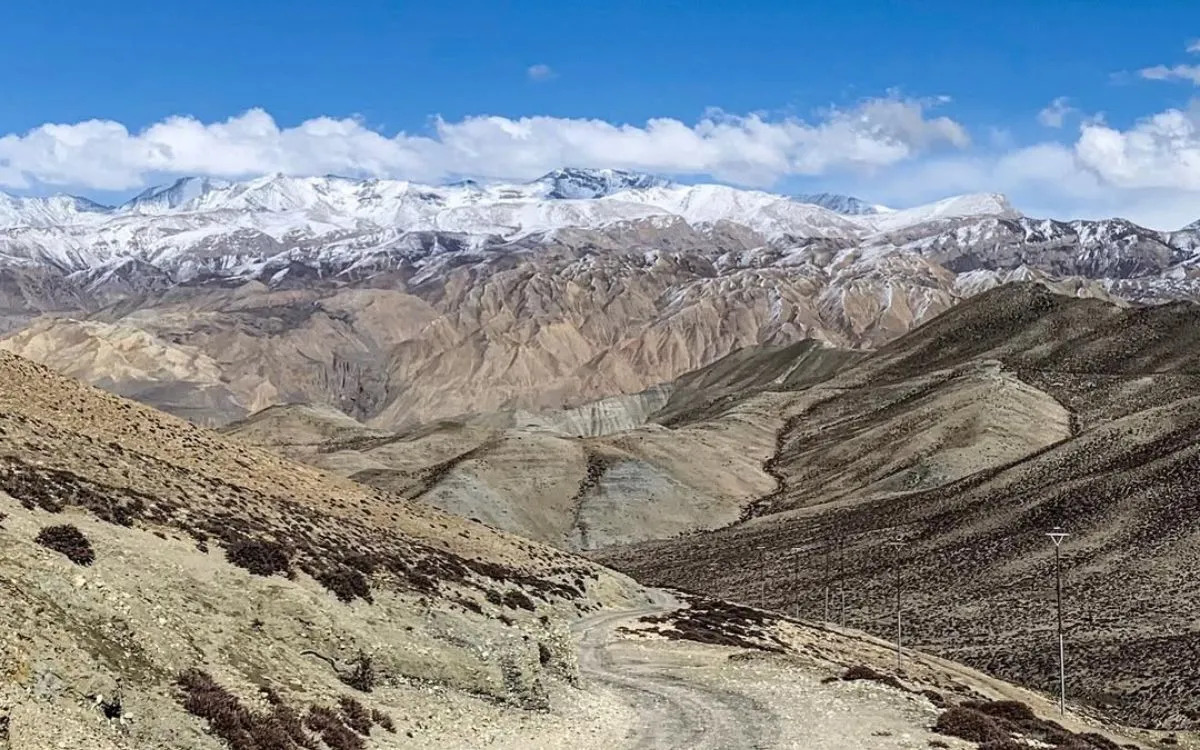
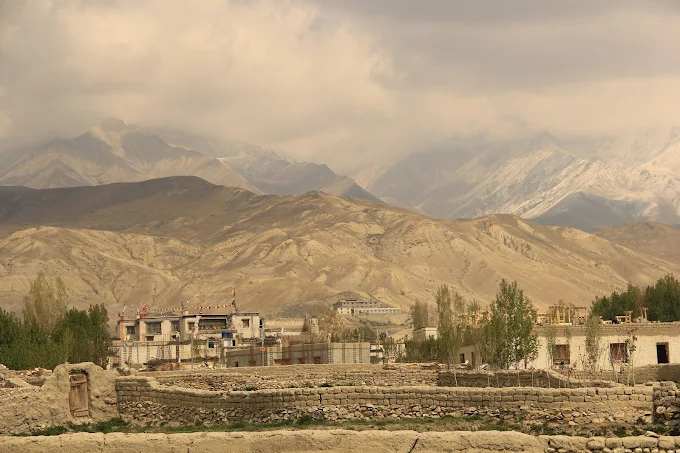
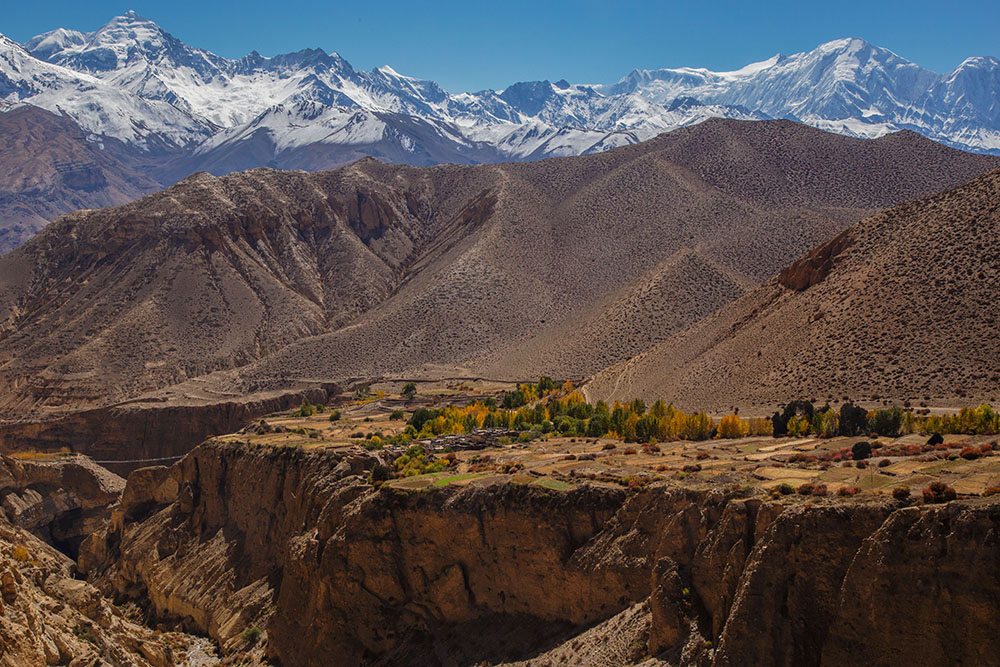
Near the lower Mustang area, you encounter more vegetation and cultivated land. Farther north, the terrain becomes increasingly dry, with dramatic cliffs, exposed rock formations and high-altitude desert-like scenery.
This gradual transformation is one of the reasons the journey itself is such an important part of an Upper Mustang experience.
Required Permits and Costs for Jomsom, Annapurna Circuit & Upper Mustang
The permits you need around Jomsom depend on where your itinerary continues. Simply arriving in Jomsom does not mean you need a special “Jomsom permit.” However, Jomsom lies within the Annapurna Conservation Area, so travelers entering the conservation area need the applicable conservation-area entry permit.
If you continue north toward Upper Mustang, additional restricted-area requirements apply.
Jomsom & Annapurna Circuit Permit Guide
Route / Destination
Required Permit
Current Cost
Who Needs It?
Jomsom / Lower Mustang
Annapurna Conservation Area Permit (ACAP)
NPR 3,000 for foreign nationals
Travelers entering the Annapurna Conservation Area
Travelers entering the Upper Mustang restricted area
Jomsom only as a transit stop
Depends on where you entered the conservation area and your overall itinerary
Varies
Travelers only passing through Jomsom
Permit fees can change. Confirm the current rate with the relevant Nepal government authority or your registered trekking agency before departure.
The Nepal Tourism Board currently lists the Annapurna Conservation Area entry fee at NPR 3,000 per foreign visitor per entry.
For TIMS, the Trekking Agencies’ Association of Nepal (TAAN) currently lists the Green TIMS card for individual foreign trekkers (FITs) at NPR 2,000 per person, while group trekkers use the Blue TIMS card at NPR 1,000 per person. SAARC rates are lower.
For Upper Mustang, the Department of Immigration’s current detailed permit information lists USD 50 per person per day. Upper Mustang is a restricted trekking area, and the permit is issued through an authorized trekking agency.
What Does This Mean for Your Jomsom Trip?
The easiest way to understand the requirements is:
If you are visiting Jomsom as part of Lower Mustang: You generally need the Annapurna Conservation Area Permit (ACAP) because Jomsom is within the Annapurna Conservation Area.
If you are trekking the Annapurna Circuit through Jomsom: You should plan for the ACAP and applicable TIMS requirements. Your trekking agency can arrange the necessary documentation before the trek.
If you are continuing from Jomsom toward Upper Mustang: You need the ACAP plus the Upper Mustang restricted-area permit and any other applicable trekking documentation. The restricted-area permit is substantially more expensive because Upper Mustang is a controlled trekking region.
Important: Upper Mustang Is Not the Same as Lower Mustang
This distinction is important when budgeting your trip.
You do not pay the Upper Mustang restricted-area fee simply because you arrive in Jomsom or travel around Lower Mustang.
The additional restricted-area permit applies when your itinerary enters the designated Upper Mustang restricted zones. The Department of Immigration identifies these areas within Lomanthang Rural Municipality, Lo-Ghekar Damodarkunda Rural Municipality, and specified areas of Baragung Muktichhetra Rural Municipality.
The second itinerary enters the Upper Mustang restricted area and therefore requires the additional restricted-area permit.
Do You Need a Guide for Upper Mustang?
Upper Mustang is a restricted trekking area, so arrangements are different from an ordinary independent hike in Nepal. The trekking permits for restricted areas are issued through listed trekking agencies.
This is one reason it is important to arrange an Upper Mustang trip through a properly established trekking operator rather than arriving in Jomsom and trying to organize the restricted-area section at the last minute.
A professional local operator can help coordinate:
Restricted-area permits
Conservation-area requirements
Licensed guides
Accommodation
Transportation
Route planning
Weather-related adjustments
Emergency logistics
Is Jomsom Worth Visiting If You Are Not Trekking?
Absolutely. You do not have to complete the full Annapurna Circuit or Upper Mustang trek to visit Jomsom.
A Jomsom-based Mustang trip can be suitable for travelers who want to experience the Himalayan landscape without committing to a long high-altitude trek.
Depending on your interests, you can combine Jomsom with:
Marpha
Tukuche
Kagbeni
Muktinath
Mustang villages
Short walks
Cultural sightseeing
Scenic drives
This makes Jomsom particularly useful for travelers with limited time.
Spring brings relatively favorable trekking conditions, with improving temperatures and good mountain scenery.
It is particularly suitable for travelers combining Jomsom with trekking in the Annapurna region.
Autumn: September to November
Autumn is traditionally one of Nepal’s strongest trekking seasons. The skies are often clearer after the monsoon, visibility is generally good, and temperatures are suitable for trekking.
September can still have some post-monsoon variability, while October and November are generally popular months.
Winter: December to February
Winter can be cold, particularly at higher elevations. Snow and freezing temperatures can affect routes and accommodation availability in more remote areas.
Jomsom itself can still be visited, but travelers should plan carefully and confirm transportation and accommodation conditions.
Monsoon: June to August
Jomsom and Mustang are unusual compared with many parts of Nepal. Much of Mustang lies within the Himalayan rain-shadow, meaning the region receives significantly less rainfall than many areas farther south.
The Nepal Tourism Board specifically notes that Upper Mustang can be visited during the monsoon because of its rain-shadow location.
However, reaching Jomsom can still be affected by monsoon conditions on roads and flight routes farther south.
So, Upper Mustang’s dry climate does not automatically mean every part of the journey is weather-proof.
Jomsom Weather and the Famous Mountain Wind
Jomsom is well known for strong winds in the Kali Gandaki Valley.
This is particularly noticeable later in the day.
For trekkers, this has several practical consequences:
Start walking early when possible.
Carry a windproof outer layer.
Protect your eyes from dust.
Keep water accessible.
Do not assume warm sunshine means warm conditions.
Build flexibility into flight schedules.
The combination of altitude, wind and dry air can make conditions feel colder than expected.
Jomsom Altitude and Acclimatization
Jomsom sits at approximately 2,720 metres, so altitude should not be ignored.
Many travelers arrive here after spending time at lower elevations, while Annapurna Circuit trekkers may arrive after crossing much higher terrain.
Your acclimatization needs therefore depend heavily on where you are coming from.
If you are arriving directly from a much lower elevation, avoid treating Jomsom as merely a quick transportation stop.
Stay hydrated, walk at a comfortable pace and pay attention to symptoms such as:
Headache
Unusual fatigue
Dizziness
Nausea
Loss of appetite
Difficulty sleeping
If symptoms become severe or worsen, seek medical assistance and descend as appropriate.
Where to Stay in Jomsom
Jomsom has accommodation options ranging from simple local lodges to more comfortable hotels.
The best choice depends on your expectations.
For trekkers
A basic lodge is often sufficient for a one-night stop.
For families and private travelers
A more comfortable hotel may be preferable, especially if Jomsom is being used as a rest day between long road journeys.
For Upper Mustang travelers
Consider the logistics rather than simply choosing the cheapest room.
A reliable lodge, convenient location and early breakfast can be more valuable than a small difference in room price when you have an early departure.
Food and Drinking Water in Jomsom
Jomsom provides considerably more food options than remote villages farther along the Mustang routes.
You can generally find a mixture of:
Dal bhat
Noodles
Tibetan-style dishes
Soups
Rice and vegetable meals
Bread
Tea and coffee
Local snacks
For longer journeys, carry some personal snacks such as energy bars, dried fruit or nuts.
Avoid assuming that every village farther into Upper Mustang will offer the same selection as Jomsom.
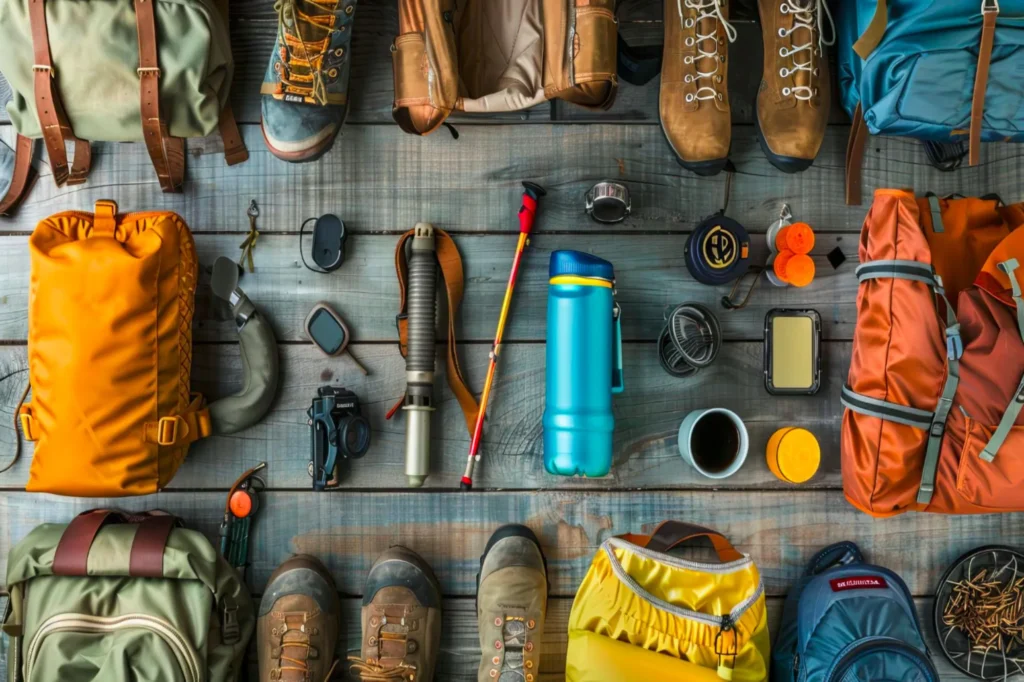
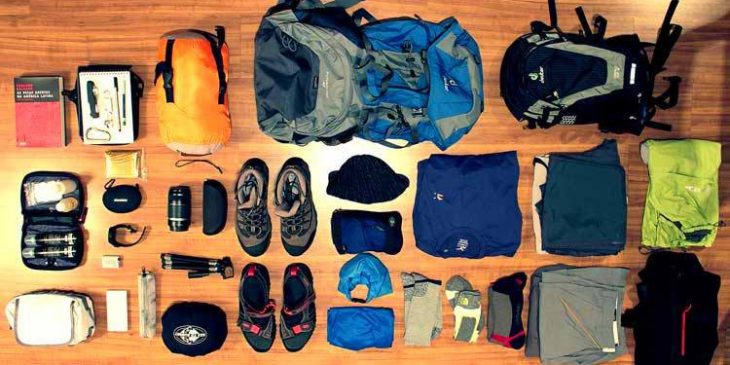
What Should You Pack for Jomsom?
Your packing list depends on whether Jomsom is simply a stop or part of a longer trek.
For a typical Jomsom and Mustang trip, consider:
Clothing
Warm insulating layer
Windproof jacket
Comfortable trekking trousers
Moisture-wicking base layers
Warm socks
Gloves
Hat or beanie
Sun hat
Footwear
Comfortable trekking shoes or boots
Sandals or lightweight shoes for evenings
Sun and wind protection
Sunglasses
Sunscreen
Lip balm
Buff or face covering
Travel essentials
Reusable water bottle
Personal medication
Headlamp
Power bank
Passport and permit documents
Cash in Nepali rupees
Small first-aid kit
If continuing into Upper Mustang, your equipment should be selected for longer periods at higher elevation and colder conditions.
Is Jomsom Safe for Travelers?
Jomsom is a well-established tourism and transport center, but Himalayan travel always requires some flexibility.
The biggest practical issues are usually related to:
Weather
Road conditions
Flight cancellations
Altitude
Strong winds
Changing trail conditions
The safest approach is not to plan your itinerary so tightly that one delayed flight causes you to miss an international departure.
For trekking beyond Jomsom, use an experienced guide and make sure your travel insurance covers the activities and elevations involved.
Jomsom vs. Kagbeni: What’s the Difference?
These two places are often confused because they are close to each other and both are associated with Upper Mustang.
Jomsom
Kagbeni
Major regional transport hub
Historic village and trekking gateway
Has an airport
No commercial airport
District administrative center
Important cultural settlement
Major road/transport connections
Key point before Upper Mustang restricted area
Good place to organize logistics
Common staging point for Upper Mustang
Around 2,720 m
Around 2,800 m
The important takeaway is simple:
Jomsom is the broader regional hub, while Kagbeni is the critical gateway immediately before Upper Mustang.
This distinction helps travelers understand why an itinerary can include both places without them being redundant stops.
How Many Days Do You Need for Jomsom?
There is no single correct answer.
1 day: Suitable if Jomsom is simply a transport stop.
2–3 days: Better if you want to combine Jomsom with nearby attractions such as Marpha, Tukuche or Muktinath.
5+ days: Recommended when Jomsom forms part of a larger Mustang exploration.
10–14+ days: More appropriate for travelers planning a substantial Upper Mustang trekking itinerary.
The Nepal government’s published Upper Mustang outline, for example, includes Jomsom at both the beginning and end of a longer Upper Mustang route.
A Practical Jomsom Travel Itinerary
If you want to experience the area without doing the entire Annapurna Circuit, a simple itinerary could look like this:
Day 1: Pokhara to Jomsom
Travel by flight or road.
Spend the afternoon exploring Jomsom and the Kali Gandaki Valley.
Overnight: Jomsom
Day 2: Jomsom – Marpha – Tukuche
Explore traditional villages and the surrounding landscape.
Overnight: Jomsom or nearby village
Day 3: Jomsom – Muktinath – Kagbeni
Visit Muktinath and continue toward Kagbeni.
Overnight: Kagbeni or Jomsom
Day 4: Return toward Pokhara
Travel by road or, subject to operating conditions, fly from Jomsom to Pokhara.
This itinerary can be shortened or expanded depending on transportation and personal interests.
Who Should Visit Jomsom?
Jomsom is particularly suitable for:
Annapurna Circuit trekkers
Upper Mustang trekkers
Adventure travelers
Photographers
Cultural travelers
Pilgrims visiting Muktinath
Families looking for a Mustang road trip
Travelers who want Himalayan scenery without a long trek
Visitors interested in Tibetan-influenced Himalayan culture
It is less suitable for travelers who want a completely relaxed resort-style vacation.
Jomsom is a mountain town, and the journey is part of the experience.
Why Travel to Jomsom With a Local Trekking Company?
The value of a local trekking company becomes particularly clear when an itinerary combines several regions.
A knowledgeable local operator can help you choose between:
flying vs. driving, trekking vs. jeep travel, short vs. extended itineraries, and Lower Mustang vs. Upper Mustang.
For a restricted-area trip, professional permit coordination is also important.
Why Hi Nepal Travels & Treks?
Hi Nepal Travels & Treks is a Pokhara-based Nepal travel and trekking company offering trekking and tour experiences across the Himalayas.
Hi Nepal states that its team has 20+ years of experience in trekking and tour management and focuses on locally guided, personalized Himalayan experiences.
The company is also listed by the Trekking Agencies’ Association of Nepal (TAAN), which provides an additional point of reference when evaluating a trekking operator.
For travelers planning Jomsom, Annapurna or Mustang journeys, working with a local operator can make the trip easier to customize around transportation, trekking ability, accommodation preferences and available time.
Responsible Travel in Jomsom and Mustang
The landscapes around Jomsom are fragile, and tourism is closely connected with local communities.
Travel responsibly by:
Carrying reusable water bottles
Minimizing plastic waste
Using established trails
Avoiding unnecessary litter
Respecting monasteries and religious sites
Asking before photographing people
Supporting locally owned lodges and businesses
Following conservation-area regulations
Avoiding damage to historic structures
A good trip is not only about seeing Mustang, it is also about leaving the destination in good condition for the people who live there and the travelers who follow.
Conclusion
Jomsom is more than a place where trekkers catch a flight or change vehicles.
It is a meeting point between several sides of the Nepal Himalayas.
The Annapurna Circuit brings travelers down from the high passes toward the Kali Gandaki Valley. The road and trail north lead toward Kagbeni and Upper Mustang. Nearby villages such as Marpha and Tukuche reveal the region’s distinctive architecture and culture, while Muktinath adds an important spiritual dimension to the journey.
That combination makes Jomsom particularly valuable for travelers who want to experience more than one side of the Annapurna and Mustang regions.
If you are planning your first trip to Mustang, think of Jomsom not simply as a stop on the map, but as the logistical and geographical crossroads that connects the Annapurna trekking world with the trans-Himalayan landscapes of Mustang.
Plan Your Jomsom & Mustang Adventure With Hi Nepal Travels & Treks
Whether you want to walk part of the Annapurna Circuit, visit Muktinath, explore Jomsom and Marpha, or continue north into Upper Mustang, a well-planned itinerary can make the difference between simply passing through Mustang and genuinely experiencing it.
Jomsom is known as an important town in Mustang and a major gateway for the Annapurna Circuit, Muktinath and Upper Mustang. It is also known for its location along the Kali Gandaki Valley and its airport connection with Pokhara.
Is Jomsom part of the Annapurna Circuit?
Yes. Jomsom is associated with the western section of the Annapurna Circuit, particularly the route through Muktinath and the Kali Gandaki Valley.
Is Jomsom the entrance to Upper Mustang?
Jomsom is one of the principal access points to Upper Mustang, but Kagbeni is the key gateway/checkpoint before entering the restricted Upper Mustang area.
How high is Jomsom?
Jomsom is approximately 2,720 metres (8,924 feet) above sea level.
Can you fly from Pokhara to Jomsom?
Yes. Jomsom has an airport with flights connecting the town with Pokhara, although flights are subject to weather and operating conditions.
Can you drive from Pokhara to Jomsom?
Yes. Jomsom is accessible by road through the Kali Gandaki Valley. Travel times can vary considerably depending on road and weather conditions.
Do I need a permit for Upper Mustang?
Yes. Upper Mustang is a restricted area and requires a special trekking permit. Current government information lists the restricted-area fee at USD 50 per person per day.
Is Jomsom suitable for a short trip?
Yes. Jomsom can be included in short Mustang trips, especially when combined with Marpha, Muktinath or Kagbeni.
What is the best month to visit Jomsom?
For general trekking in the Annapurna region, March–May and September–November are traditionally strong periods. Upper Mustang is unusual because its rain-shadow location also makes it possible to consider during the monsoon.
How many days should I spend in Jomsom?
One night is enough if Jomsom is only a transit point. Two or three days gives you more time to explore the surrounding Mustang area, while longer stays make sense when Jomsom is part of an Upper Mustang itinerary.
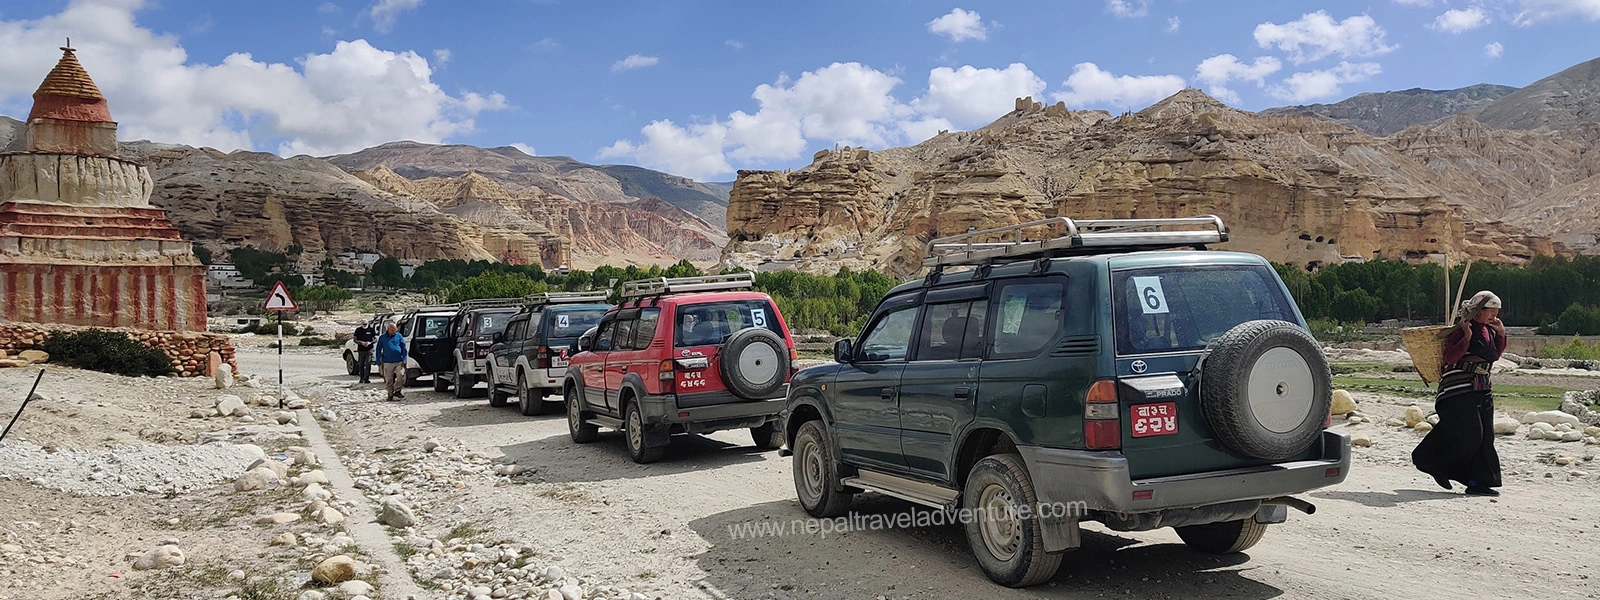
AnUpper Mustang Jeep Tour is one of the easiest ways to explore the remote landscapes, ancient villages, monasteries, and cultural heritage of northern Mustang without spending several weeks walking between settlements.
Instead of following the entire route on foot, you travel by private or shared 4WD jeep, stopping at major attractions along the way. This makes the journey particularly suitable for families, older travelers, small groups, photographers, and travelers with limited time.
The journey can be organized from either Kathmandu or Pokhara. Starting from Kathmandu gives you a complete Nepal overland experience, while starting from Pokhara allows you to focus more directly on Mustang and shorten the overall trip.
Quick Answer: Upper Mustang Jeep Tour Cost, Duration and Route
For 2026, a practical price range for an organized Upper Mustang Jeep Tour is approximately USD 1,200–2,300 per person, based on group size and travel style. Hi Nepal Travels and Treks currently lists indicative prices within this range for its Kathmandu-to-Kathmandu Upper Mustang tour, with smaller private groups costing more per person and larger groups costing less.
Trip Factor
Typical Details
Approx. Tour Price
USD 1,200–2,300 per person
Starting Point
Kathmandu or Pokhara
Main Destination
Lo Manthang
Transport
Private or shared 4WD jeep
Typical Duration
About 5–13 days, depending on the starting point and itinerary
Maximum Altitude
Lo Manthang – 3,840 m
Main Highlights
Muktinath, Kagbeni, Ghami, Charang, Lo Manthang and Chhoser
Upper Mustang RAP
USD 50 per person per day
ACAP
NPR 1,000 for SAARC nationals / NPR 3,000 for other foreign nationals
Best For
Families, groups, older travelers and time-conscious travelers
Note:Upper Mustang Jeep Tour prices are indicative and can vary according to group size, private or shared transportation, number of days, accommodation, season, permits, meals and other inclusions. Always check the final itinerary and inclusions before booking.
Who Is the Upper Mustang Jeep Tour Best Suited For?
A jeep tour is particularly useful if you want to experience Upper Mustang without completing a long trek.
It is a good option for:
Families and older travelers
Travelers with limited vacation time
Couples and private groups
Travelers who prefer road travel
Photographers carrying camera equipment
Travelers who want a more flexible itinerary
Visitors who want to combine Upper Mustang with Muktinath, Pokhara or Kathmandu
You will still need to walk around villages, monasteries and viewpoints, and altitude remains an important consideration even when traveling by vehicle.
Upper Mustang Jeep Tour Cost 2026/27
The price of an Upper Mustang Jeep Tour depends heavily on how many people are traveling together.
This is because a private jeep is normally hired for the group rather than priced like a standard individual bus ticket. When more people share the vehicle, the transportation cost can be distributed across the group.
These are indicative package prices, not a universal fixed market rate. Your final quotation can be different depending on the number of days, accommodation standard, inclusions, travel dates and transportation arrangements.
If you are already in Pokhara and want to start there, the overall cost can also be lower because you are removing the Kathmandu–Pokhara–Kathmandu portion of the journey.
What Is Included and Excluded in the Jeep Tour Price?
The exact inclusions depend on the package, but an organized Upper Mustang Jeep Tour can include:
Private 4WD jeep
Experienced driver
Licensed guide
Upper Mustang RAP
ACAP
Accommodation
Meals according to the package
Kathmandu and/or Pokhara transfers
Applicable government and local taxes
Typical exclusions include:
International airfare
Nepal visa
Travel insurance
Personal expenses
Snacks and drinks
Wi-Fi and charging fees
Tips
Optional activities
Extra nights caused by delays or personal circumstances
Always check the inclusion list before comparing two tour prices.
Shared Jeep vs Private Jeep Cost
Feature
Shared Jeep
Private Jeep
Price
Lower per person
Higher per person
Schedule
Less flexible
More flexible
Stops
Group-based
Customizable
Route Changes
Limited
Easier
Best For
Budget travelers
Families and private groups
For families or groups of friends, a private jeep can offer better value than it first appears because the vehicle cost is shared among several travelers.
Upper Mustang Jeep Tour Route From Kathmandu
If you are starting your Nepal journey in Kathmandu, a longer Kathmandu-to-Kathmandu Upper Mustang route makes sense.
Your current package estimates this section at around 150 km and 6–7 hours, although mountain-road travel times should always be treated as approximate.
Jomsom to Muktinath and Kagbeni
From Jomsom, you can include Muktinath before continuing toward Kagbeni.
Kagbeni is an important gateway to the Upper Mustang restricted area.
From here, the landscape changes dramatically as you move farther north into the arid, high-altitude terrain of Upper Mustang.
Kagbeni to Lo Manthang
The core Upper Mustang journey continues through:
Kagbeni → Chhusang/Chele → Ghami → Charang → Lo Manthang
This is where the journey becomes particularly distinctive, with barren plateaus, red and ochre cliffs, Buddhist monasteries, chortens, mani walls and traditional settlements.
Lo Manthang and Chhoser
After reaching Lo Manthang at approximately 3,840 m, allow time for sightseeing rather than treating it only as an overnight stop.
A full exploration day can include:
Lo Manthang’s historic walled settlement
Royal Palace area
Thubchen Gompa
Jampa Lhakhang
Chchode Gompa
Chhoser Caves
Nearby villages and monasteries
Your existing package uses a dedicated exploration day for Lo Manthang and Chhoser before beginning the return journey.
Return to Pokhara and Kathmandu
The return route can travel south through Marpha and the Kali Gandaki Valley before reaching Pokhara.
From Pokhara, travelers can either drive back to Kathmandu or choose a domestic flight if that is included or added to the itinerary.
Upper Mustang Jeep Tour Route From Pokhara
If you are already in Pokhara, you do not need to follow the complete Kathmandu-to-Kathmandu itinerary.
This can save 1–2 days or more, depending on the itinerary and whether you include additional sightseeing.
Your existing package specifically notes that the Upper Mustang journey can be customized to start directly from Pokhara. (Hine Pal Treks)
Kathmandu vs Pokhara Starting Point
Starting From Kathmandu
Starting From Pokhara
Complete Nepal road journey
More focused on Mustang
Longer itinerary
Shorter itinerary possible
Includes Kathmandu–Pokhara travel
Skips Kathmandu–Pokhara section
Better for first-time Nepal visitors
Better if already in Pokhara
More sightseeing opportunities
More time available for Mustang
If Upper Mustang is your main objective, starting from Pokhara is generally more time-efficient.
If you want to combine Upper Mustang with Kathmandu sightseeing and Pokhara, the Kathmandu-to-Kathmandu option is more comprehensive.
Upper Mustang Jeep Tour Itinerary Options
Rather than presenting one itinerary as suitable for everyone, I recommend showing three practical options.
5-Day Upper Mustang Jeep Tour from Pokhara
A short itinerary can focus on the main Upper Mustang highlights:
Day 1: Pokhara → Jomsom → Kagbeni → Chele/Chhusang Day 2: Chhusang → Ghami → Charang Day 3: Charang → Lo Manthang Day 4: Lo Manthang and Chhoser sightseeing Day 5: Begin return journey toward Jomsom/Pokhara
This is a fast-paced itinerary and should remain flexible because mountain-road conditions can affect driving times.
6–7 Day Upper Mustang Jeep Tour from Pokhara
A longer itinerary gives you more time for cultural stops and sightseeing.
This option is better if you want to spend meaningful time around Lo Manthang and the surrounding villages rather than simply reaching the walled city and immediately returning.
13-Day Kathmandu-to-Kathmandu Upper Mustang Tour
For travelers who want the complete experience, your existing package provides a 13-day Kathmandu-to-Kathmandu itinerary with private jeep transportation. It includes Kathmandu sightseeing, Pokhara, the Kali Gandaki route, Muktinath, Upper Mustang, Lo Manthang, Chhoser and the return journey.
This is the strongest option for travelers who want to turn Upper Mustang into a complete Nepal holiday rather than a standalone Mustang road trip.
Upper Mustang Jeep Tour Permits and Cost
Because Upper Mustang is a restricted area, the permit cost is an important part of your overall budget.
Upper Mustang Permit Costs 2026
Permit
SAARC Nationals
Other Foreign Visitors
Upper Mustang Restricted Area Permit (RAP)
USD 50/person/day*
USD 50/person/day*
Annapurna Conservation Area Permit (ACAP)
NPR 1,000/person/entry
NPR 3,000/person/entry
The current Department of Immigration fee listing gives the Upper Mustang RAP as USD 50 per person per day. The ACAP figures above are from the current park-entry fee table.
Important: The RAP is charged according to the applicable number of permit days, so it should not be treated as a single flat fee for the whole Nepal trip.
For example, 5 permit days would mean USD 250 per person for the RAP, while 6 permit days would mean USD 300, before considering other applicable fees.
How Much Do Permits Add to the Jeep Tour Cost?
This is why advertised Upper Mustang prices can look very different.
A package may quote transportation and accommodation separately, while another company may include the RAP, ACAP, guide, meals and accommodation in one final price.
When comparing tours, ask:
“Is the USD 50-per-day Upper Mustang RAP already included in the quoted price?”
That single question can prevent a major misunderstanding when comparing packages.
How to Get to Jomsom Before Starting the Jeep Tour
Jomsom is the main gateway for most Upper Mustang road journeys. If you are already in Pokhara, you can choose between flying to Jomsom or traveling overland by jeep. Your choice can significantly affect the total duration and cost of the trip.
Flight From Pokhara to Jomsom: Cost and Duration
The Pokhara–Jomsom flight is the quickest way to reach the Mustang region. The flight takes roughly 20–25 minutes, subject to weather and operating conditions.
Flights are generally operated in the morning because winds in the Kali Gandaki Valley often become stronger later in the day. Weather can therefore cause delays or cancellations.
If you are planning a short Upper Mustang Jeep Tour, flying to Jomsom can save considerable time that you can instead spend exploring Kagbeni, Lo Manthang and the surrounding areas.
Tip: If your itinerary depends on a flight to Jomsom, keep some flexibility in your schedule. Mountain flights are weather-dependent, and a delayed flight can affect the rest of your itinerary.
Overland Drive From Pokhara to Jomsom: Route and Travel Time
Traveling from Pokhara to Jomsom by road takes considerably longer but provides a more complete overland experience.
The route passes through changing landscapes, from the greener lower valleys to the increasingly dry and rugged terrain of Mustang.
The exact driving time depends on road conditions, traffic, weather and stops, so it is better to treat quoted travel times as estimates rather than fixed schedules.
For travelers who are already hiring a private jeep, continuing overland from Pokhara can be convenient because you do not need to arrange a separate vehicle after reaching Jomsom.
Which Option Is Better — Flying vs Driving to Jomsom?
Factor
Flight
Overland Jeep
Travel Time
Much faster
Longer
Scenery
Limited from the air
More scenic stops
Weather Dependency
Higher
Roads can also be weather-affected
Best For
Short itineraries
Longer road trips
Flexibility
Flight schedule dependent
More flexible
Cost
Additional flight expense
Included if using your private jeep
Choose the flight if time is your priority. Choose the road if you want the journey itself to be part of the experience.
Types of Jeeps Used for Upper Mustang Tour
Upper Mustang is not a destination for ordinary city cars. The route includes rough, rocky and sometimes narrow mountain roads, particularly in the higher sections.
A reliable 4WD jeep with an experienced mountain driver is therefore an important part of a safe and comfortable journey.
Shared Jeep Tours: Cost, Schedule and Group Size
Shared jeep travel can make an Upper Mustang trip more affordable because several travelers share the transportation cost.
The main advantage is price, but there are some compromises.
With a shared jeep, you may have less control over:
Departure times
Photo stops
Meal breaks
Sightseeing duration
Route adjustments
Overnight stops
Shared travel is best suited to budget-conscious travelers who are comfortable following a common itinerary.
Private Jeep Hire: Flexibility and Pricing
A private jeep gives your group considerably more control over the journey.
You can discuss additional stops with your guide and driver, spend longer at places that interest you, and adjust the day’s schedule when road or weather conditions change.
For families, couples and groups of friends, a private jeep can also provide good value because the transportation cost is divided among the travelers.
Hi Nepal Travels and Treks offers private jeep-based Upper Mustang travel, with the final price depending on group size, itinerary and inclusions.
Jeep Seating Capacity and Luggage Allowance
The exact seating and luggage capacity depends on the vehicle provided.
Do not assume that filling every seat with passengers and carrying large suitcases will be comfortable on a rough mountain road.
If you are carrying large luggage, camera equipment or specialist gear, mention this when booking so the appropriate vehicle arrangement can be made.
For a long mountain journey, having enough space for both passengers and luggage can make a noticeable difference to comfort.
Best Time to Visit Upper Mustang by Jeep
One of the advantages of Upper Mustang is that it can be visited during a wider range of months than many trekking destinations in Nepal.
Its location in the Himalayan rain shadow means that the region receives considerably less monsoon rainfall than much of southern and central Nepal.
However, the best time depends on whether you prioritize stable road conditions, clear views, fewer visitors or warmer temperatures.
Ideal Months for Road Conditions and Weather
Spring and autumn are generally the most favorable seasons for an Upper Mustang Jeep Tour.
Season
Months
Typical Conditions
Jeep Travel
Spring
March–May
Increasingly warm and mostly dry
Excellent
Monsoon
June–August
Upper Mustang remains relatively dry; access roads may be affected by rain elsewhere
Good with flexibility
Autumn
September–November
Clearer skies and generally stable conditions
Excellent
Winter
December–February
Very cold; snow and difficult conditions are possible
Challenging
October is particularly attractive for travelers who want clear mountain views and generally favorable road conditions.
May can also be an excellent time for visitors interested in the Tiji Festival in Lo Manthang, although festival dates vary by year.
Can You Do the Jeep Tour During Monsoon Season?
Yes. Upper Mustang is one of Nepal’s better monsoon travel destinations because of its rain-shadow location. The higher Mustang region generally receives much less rainfall than places such as Pokhara and Kathmandu.
However, this does not mean the entire journey is completely unaffected by monsoon. The roads connecting Pokhara, Beni and lower Mustang can experience rain, landslides, mud or delays during the monsoon period.
Once you move deeper into Upper Mustang, conditions are generally much drier, but wind, dust and changing visibility can still affect the journey.
If traveling between June and August, allow some flexibility in your schedule rather than arranging tight connections.
Key Places to Visit on the Upper Mustang Jeep Tour
The journey to Lo Manthang is not simply about reaching the destination. Some of Mustang’s most memorable experiences come from the villages, monasteries and landscapes along the route.
Lo Manthang: The Former Royal Kingdom
Lo Manthang is the main highlight of Upper Mustang. The historic walled settlement was once the capital of the Kingdom of Lo and remains one of the most culturally distinctive places in Nepal.
Inside and around the settlement, you can explore:
Traditional mud-brick buildings
Historic monasteries
Narrow lanes
Chortens and mani walls
Former royal areas
Local cultural sites
A jeep tour gives you the advantage of reaching Lo Manthang relatively quickly, allowing you to dedicate more time to exploring the town itself.
Chosar Caves and Jhong Cave
The caves around Lo Manthang are among the most fascinating features of Upper Mustang. The Chhoser area is particularly known for its dramatic cliffside caves and ancient settlements.
Some cave sites require a short walk after the jeep reaches the area, so an Upper Mustang Jeep Tour should not be viewed as a completely vehicle-only experience.
Depending on local conditions and your itinerary, your guide can help determine which cave sites are practical to visit.
Ghar Gompa: One of Mustang’s Important Monasteries
Ghar Gompa, also known as Lo Gekar Monastery, is an important religious site in the Mustang region. It is associated with the Buddhist heritage of the area and is located along the route toward Lo Manthang.
Its remote setting, surrounding cliffs and traditional architecture make it a worthwhile stop for travelers interested in culture, history and photography.
Charang and Its Ancient Dzong
Charang is one of the major settlements on the route to Lo Manthang. The village is known for its traditional houses, Buddhist heritage and historic Charang Dzong.
It is a useful overnight stop on many itineraries and provides a chance to experience Mustang’s traditional architecture before continuing toward Lo Manthang.
Muktinath Temple
Muktinath is located south of the core Upper Mustang route but can be included in many broader Mustang itineraries.
The site is particularly significant because it is sacred to both Hindus and Buddhists.
Travelers visiting Upper Mustang by jeep often combine Muktinath with the journey because of its location along the wider Jomsom–Kagbeni route.
If your primary goal is Lo Manthang, however, the exact inclusion of Muktinath depends on your starting point and number of available days.
Upper Mustang Jeep Tour vs Trekking: Which Should You Choose?
Both options allow you to experience Upper Mustang, but they suit different types of travelers.
Time and Cost Comparison
A jeep tour can cover the route considerably faster than trekking. A full trek requires more days because travelers walk between settlements, while a jeep can cover long distances in a single day. The cost comparison is less straightforward.
A trek includes guide, porter and accommodation expenses, while a private jeep includes vehicle and driver costs. For larger groups, sharing a private jeep can make road travel more economical per person.
However, neither option completely removes the challenge of altitude.
Lo Manthang is around 3,840 m, and travelers can experience altitude-related symptoms regardless of whether they arrive on foot or by vehicle.
What You See and Experience Differently
A jeep tour emphasizes access and sightseeing. You can cover more ground and visit multiple locations in a shorter period.
Trekking, on the other hand, allows you to experience the landscape at walking pace. You spend more time on trails, pass through smaller settlements and experience the gradual transition in the environment.
If your priority is seeing the major highlights efficiently, choose a jeep tour.
If you enjoy the process of walking through the Himalayas as much as the destinations themselves, trekking may be more rewarding.
Accommodation Along the Jeep Tour Route
Accommodation in Upper Mustang is comfortable enough for most travelers but remains relatively basic compared with hotels in Kathmandu or Pokhara.
Teahouse and Guesthouse Options in Kagbeni, Charang and Lo Manthang
Local guesthouses, teahouses and small hotels are available along the main route.
Common overnight locations include:
Kagbeni
Chele/Chhusang
Ghami
Charang
Lo Manthang
The standard varies from one village to another.
Lo Manthang generally offers more choices than smaller settlements, but travelers should still expect simple mountain accommodation rather than luxury hotels.
What to Expect in Terms of Comfort and Facilities
Depending on the property, you may find:
Twin or double rooms
Basic beds and blankets
Attached or shared bathrooms
Hot showers, sometimes for an additional charge
Dining areas
Limited electricity
Wi-Fi in some locations
Facilities can become more basic as you travel farther into remote areas. Pack a warm sleeping layer even if accommodation provides blankets, particularly during spring, autumn and winter.
What to Pack for an Upper Mustang Jeep Tour
A jeep tour requires less trekking equipment than a traditional Upper Mustang trek, but the destination itself is still a cold, dry, and high-altitude Himalayan environment.
Essential Clothing and Gear for High-Altitude Terrain
Your packing list should include:
Warm fleece or insulating layer
Windproof jacket
Comfortable trousers
Warm socks
Gloves
Sun hat
Sunglasses with good UV protection
Sunscreen
Lip balm
Comfortable walking shoes
Reusable water bottle
Personal medication
Power bank
Small daypack
Headlamp
A buff or lightweight face covering can also be useful on dusty sections of the road.
You do not need to carry a full trekking load if you are traveling by jeep, so keep your luggage practical and manageable.
Health and Altitude Precautions Even Without Trekking
Do not assume that traveling by jeep means altitude is no longer an issue.
In fact, reaching high elevations by vehicle can mean that your body has less time to acclimatize than it would during a gradual trek.
Stay hydrated, get enough sleep and avoid excessive alcohol.
Inform your guide if you experience symptoms such as persistent headache, unusual dizziness, nausea or difficulty breathing.
Your itinerary should allow sufficient time for your body to adjust to increasing altitude.
Do You Need a Guide for the Jeep Tour?
Yes. An Upper Mustang Jeep Tour is not simply a matter of hiring a vehicle and independently driving into the restricted area.
International visitors must follow the restricted-area regulations and required agency and guide arrangements.
Mandatory Guide Requirement for Restricted Areas
Because Upper Mustang is a restricted area, international travelers should arrange the trip through an authorized trekking agency with the required guide arrangements.
This also helps ensure that permits, route planning and local requirements are handled correctly.
Role of the Guide During a Jeep-Based Tour
A guide adds value even when you are not trekking.
Your guide can help with:
Permit and checkpoint procedures
Cultural interpretation
Monastery visits
Communication with local communities
Accommodation coordination
Route adjustments
Altitude awareness
Weather and road-condition decisions
Emergency coordination
A knowledgeable local guide can also explain the history behind the villages and religious sites you pass instead of turning the journey into a simple road trip.
How to Book an Upper Mustang Jeep Tour
Once you know your preferred route, the next step is choosing an operator and confirming exactly what is included in the price.
Best Time to Book in Advance
For normal travel periods, booking ahead gives you a better choice of vehicle, accommodation, and preferred itinerary.
Advance planning becomes even more important for:
Autumn travel
Spring travel
Tiji Festival
Larger private groups
Fixed departure dates
Special vehicle requirements
For festival dates or larger groups, booking several weeks or months ahead is sensible rather than waiting until you arrive in Nepal.
What to Check Before Booking
Before making a reservation, confirm:
Total price
Number of travelers
Private or shared jeep
Exact itinerary
Number of permit days
RAP and ACAP inclusion
Guide and driver
Accommodation
Meals
Kathmandu/Pokhara transportation
Flight arrangements, if applicable
Travel insurance requirements
Cancellation terms
What happens if weather or road conditions cause delays
Conclusion
An Upper Mustang Jeep Tour is ideal for travelers who want to explore Mustang without a long trek. The journey takes you to remarkable destinations, including Kagbeni, Muktinath, Ghami, Charang, Lo Manthang, and Chhoser.
Starting from Pokhara saves time, while a Kathmandu round trip offers a broader Nepal travel experience.
In 2026, expect to pay approximately USD 1,200–2,300 per person, depending on group size, duration, transportation, and inclusions. Before booking, check permit coverage, jeep quality, accommodation, and road-condition arrangements.
How Many Days Are Needed for the Upper Mustang Jeep Tour?
A short trip can cover the major highlights in around 5–7 days from Pokhara, while a complete Kathmandu-to-Kathmandu experience can take around 12–13 days, depending on the itinerary.
Is the Upper Mustang Jeep Tour Safe?
A properly organized jeep tour with an experienced mountain driver, suitable 4WD vehicle, guide and flexible itinerary is generally the safest approach to road travel in the region. The main challenges include rough roads, altitude, weather and changing mountain conditions.
Can You Combine Jeep Tour With Trekking?
Yes. A jeep-and-trek combination is a good option for travelers who want to reduce long driving sections while still experiencing selected trails on foot. You can use the jeep for longer transfers and walk around villages, monasteries and scenic sections.
What Is the Road Condition Like on the Jeep Route?
Expect rough, rocky and dusty mountain roads, with some narrow and uneven sections. Road conditions can change due to weather, construction, erosion and local traffic. For this reason, driving times shown in itineraries should always be treated as estimates.
How Much Does the Upper Mustang Jeep Tour Cost in Total?
For 2026, a useful starting range is approximately USD 1,200–2,300 per person for an organized tour, based on group size and package style. The final price can vary significantly depending on group size, itinerary, number of days, accommodation, permits, meals, transportation and inclusions.
Is a Private Jeep Worth the Extra Cost?
For families and groups, often yes. You have greater control over the itinerary and do not have to coordinate every stop with unrelated travelers.
Can I Start the Upper Mustang Jeep Tour From Pokhara?
Yes. Starting from Pokhara is a practical option if you are already there. It removes the Kathmandu–Pokhara section and can make the trip considerably shorter.
Can I Visit Upper Mustang by Jeep During the Monsoon?
Yes. The Upper Mustang region lies in the Himalayan rain shadow and is considerably drier than much of Nepal during monsoon. However, roads connecting Pokhara and lower Mustang can still be affected by monsoon weather, so some flexibility is necessary.
Do I Need to Trek if I Choose a Jeep Tour?
No. A jeep tour significantly reduces the amount of walking required. You will still need to walk around Lo Manthang, monasteries, caves and villages, but you do not need to trek the entire route.
The Upper Mustang Trek is generally considered a moderate-to-challenging trek in Nepal. You do not need technical climbing skills or previous mountaineering experience, but you should be prepared for several hours of walking each day, rocky trails, strong winds and elevations above 3,000 meters.
Unlike some popular Himalayan treks, Upper Mustang is not defined by a single extremely high destination. Its difficulty comes from the combination of altitude, repeated ascents and descents, dry terrain and consecutive walking days.
Road access has also changed the trekking experience. Vehicles can reach Lo Manthang, allowing travelers to combine walking with driving. However, traditional trails and unpaved sections remain, particularly farther into the region.
For reasonably fit travelers, Upper Mustang is achievable with proper preparation, gradual acclimatization and a well-planned itinerary. Here is what to expect before deciding whether this trek suits your fitness level.
Upper Mustang Trek Difficulty at a Glance
Difficulty factor
What to expect
Overall difficulty
Moderate to challenging
Technical climbing
Not required
Daily walking
Usually 5–7 hours on trekking days
Terrain
Rocky trails, gravel, dusty paths and jeep tracks
Typical destination altitude
Lo Manthang, approximately 3,840 m
Highest elevations
Some routes cross passes above 4,000 m
Main physical challenge
Sustained walking at altitude
Weather
Dry conditions, cold mornings and strong winds
Previous experience
Helpful but not essential
The difficulty depends on your chosen route. A traditional trekking itinerary involves more walking than a jeep-supported tour, while extended routes and side trips can add longer days.
Why Is Upper Mustang Considered a Moderate Trek?
The standard route to Lo Manthang follows established village paths, rocky trails and sections alongside the road network. There is no technical climbing involved, making it accessible to many travelers who have prepared physically.
However, the trek still requires endurance. Lo Manthang sits at approximately 3,840 meters, and some commonly used routes cross passes above 4,000 meters. At these elevations, walking uphill can feel harder than it would at lower altitudes.
The landscape also presents its own challenges. Much of Upper Mustang consists of dry valleys, exposed plateaus, rocky slopes and dusty trails. Afternoon winds can make walking uncomfortable, while loose stones can make descents tiring.
Road development has made transportation more flexible, but it has not removed these challenges from the traditional trekking routes.
The main difficulty is sustaining your energy across several days, rather than overcoming a single technical obstacle.
What Makes the Upper Mustang Trek Difficult?
1. Altitude and Elevation Gain
Altitude is one of the most important factors affecting the Upper Mustang Trek. Although Lo Manthang is lower than the main destinations on some other Himalayan treks, much of the route remains above 3,000 meters.
As elevation increases, the reduced availability of oxygen can make ordinary physical activity feel more demanding. You might notice that you become tired more quickly, breathe harder while climbing or need more frequent breaks.
Some route variations cross passes such as Nyi La, at approximately 4,010 meters. These sections can feel challenging, particularly if you are not accustomed to high-altitude walking.
Gradual ascent, sensible pacing and sufficient time to adjust to the elevation are essential. Remember that physical fitness does not prevent altitude sickness.
2. Rocky Trails and Uneven Terrain
Upper Mustang is not a uniformly smooth walking route. You will encounter gravel, loose stones, dry riverbeds, dusty paths and uneven village trails.
These surfaces require more attention than flat walking paths. Descending over loose stones can be particularly tiring because you must maintain your balance while controlling your steps.
Some sections also run alongside unpaved jeep tracks. Travelers who prefer traditional trails should discuss route options with their trekking agency before departure.
Good trekking boots with reliable grip and trekking poles can make uneven sections easier to manage.
3. Long Walking Days
Many itineraries involve approximately five to seven hours of walking on trekking days, although the duration varies according to the route, elevation gain and walking pace.
A day covering 10 kilometers on relatively gentle terrain is very different from a day involving repeated climbs and descents at 3,500 meters.
The accumulated fatigue can also make the later stages harder. Even if you feel comfortable during the first few days, your legs may become tired after several consecutive days of walking.
A realistic itinerary should allow time for breaks, meals and changes in walking pace rather than assuming that every section can be completed quickly.
4. Strong Winds and Dry Weather
Upper Mustang lies in the rain shadow of the Annapurna and Dhaulagiri ranges, making it considerably drier than many other parts of Nepal.
However, dry weather does not always mean comfortable trekking conditions. Strong afternoon winds, dust, intense sunlight and cold mornings can affect your energy and comfort.
Starting early can help you complete longer sections before the winds become stronger. Sunglasses, sunscreen, a windproof jacket and a face covering are also useful.
5. Remoteness and Basic Facilities
Accommodation and food are available along the established route, particularly in larger settlements such as Kagbeni and Lo Manthang. However, facilities can become more basic in smaller villages.
You should be prepared for simple lodges, variable hot-water availability and inconsistent internet or mobile connectivity.
Medical facilities are also limited compared with those in Kathmandu or Pokhara. This makes preparation, local guidance and a plan for responding to altitude-related problems particularly important.
Upper Mustang Trek Difficulty by Route Section
The traditional route toward Lo Manthang gradually takes you from the Kali Gandaki Valley into higher, drier landscapes. The following ratings are approximate because walking times and trail choices vary between itineraries.
Route section
Typical difficulty
Main challenge
Jomsom to Kagbeni
Easy to moderate
Initial altitude exposure
Kagbeni to Chele
Moderate
Gradual climb and rocky terrain
Chele to Syangboche
Challenging
Repeated climbs and high passes
Syangboche to Ghami
Moderate to challenging
High-altitude crossing and descent
Ghami to Tsarang
Moderate
Mixed ascents and descents
Tsarang to Lo Manthang
Moderate
Sustained walking at altitude
The sections around Chele, Syangboche and the higher passes can feel more demanding because of the elevation changes and exposed terrain.
The return journey also requires planning. Depending on the route, you may encounter long walking days or additional ascents and descents. Extended itineraries through places such as Yara and Tange can be more demanding than the classic route to Lo Manthang.
These ratings are practical guidance rather than an official grading system. Weather, fitness, altitude response and itinerary design all affect how difficult each day feels.
Is Upper Mustang Harder Than Other Nepal Treks?
Upper Mustang is generally less demanding in terms of maximum altitude than the Everest Base Camp Trek or Annapurna Circuit. However, it is not necessarily easier for every traveler.
The Everest Base Camp Trek reaches higher elevations, while the Annapurna Circuit involves crossing Thorong La Pass at approximately 5,416 meters. These routes generally present greater altitude-related demands.
Upper Mustang offers a different challenge: long walking days across dry, exposed terrain, with high passes on some itineraries.
If this is your first Himalayan trek, Ghorepani Poon Hill is usually an easier starting point. However, a reasonably fit beginner can complete Upper Mustang with adequate preparation and a sensible itinerary.
What Fitness Level Do You Need for Upper Mustang?
You do not need to be an athlete to complete the Upper Mustang Trek. A moderate level of general fitness, combined with consistent preparation, is usually a reasonable starting point for the standard route.
Before departure, aim to become comfortable with:
Walking approximately 8–12 kilometers in a day.
Hiking uphill and downhill on uneven terrain.
Staying active for several consecutive days.
Carrying a light daypack.
Maintaining a steady pace for several hours.
Managing stairs, inclines and rocky descents without excessive fatigue.
Previous hiking experience is helpful, but it is not essential. What matters is preparing your body for sustained activity rather than relying on occasional intense workouts.
How to Prepare for the Trek
If you are not already hiking regularly, allow around 8–12 weeks to build your endurance.
Start with brisk walking, cycling or other cardiovascular exercise. Gradually increase the duration of your weekend walks and introduce uphill terrain or stair climbing.
Strength training can also help. Focus on exercises such as squats, step-ups, lunges and calf raises to prepare your legs for repeated climbs and descents.
During the final weeks, try walking on two consecutive days to experience how your body feels when you are not completely rested.
Use your trekking boots and daypack during training so you can identify discomfort before departure.
You do not need to train for speed. Your goal is to walk steadily, recover well and remain comfortable across multiple trekking days.
Is Upper Mustang Suitable for Beginners, Older Trekkers and Families?
Beginners
Yes, beginners can complete the standard Upper Mustang Trek if they have reasonable fitness and choose an appropriate itinerary.
However, road access should not create the impression that the region is an easy sightseeing destination. Walking at altitude for several consecutive days remains physically demanding.
If you are new to trekking, avoid rushing the itinerary. Consider a porter if carrying a heavy backpack would make walking difficult.
Older Trekkers
Age alone does not determine whether someone can complete Upper Mustang. Walking ability, general fitness, joint health and tolerance for altitude are more useful considerations.
Older travelers may benefit from shorter walking days, additional rest and a porter. Those with existing medical conditions should discuss the demands of high-altitude travel with a qualified healthcare professional before departure.
Families With Children
Families may be able to complete Upper Mustang with suitable planning, but children need an itinerary appropriate to their stamina and experience.
Parents should monitor children carefully for altitude-related symptoms, particularly because younger children may struggle to explain how they feel.
A private itinerary with flexible walking days and vehicle transfers where practical can make the journey more manageable.
How Does the Season Affect Trek Difficulty?
Upper Mustang is unusual because its rain-shadow location makes trekking possible during Nepal’s monsoon season. Nevertheless, temperatures, wind and trail conditions change throughout the year.
Spring (March–May): Generally comfortable for trekking, although early spring can be cold and afternoon winds are possible.
Summer/monsoon (June–August): Upper Mustang is relatively dry, but dust, strong winds and conditions on approach roads can affect travel.
Autumn (September–November): Often offers stable weather, clear views and comfortable walking conditions.
Winter (December–February): Cold temperatures, possible snow on higher passes and reduced services can make trekking more challenging.
For many travelers, spring and autumn provide the most comfortable conditions. If you plan a winter trek, you will need suitable cold-weather equipment and a flexible itinerary.
Yes, road access can reduce some of the logistical and physical demands of traveling through Upper Mustang.
Vehicles can reach Lo Manthang, and transfers can shorten certain walking sections. Depending on road conditions and the itinerary, this flexibility can be particularly useful for families, older travelers or people who want to combine trekking with sightseeing.
However, Upper Mustang is not fully paved. Traditional trails, rough jeep tracks and exposed walking sections remain, especially farther north.
A jeep tour and a trekking itinerary are also different experiences. A jeep tour prioritizes road travel, while a trek involves walking through the landscape and villages.
If you want to reduce walking without giving up the experience entirely, consider a customized itinerary with strategic vehicle transfers. You can discuss options through the Upper Mustang tour page.
Do You Need a Guide or Porter?
Foreign trekkers entering Upper Mustang’s restricted area must follow the applicable permit and guided-trekking requirements. Confirm the current rules with a registered trekking agency before departure.
A guide helps with route decisions, local arrangements, cultural etiquette and coordination if weather or road conditions change. Local support is especially useful in remote areas where services and communication can be limited.
A porter is not essential for everyone, but carrying less weight can make a noticeable difference at altitude. You can keep a small daypack with water, snacks, warm layers and personal essentials while your main luggage is carried separately.
How to Make the Upper Mustang Trek Easier
A few practical decisions can reduce unnecessary fatigue and help you enjoy the journey.
Choose a realistic itinerary: Avoid squeezing too many walking hours into a short trip.
Ascend gradually: Give your body time to adjust to increasing elevation.
Walk at a steady pace: Do not rush to keep up with faster trekkers.
Start early when practical: This can help you avoid stronger afternoon winds.
Carry suitable equipment: Use broken-in boots, layered clothing, sun protection and trekking poles if helpful.
Stay hydrated and eat regularly: Upper Mustang’s dry climate can make fluid loss easy to overlook.
Take altitude symptoms seriously: Stop ascending and seek appropriate assistance if symptoms develop or worsen.
Headache, nausea, dizziness and unusual fatigue can be signs of acute mountain sickness. If symptoms worsen, descending to a lower altitude may be necessary. Severe symptoms, including confusion or difficulty walking straight, require urgent medical attention and immediate descent with assistance.
Good preparation reduces avoidable strain, but it cannot eliminate altitude-related risks.
Is the Upper Mustang Trek Right for You?
The Upper Mustang Trek is a good option if you want to explore Nepal’s distinctive landscapes, traditional settlements and Tibetan-influenced culture without technical climbing.
It is achievable for many reasonably fit travelers, including beginners who prepare properly. However, you should be comfortable with several hours of walking, uneven terrain, changing weather and elevations above 3,000 meters.
If you prefer a less physically demanding experience, a jeep tour may suit you better. If walking through traditional trails is a priority, choose an itinerary that allows sufficient time for trekking and acclimatization.
Ultimately, Upper Mustang is less about exceptional physical strength and more about preparation, pacing and adapting to altitude. Choose your itinerary according to your fitness and travel goals, and you will be better prepared to enjoy the region.
Frequently Asked Questions
Is Upper Mustang harder than Everest Base Camp?
Everest Base Camp generally involves greater altitude exposure, while Upper Mustang presents challenges from wind, dry terrain and sustained walking. The more difficult trek depends on your itinerary, fitness and response to altitude.
Can a beginner complete the Upper Mustang Trek?
Yes. Beginners with reasonable fitness can complete the standard route if they train beforehand, ascend gradually and allow enough time for the journey.
What is the highest point on the Upper Mustang Trek?
Lo Manthang is approximately 3,840 meters above sea level. Some route variations cross passes above 4,000 meters, so the highest point depends on your itinerary.
How many hours do you walk each day?
Many standard itineraries involve around five to seven hours of walking on trekking days. Longer routes, side trips and changes in terrain can increase the duration.
Is Upper Mustang difficult in winter?
Winter is generally more challenging because of freezing temperatures, possible snow on higher passes and reduced services. Suitable equipment and a flexible itinerary are essential.
Can you avoid walking on jeep roads?
Traditional footpaths remain available on many sections, depending on the route. Discuss your preference with your trekking agency so the itinerary can prioritize traditional trails where practical.
Do you need a porter for Upper Mustang?
No, not everyone needs one. However, a porter can reduce physical strain by carrying your main luggage, allowing you to walk with a lighter daypack.
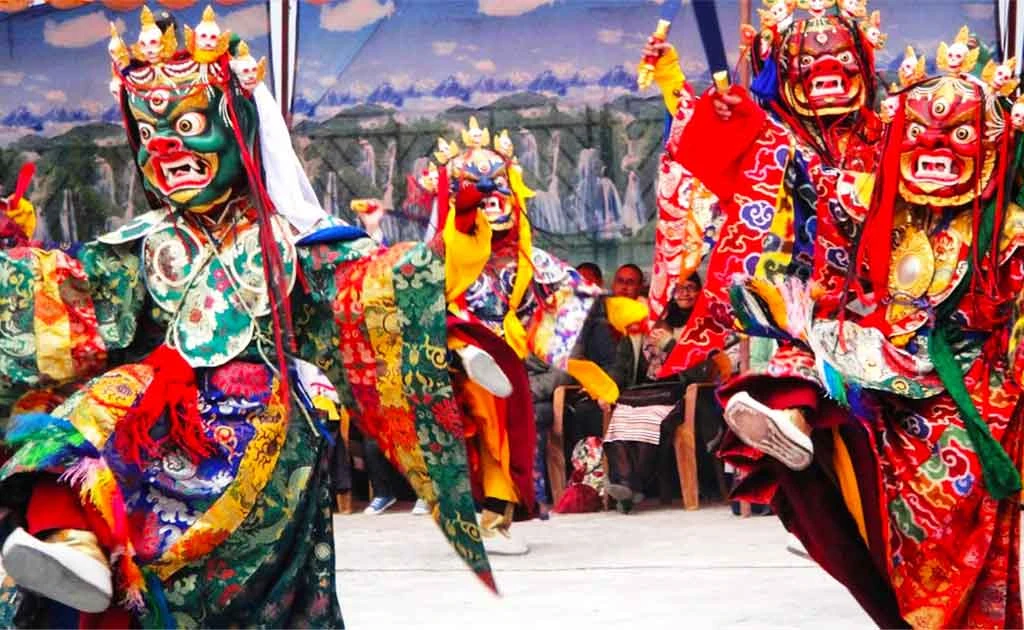
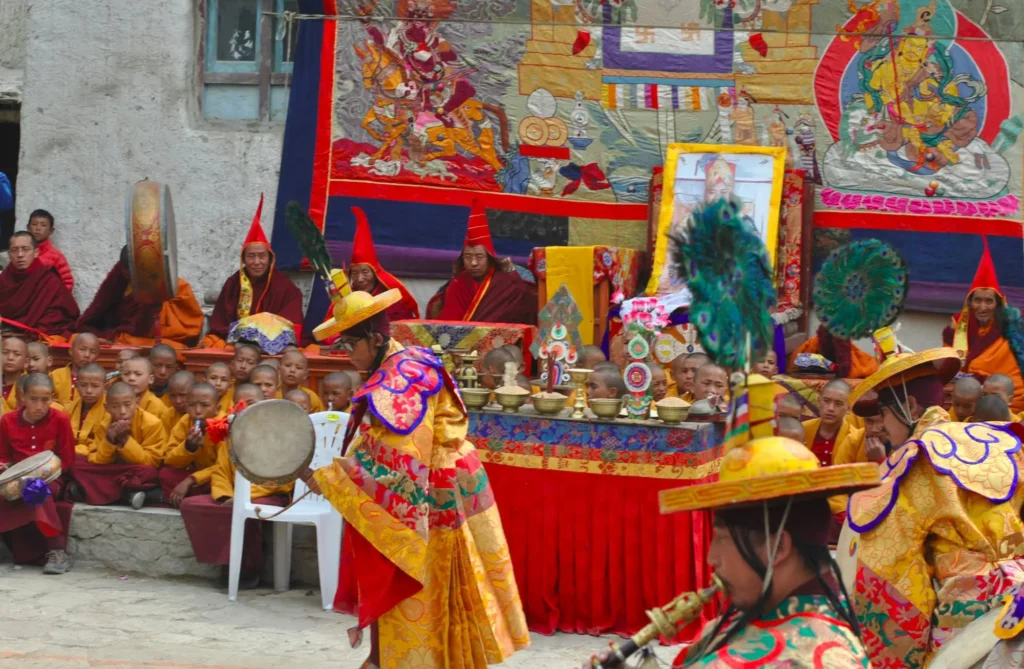
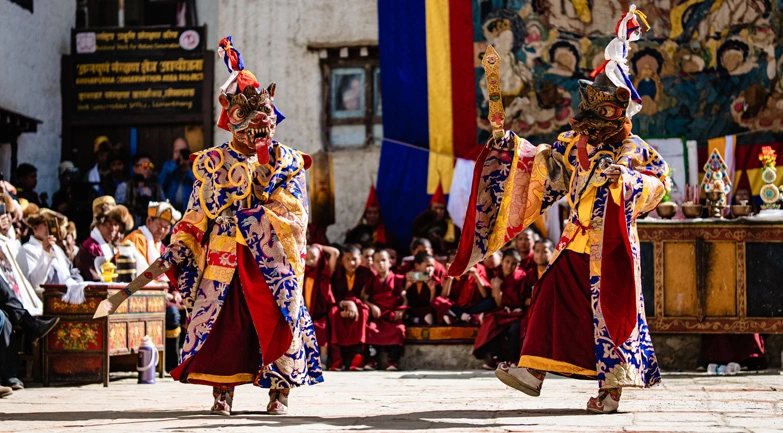
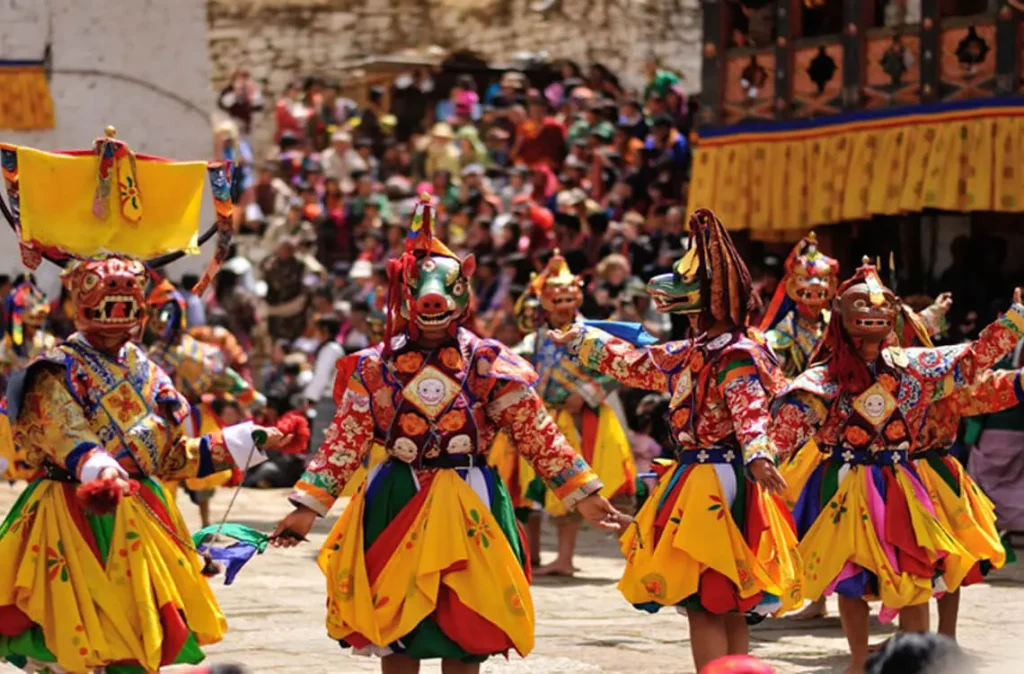
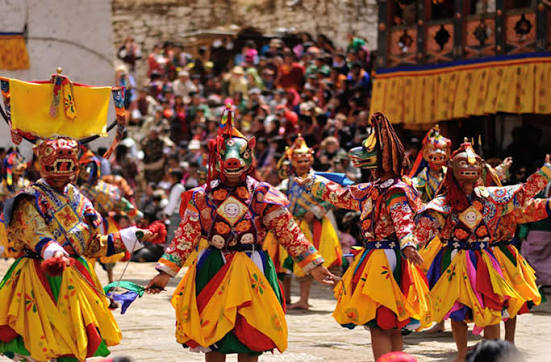
The Tiji Festival, also known as Tenchi, is a three-day Buddhist festival celebrated in Lo Manthang, Upper Mustang, Nepal. Rooted in Tibetan Buddhist traditions, the festival features sacred masked dances, ritual music, prayers, and ceremonies representing the defeat of destructive forces and the restoration of peace.
For travelers interested in Himalayan culture, Tiji offers an opportunity to witness a living religious tradition in one of Nepal’s most distinctive historical settings. The celebration takes place in the former Kingdom of Lo, surrounded by ancient monasteries, traditional Tibetan-style buildings, and the dramatic landscapes of Upper Mustang.
The 2027 Tiji Festival is scheduled for June 1–3, 2027. Visitors planning to attend should arrange their transportation, accommodation, and restricted-area permits well in advance.
Unlike a typical cultural show, Tiji is an important religious occasion for the local community. Understanding its meaning, respecting its customs, and allowing enough time to reach Lo Manthang can make your visit more rewarding.
Tiji Festival at a Glance
Festival information
Details
Festival name
Tiji Festival / Tenchi
Location
Lo Manthang, Upper Mustang, Nepal
Duration
Three days
2026 dates
May 14–16, 2026 — completed
2027 dates
June 1–3, 2027 — scheduled
Day 1
Tsa Chham — June 1
Day 2
Nga Chham — June 2
Day 3
Rha Chham — June 3
Religious tradition
Tibetan Buddhism / Vajrayana
Main attractions
Masked dances, rituals, prayers, and traditional music
Approximate elevation
3,840 metres
Main permit
Upper Mustang Restricted Area Permit
Best preparation
Book accommodation, transport, and permits ahead of time
Confirm the annual festival schedule with local organizers or your trekking agency before booking non-refundable travel arrangements.
What Is the Tiji Festival in Upper Mustang?
Tiji is a religious festival associated with the Vajrakila tradition of Vajrayana Buddhism. Its central story concerns Dorje Jono and the demon Man Tam Ru Ta, whose destructive actions are believed to have brought suffering to the Kingdom of Mustang.
Through ritual dances and ceremonies, the story represents the confrontation and eventual defeat of harmful forces. The festival expresses hopes for peace, prosperity, and harmony for all beings.
The celebrations take place in Lo Manthang, the historic walled settlement that once served as the capital of the Kingdom of Lo. Monks perform elaborate masked dances, accompanied by traditional instruments and ceremonial music.
For visitors, the experience combines religious observance with an opportunity to learn about Mustang’s cultural heritage. However, the ceremonies are not simply performances staged for tourists. They remain part of the community’s Buddhist traditions, and visitors should observe them respectfully.
Tiji Festival Dates for 2026 and 2027
Tiji follows the Tibetan calendar, so its dates change on the Gregorian calendar from year to year.
Year
Festival dates
Status
2026
May 14–16
Completed
2027
June 1–3
Scheduled
2028 onward
To be announced
Check annual dates
The three days of the 2027 festival are scheduled as follows:
June 1, 2027 — Tsa Chham: Opening ritual dances.
June 2, 2027 — Nga Chham: The central confrontation in the festival narrative.
June 3, 2027 — Rha Chham: The concluding rituals and symbolic banishment of destructive forces.
If you plan to attend all three days, aim to reach Lo Manthang before June 1. Arriving at least a day early gives you time to settle in and reduces the risk of missing the opening ceremony because of transportation delays.
For future dates, avoid relying on old travel articles. Always verify the relevant year’s schedule before finalizing your Upper Mustang tour.
History and Religious Significance of Tiji Festival
The history of Tiji is closely connected with Mustang’s Buddhist heritage and the former Kingdom of Lo.
The festival’s religious background is associated with Vajrakila, also known as Dorje Phurba or Vajrakumar. This Buddhist tradition focuses on overcoming obstacles and destructive forces.
The story of Dorje Jono and Man Tam Ru Ta gives these ideas a local expression. Rather than representing only a battle between two characters, the narrative symbolizes the removal of negativity and the restoration of balance.
The name Tiji is associated with Tenpa Chirim, a phrase connected with the well-being of sentient beings through Buddha’s teachings.
For the Loba people of Upper Mustang, the festival is an important expression of cultural identity. Its continuation connects present-day communities with the religious practices, monastic institutions, and history of the former kingdom.
Tiji takes place in Lo Manthang, in Nepal’s Upper Mustang region, close to the Tibetan border.
Situated at approximately 3,840 metres above sea level, Lo Manthang is known for its historic walls, traditional houses, monasteries, and Tibetan-influenced architecture. Its surrounding landscape features dry valleys, eroded cliffs, unusual rock formations, and barren mountain slopes.
The festival’s principal ceremonies are associated with Choede Monastery and its monks. Their participation reflects the religious foundations of the celebration.
The town’s historical setting also makes Tiji distinctive. Instead of attending a festival in a purpose-built venue, visitors experience the ceremonies within a settlement shaped by centuries of religious, cultural, and political history.
Because of the altitude, travelers should plan their journey carefully and allow time for acclimatization.
What Happens During the Three Days of Tiji Festival?
Each day follows a different part of the festival’s religious narrative. Monks wear elaborate masks and costumes, perform established dance sequences, and accompany the rituals with traditional music.
Day 1: Tsa Chham — June 1, 2027
The opening day introduces the festival’s central narrative and the destructive forces threatening the kingdom.
The masked dancers’ movements, costumes, and gestures communicate elements of the religious story. Drums, horns, and cymbals help establish the rhythm of the ceremonies.
For visitors, the first day offers an introduction to the festival’s visual symbolism and ritual atmosphere.
Day 2: Nga Chham — June 2, 2027
The second day develops the confrontation between Dorje Jono and the destructive demon.
The dances represent the struggle against harmful forces, with elaborate movements and ceremonial sequences performed by the monks.
This can be a particularly engaging day for visitors interested in Buddhist ritual arts and cultural photography. However, the religious significance of the performances should remain the priority.
Day 3: Rha Chham — June 3, 2027
The final day brings the ritual narrative toward its conclusion. Ceremonies symbolically represent the defeat and banishment of destructive forces.
Traditional accounts describe the use of ritual objects or representations of negativity that are discarded during the concluding ceremonies.
The final day expresses the festival’s central message: overcoming obstacles and restoring peace and harmony.
Exact ritual sequences and timings can vary, so consult local organizers or your guide for the current program.
Sacred Masked Dances and the Role of Choede Monastery
The masked dances, commonly known as Cham, are among the most recognizable features of Tiji.
The masks represent spiritual beings, protective forces, and other characters connected with the religious narrative. Their expressions, colours, and designs contribute to the meaning of the dances, while the performers’ gestures and movements follow established ritual traditions.
Traditional instruments, including long horns, drums, and cymbals, accompany the performances.
Choede Monastery plays an important role in the festival, with its monks responsible for the principal sacred dances. Preparation for the ceremonies extends beyond the public celebration, with traditional accounts describing a three-month retreat before the festival.
For visitors, understanding this preparation provides useful context. What may initially appear to be a colourful dance performance is part of a much longer religious process.
How to Get to Lo Manthang for Tiji Festival
There is no direct commercial flight from Kathmandu to Lo Manthang. Most travelers first reach Pokhara and continue toward Mustang by road, domestic flight, trekking route, or a combination of transport options.
The best approach depends on your budget, available time, physical ability, and interest in trekking.
Trekking Through Upper Mustang
A traditional trekking route follows the Kali Gandaki Valley northward, passing through villages and settlements such as Kagbeni, Chele, Ghami, and Tsarang before reaching Lo Manthang.
A trekking journey allows you to experience Mustang’s landscapes and local communities at a slower pace. It also provides opportunities to explore monasteries, traditional settlements, and the region’s distinctive architecture.
However, several days of travel and walking at increasing elevations require appropriate preparation. A well-planned itinerary should include adequate rest and acclimatization.
Reaching Mustang by Jeep or Flight
Travelers with limited time may choose a jeep-supported journey. Another option is to fly from Pokhara to Jomsom and continue north by road or on foot.
Flights to Jomsom are weather-dependent, and road conditions can change. A combination of transportation methods may help reduce travel time, but it still requires careful coordination.
For the 2027 festival, avoid an itinerary that depends on reaching Lo Manthang on June 1 itself. Building in extra time is more reliable than planning around the earliest possible arrival.
How Many Days Do You Need?
A trip of approximately 10–14 days can provide time for travel, acclimatization, cultural stops, the three festival days, and the return journey, depending on the route and transport arrangements.
Longer itineraries may suit travelers who want a more immersive trekking experience.
Lo Manthang has local guesthouses, teahouses, and small hotels catering to visitors. Facilities vary, and accommodation may be more basic than in Kathmandu or Pokhara.
During Tiji, demand can increase as travelers arrive specifically for the festival. Booking in advance is therefore advisable, especially if you need a room for all three days.
For the 2027 celebration, plan your accommodation around your arrival before June 1 and departure after June 3.
Your booking arrangements should account for possible travel delays as well as the fixed festival schedule. If you are joining an organized trek, confirm whether accommodation in Lo Manthang and overnight stops along the route are included.
Visitor Etiquette and Photography at Tiji Festival
Tiji offers excellent opportunities for cultural and travel photography, but visitors should remember that the ceremonies have religious significance.
Follow local instructions and observe the proceedings without interfering.
Dress respectfully around monasteries and ceremonies.
Stay outside restricted ritual areas.
Ask permission before photographing people at close range.
Avoid blocking local worshippers’ views.
Keep conversations quiet during important rituals.
Do not touch ceremonial objects or religious items.
Follow photography restrictions and instructions from organizers.
Patience often produces better photographs than moving constantly through the crowd. A respectful approach also helps protect the cultural experience for the local community.
Tiji Festival vs Yartung Festival
Tiji is not the only festival celebrated in Mustang. Yartung is another important regional celebration, known particularly for traditional horse racing, horsemanship, music, and community festivities.
Feature
Tiji Festival
Yartung Festival
Main focus
Buddhist rituals and masked dances
Horsemanship and community celebrations
Cultural character
Religious and ceremonial
Social, cultural, and sporting
Best for
Buddhist heritage, ritual arts, and history
Horses, local customs, and community life
Experience
Monastic traditions in Lo Manthang
Traditional festivities in Mustang communities
Choose Tiji if you are especially interested in Tibetan Buddhist traditions and sacred masked dances. Yartung offers a different perspective on Mustang’s cultural and social life.
Why Experience Tiji Festival With Hi Nepal Travels and Treks?
Planning a festival-focused journey requires more than reaching Lo Manthang. Your permits, accommodation, transportation, and arrival date all need to work together.
Hi Nepal Travels and Treks can help coordinate a trip around the festival, including applicable permit arrangements, guides, accommodation, transport, and route planning.
Depending on your preferences, the journey can focus on trekking, jeep-supported travel, or a combination of transportation methods.
A well-planned trip also leaves time to explore Mustang’s historic villages, monasteries, and landscapes instead of treating Tiji as a three-day stop.
If you are planning to attend the 2027 festival, you can discuss your Upper Mustang trip and organize the journey around the scheduled June 1–3 celebrations.
Frequently Asked Questions
What does Tiji mean?
Tiji is also known as Tenchi. Its name is associated with Tenpa Chirim, and the festival expresses hopes for peace, prosperity, harmony, and the well-being of sentient beings.
When is Tiji Festival in 2027?
The festival is scheduled for June 1–3, 2027, in Lo Manthang, Upper Mustang. Confirm the dates before making final travel arrangements.
How many days does Tiji Festival last?
Tiji lasts three days, featuring ritual dances and ceremonies associated with the story of Dorje Jono and the demon Man Tam Ru Ta.
Can tourists attend Tiji Festival?
Yes. International visitors can attend if they meet the applicable entry and restricted-area permit requirements. Visitors should respect local customs and follow the organizers’ instructions.
Do I need a guide to visit Upper Mustang?
International travelers must comply with the current restricted-area trekking rules, including applicable agency, guide, and group requirements. Confirm the latest regulations before booking.
What is the best way to reach Lo Manthang?
You can trek through Upper Mustang, travel by jeep, or combine a flight to Jomsom with onward road travel or trekking. The right option depends on your available time, budget, and preferred experience.
How early should I arrive for Tiji Festival?
Arriving at least one day before the opening ceremony is advisable. For the 2027 festival, reaching Lo Manthang by May 31 provides a useful buffer.
What is the Upper Mustang permit cost?
The published Upper Mustang Restricted Area Permit fee is USD 50 per person per day, with ACAP charged separately. Verify the current fees and regulations with the relevant authorities.
Is Tiji Festival suitable for first-time trekkers?
It can be suitable if the itinerary matches your fitness and experience. The main consideration is altitude, as Lo Manthang sits at approximately 3,840 metres. Allow time for acclimatization and seek professional medical advice about altitude-related risks.
Is Upper Mustang cold during Tiji Festival?
It can be cold, especially in the mornings and evenings. Wind and changing temperatures make layered clothing, an insulated jacket, and sun protection useful.
Can I take photographs during Tiji?
Photography may be possible, but restrictions can apply during religious ceremonies. Follow local instructions and ask permission before taking close-up photographs of individuals.
How much does a Tiji Festival trek cost?
The total cost depends on trip duration, transportation, accommodation, permits, guide and porter services, group size, and itinerary. Request a quotation based on your preferred travel arrangements rather than relying on a single general price.
Can I visit Upper Mustang outside the Tiji Festival?
Yes. Upper Mustang can be visited outside the festival period, subject to permit requirements, seasonal conditions, and current travel regulations. Visiting at another time allows you to explore Lo Manthang, its monasteries, villages, and distinctive landscapes without planning around the festival dates.
Plan Your Tiji Festival Trip for 2027
The Tiji Festival offers a rare opportunity to experience Mustang’s living Buddhist traditions in their historic setting. Its masked dances, ritual music, and ceremonies provide a deeper understanding of the cultural heritage of Lo Manthang.
The festival is scheduled for June 1–3, 2027. If you plan to attend all three days, arrange your permits, accommodation, and transportation early, and allow enough time to reach Lo Manthang before the opening ceremony.
With thoughtful preparation and respect for local traditions, Tiji can become a memorable part of your journey through Upper Mustang.
Introduction — Why Timing Matters for the Upper Mustang Trek?
Choosing the best time to trek Upper Mustang can make a significant difference to your experience. The region sits in the rain shadow of the Annapurna and Dhaulagiri mountain ranges, creating a climate that is considerably drier than much of Nepal. While heavy monsoon rainfall affects trekking areas such as Pokhara, the lower Annapurna region, and many trails in eastern Nepal, Upper Mustang can remain relatively dry during the same period.
That unusual climate makes Upper Mustang different from many of Nepal’s classic trekking destinations. June to August, normally considered monsoon months in Nepal, can still be a practical trekking period in Upper Mustang. The dry, desert-like landscapes, high Himalayan surroundings, ancient villages, monasteries, and Tibetan-influenced culture make the region particularly appealing during a season when many other trekking routes experience frequent rain.
However, “possible” does not always mean “best.” Weather conditions can vary considerably with altitude, wind, cloud cover, and the time of day. Upper Mustang is also a high-altitude, remote region, so travelers need to consider temperature changes, strong winds, trail conditions, accommodation availability, and transportation when choosing their travel dates.
For most travelers, spring and autumn remain the most comfortable seasons, particularly if clear mountain views, pleasant daytime temperatures, and reliable trekking conditions are priorities. Spring and autumn are the best general trekking seasons in Nepal, and October and November generally offer some of the clearest skies after the monsoon.
At the same time, travelers specifically looking for a monsoon trek in Nepal should not overlook Upper Mustang. Its rain-shadow geography is one of the region’s biggest advantages.
What Makes Upper Mustang’s Climate Different from Other Nepal Treks?
Upper Mustang is geographically and climatically different from the lush, humid trekking environments found on the southern side of the Himalayas. The region lies on the northern, leeward side of the Annapurna range, where the mountains block much of the moisture carried inland by the South Asian monsoon.
As moist air rises over the Himalayan mountains, much of its moisture is released as precipitation on the southern slopes. By the time the air reaches the Mustang region, considerably less moisture remains. This creates the rain-shadow effect responsible for Mustang’s dry, rugged environment.
The difference is substantial. According to the Nepal Tourism Board, Nepal receives around 80% of its precipitation during the June–September monsoon, while Mustang receives less than 300 mm of average annual rainfall.
This helps explain why Upper Mustang can look almost desert-like even while other parts of Nepal are green and receiving heavy rainfall.
The landscape is one of the clearest signs of this climate. Instead of dense forests and thick vegetation, trekkers encounter eroded cliffs, barren hills, dry valleys, rocky trails, caves, traditional villages, and broad Himalayan landscapes. The terrain has a strong Tibetan Plateau character, which is one of the reasons Upper Mustang is often described as one of Nepal’s most distinctive trekking regions. Upper Mustang is geographically part of the Tibetan Plateau and highlights its unique mountain culture and landscape.
But the rain shadow does not mean Upper Mustang has warm or easy weather throughout the year.
Wind is an important part of the Mustang experience. The region can become particularly windy during the afternoon, and temperatures can fall quickly when the sun disappears behind clouds or mountains. Nights are considerably colder than daytime conditions, especially at higher elevations.
Altitude is another factor. Lo Manthang sits at approximately 3,840 m (12,598 ft), and many trekking routes in Upper Mustang travel through similarly high terrain. At these elevations, travelers should be prepared for cold nights, intense sunlight during clear periods, dry air, and changing weather.
This is why choosing the right season is about more than avoiding rain.
It is about finding the right balance between temperature, wind, visibility, trail conditions, crowds, accommodation availability, and your personal trekking priorities.
Quick Answer: Best Months to Trek Upper Mustang at a Glance
If you want the short answer, March to May and September to November are generally the most favorable periods for an Upper Mustang trek, while June to August is an excellent alternative for travelers specifically looking for a dry monsoon destination. Winter is possible in principle but is generally less suitable because of cold temperatures, strong winds, snow, and reduced services.
Here is a practical overview:
Season
Months
Overall Conditions
Best For
Spring
March–May
Mild to warm days, increasingly favorable conditions
First-time trekkers, scenery, culture
Early Summer/Monsoon
June–August
Relatively dry because of the rain shadow, but windy conditions possible
Monsoon trekking, photographers, fewer crowds
Autumn
September–November
Generally dry, stable, and clear
Best overall trekking experience
Winter
December–February
Very cold, windy, possible snow and limited services
Experienced trekkers seeking solitude
For travelers who want the best combination of comfortable trekking conditions and clear Himalayan views, October and November are particularly strong choices. The clearest skies in Nepal are generally found after the monsoon, particularly during October and November.
If avoiding crowds is more important than having the most predictable conditions, late spring or the monsoon period can be attractive alternatives. Upper Mustang receives substantially fewer visitors during some of these months than during the major autumn trekking period, while the rain-shadow geography means rain is generally much less of a concern than it is on Nepal’s wetter trekking routes.
TheTiji Festival is another reason travelers may deliberately choose a particular period. The festival is held in Lo Manthang and is generally associated with May, although the exact dates vary according to the Tibetan lunar calendar. Nepal Tourism Board notes that many visitors travel to Lo Manthang specifically for the festival.
So, rather than asking only “When is Upper Mustang open?”, a better question is:
What kind of Upper Mustang experience do you want?
If you want clear skies and comfortable trekking, choose autumn.
If you want spring landscapes and cultural experiences, choose March to May.
If your priority is solitude and a winter atmosphere, December to February may be possible with careful planning, but winter conditions should not be underestimated.
Upper Mustang is a restricted trekking region, so seasonal planning should also include the necessary permits and logistics. Travelers entering restricted areas must obtain a special trekking permit through the Department of Immigration, and Upper Mustang is specifically listed as a restricted area.
For that reason, your travel season, permit arrangements, transportation, accommodation, guide, and itinerary should be considered together rather than separately.
Upper Mustang Weather Overview: The Rain Shadow Advantage
The defining feature of Upper Mustang weather is its position behind the Himalayas.
While the summer monsoon brings substantial rainfall to much of Nepal, the Upper Mustang region remains comparatively dry because it lies within the Himalayan rain shadow. As one of Nepal’s principal rain-shadow zones, Mustang offers conditions suitable for trekking even during the monsoon season.
The rain-shadow effect also helps create the region’s distinctive appearance. The Upper Mustang landscape is dominated by dry valleys, exposed rock formations, cliffs, and barren hills rather than the dense green vegetation commonly associated with Nepal during the rainy season.
However, travelers should avoid interpreting “dry” as “hot.”
Upper Mustang is a high-altitude Himalayan region, and temperatures can vary significantly between daytime and nighttime. Clear sunny afternoons can feel surprisingly warm when you are walking in direct sunlight, while early mornings and evenings can be very cold.
Temperatures in Nepal generally decrease by around 6°C for every 1,000 m increase in elevation, although actual conditions vary with location, weather, wind, and season.
The monsoon arrives in Nepal carrying moisture from the south. When this moist air reaches the Himalayan mountain ranges, it is forced upward.
As the air rises, it cools and releases moisture as rain or snow on the windward side of the mountains.
The Annapurna and Dhaulagiri ranges form a major barrier between the wetter southern side of the Himalayas and the Mustang region to the north. As a result, Upper Mustang receives far less monsoon precipitation than many other trekking destinations in Nepal.
This geographical effect is known as a rain shadow.
It is the reason Upper Mustang can remain comparatively dry during June, July, and August while places such as Pokhara may be experiencing frequent rainfall.
The Nepal Tourism Board specifically describes Mustang as a rain-shadow region and states that below 300 mm of annual rainfall is recorded in Mustang, compared with much higher rainfall in wetter areas such as Pokhara.
That contrast is important when planning a summer trek.
A traveler may leave Kathmandu or Pokhara during the monsoon and experience rain along the way, then arrive in the Mustang region to find a much drier, more arid landscape.
Nevertheless, the rain shadow does not guarantee completely rain-free conditions. Localized rainfall can still occur, particularly around transitional areas and during changing weather patterns. Travelers should therefore pack appropriate protection rather than assuming they will encounter zero rain.
The biggest challenges during the Upper Mustang monsoon season are often wind, dust, changing visibility, transportation conditions, and temperature variation, rather than prolonged rainfall.
Average Temperature and Rainfall by Month in Upper Mustang
There is no single reliable official month-by-month climate table covering every trekking location in Upper Mustang, because weather varies with elevation and exact location. Conditions in lower Mustang can differ noticeably from those around Lo Manthang and the higher villages.
For that reason, it is better to use seasonal patterns rather than present false precision.
The broad pattern is:
March–May: Temperatures gradually become more comfortable, with generally improving trekking conditions as spring progresses.
June–August: The wider Nepal monsoon is active, but Upper Mustang remains relatively dry because of its rain-shadow location.
September–November: Conditions generally become drier and more stable, with October and November particularly favorable for clear mountain views.
December–February: Temperatures drop significantly, and winter conditions can become harsh, especially at higher elevations. Strong winds, cold, snow, and limited services make this the least favorable season for most trekkers.
Rather than relying on a single temperature number, trekkers should prepare for large differences between daytime and nighttime temperatures and changing conditions as elevation increases.
This is especially important around Lo Manthang and other high settlements.
A sunny afternoon can feel comfortable while walking, but once the sun drops, the temperature can fall rapidly. Strong winds can make it feel considerably colder than the thermometer suggests.
That is why a good Upper Mustang packing list should always include warm layers, even when you are trekking during the warmer months.
Mustang is a region that can be cold in winter and windy year-round, underscoring the need to consider wind and temperature, not rainfall alone, when selecting your trekking dates.
For most travelers, the takeaway is simple:
Upper Mustang’s rain-shadow climate makes it unusually suitable for monsoon trekking, but autumn offers the strongest combination of stable weather, clear visibility, and comfortable trekking conditions.
Season-by-Season Breakdown for Trekking Upper Mustang
There is no single month that is perfect for every Upper Mustang trekker. The best season depends on what you value most, comfortable temperatures, clear mountain views, fewer people, cultural festivals, photography, or the chance to trek during Nepal’s monsoon.
Upper Mustang can be visited during several different seasons, but conditions change considerably throughout the year. Spring and autumn are generally the most favorable seasons for trekking, while summer offers a unique advantage because of the region’s rain-shadow climate. Winter is the most challenging period and requires considerably more preparation.
Spring (March–May) in Upper Mustang: Weather, Pros & Cons
March to May is one of the best periods to trek Upper Mustang, particularly for travelers who want a combination of improving weather, relatively comfortable daytime conditions, and the opportunity to experience the region before the main monsoon season.
Spring begins with colder conditions, especially in March, but temperatures gradually become more comfortable as April and May approach. The landscape remains dry and rugged, while warmer conditions make long trekking days more manageable than during winter.
April and May are particularly attractive months for an Upper Mustang trek.
One of the biggest advantages of spring is that you can enjoy the distinctive Mustang landscape without the intense cold associated with winter. The days generally become warmer, although early mornings, evenings, and higher elevations can still be cold.
Spring is also an important cultural season because the Tiji Festival is traditionally held in Lo Manthang during May. The festival follows the Tibetan lunar calendar, so the exact dates change each year. Travelers planning specifically around Tiji should confirm the official dates before booking flights, accommodation, and permits.
Advantages of Trekking Upper Mustang in Spring
Comfortable trekking conditions, particularly later in spring
Increasingly pleasant daytime temperatures
Generally dry trails
Excellent opportunities for landscape photography
Opportunity to combine trekking with the Tiji Festival
Less winter-related disruption than December–February
Potential Challenges
Spring is not completely predictable.
Wind can become noticeable during the afternoon, particularly in the exposed valleys of Mustang. Trekkers should also expect colder mornings and evenings at higher elevations.
May can also become warmer and busier as the main trekking season approaches.
For travelers interested in culture, photography, and a balance between weather and accessibility, April and May are excellent choices.
Summer/Monsoon (June–August) in Upper Mustang: Why It’s Actually Trekkable
For most of Nepal, June through August is the monsoon season. Heavy rainfall can make trails muddy, slippery, and difficult on many trekking routes.
Upper Mustang is different.
Because of its location in the Himalayan rain shadow, the region receives substantially less rainfall than Nepal’s wetter southern and central areas. This makes Upper Mustang one of the country’s most practical destinations for travelers who want to trek during the monsoon.
Nepal Tourism Board specifically identifies Mustang as a rain-shadow region and notes that trekking is possible there during the monsoon period.
That does not mean Upper Mustang becomes completely dry and cloudless every day.
Instead, the major advantage is that the amount and frequency of rainfall are generally much lower than on many other Nepal trekking routes.
For travelers with limited vacation windows during June, July, or August, this can be a major advantage.
Advantages of Trekking Upper Mustang in Summer
Much drier than many other Nepal trekking regions during monsoon
Excellent option for a monsoon trek in Nepal
Fewer trekkers than the main autumn season
Distinctive dry landscapes
Strong opportunities for photography
Good option for travelers who cannot visit Nepal during spring or autumn
What You Should Expect
The most noticeable issue during summer is often wind rather than rain.
Mustang’s valleys are highly exposed, and strong afternoon winds can blow through the region. Dust can also become an issue on exposed trails and roads.
Visibility can vary. Some days can be bright and exceptionally clear, while other days may have clouds or haze.
Transportation should also be considered carefully because getting to Mustang involves roads and, depending on the itinerary, flights through the Kali Gandaki corridor. Weather can still affect transportation even if Upper Mustang itself is relatively dry.
Therefore, travelers should build some flexibility into their itinerary rather than planning every transfer with zero margin for delays.
Overall, June to August is one of Upper Mustang’s biggest seasonal advantages.
Autumn (September–November) in Upper Mustang: Peak Season Explained
If someone asks for the best overall time to trek Upper Mustang, autumn is usually the safest recommendation.
September, October, and November bring some of the most favorable trekking conditions in Nepal, especially after the main monsoon period has ended.
The atmosphere generally becomes drier, visibility improves, and the Himalayan landscape can look exceptionally clear after the summer rains.
Spring and autumn are the best seasons for trekking, with October and November generally offering particularly clear skies.
For photographers and travelers whose priority is mountain scenery, this is a major advantage.
September
September is a transition month.
Early September can still experience some residual monsoon influence, while later September generally becomes increasingly stable.
The advantage of September is that it can provide a good balance between improving weather and somewhat lower visitor numbers than the busiest part of autumn.
October
October is arguably the strongest all-round month for an Upper Mustang trek.
The weather is generally dry, visibility is often excellent, and temperatures are more comfortable than during winter.
This makes October particularly suitable for:
First-time trekkers
Photography
Mountain views
Cultural exploration
Longer trekking itineraries
Travelers who want the most predictable conditions
The trade-off is demand.
Because October is one of Nepal’s major trekking months, popular accommodations and transportation can become busier.Booking your Upper Mustang trek in advance is recommended, particularly if you are traveling with fixed dates.
November
November remains an excellent month, but temperatures begin to fall as winter approaches.
The first part of November can still provide excellent trekking conditions, while late November can become significantly colder, particularly at night.
For travelers who want clear skies with somewhat fewer crowds than October, early November can be an excellent choice.
Winter (December–February) in Upper Mustang: Is It Possible?
Technically, winter trekking in Upper Mustang is possible, but it is not the season we would recommend for most travelers.
The biggest problem is not rainfall.
It is cold, wind, snow, and reduced services.
Nepal Tourism Board warns that winter in Mustang can be very cold and windy and recommends avoiding winter trekking because of unfavorable conditions.
As temperatures fall, higher sections of the route can become much more difficult. Snow and freezing conditions may affect trails and mountain passes, while some accommodation and local services may operate on a reduced basis because many residents traditionally move to lower areas during the harshest winter months.
This is particularly important aroundLo Manthang and other high-altitude settlements.
Can Experienced Trekkers Visit in Winter?
Yes, under the right circumstances.
Experienced trekkers with appropriate equipment, flexible schedules, suitable support, and a good understanding of high-altitude winter conditions may choose to travel during this period.
But the question is not simply whether the trek is technically possible.
The better question is whether winter provides the experience you actually want.
If your priority is reliable accommodation, comfortable walking conditions, clear mountain views, and straightforward logistics, autumn is a much better choice.
If your priority is solitude and a stark winter landscape—and you have significant high-altitude trekking experience—winter may offer a completely different Upper Mustang experience.
Best Time to Trek Upper Mustang for Clear Mountain Views
For many trekkers, the biggest reason for choosing a particular season is simple:
They want to see the Himalayas clearly.
Upper Mustang is surrounded by dramatic Himalayan terrain, including the Annapurna and Dhaulagiri ranges, and the region offers expansive views across dry valleys and high mountain landscapes.
Clear visibility depends on more than the calendar. Cloud cover, dust, wind, atmospheric haze, and recent weather conditions can all affect what you see.
Nevertheless, autumn generally offers the most reliable combination of clear skies and stable weather.
Months with the Clearest Skies and Best Visibility
October and November are among the best months for clear Himalayan views in Upper Mustang.
The main monsoon has ended, the atmosphere is generally drier, and the probability of prolonged cloud cover is lower than during the wetter months elsewhere in Nepal.
September can also provide excellent visibility, particularly later in the month as monsoon conditions retreat.
Spring is another strong option.
April and May can provide excellent mountain scenery, although increasing haze and afternoon cloud or wind can occasionally affect visibility.
For the clearest views, many trekkers also benefit from starting their daily walks relatively early.
Morning conditions are often calmer than the afternoon, when Mustang’s characteristic winds can become stronger.
Best Time for Photography in Upper Mustang
Upper Mustang is an exceptional destination for landscape photography because the scenery is visually different from the green valleys found on many other Nepal trekking routes.
Photographers can capture:
Dry Himalayan valleys
Red and ochre cliffs
Ancient settlements
Tibetan-style monasteries
Whitewashed houses
Prayer flags and mani walls
Dramatic mountain backdrops
Cave formations
High-altitude landscapes
Traditional Mustang architecture
October and November are excellent months for photography because clearer skies can provide strong contrast between the mountains, blue sky, and rugged terrain.
Spring is also attractive, especially for travelers who want softer light and a slightly different atmosphere.
For photographers, timing during the day matters as much as choosing the right month.
Early morning and late afternoon generally provide softer light, while the middle of the day can produce harsh shadows and strong glare at high altitude.
At the same time, the afternoon wind can create dust and make tripod photography more difficult in exposed areas.
A photographer planning an Upper Mustang trek should therefore consider not only the season but also daily trekking hours, wind conditions, and sunrise/sunset opportunities.
Trekking Upper Mustang During Monsoon Season (June–August)
Upper Mustang is one of the rare trekking destinations in Nepal where the monsoon season can actually be an advantage.
While many travelers associate June, July, and August with wet trails and persistent rain, Upper Mustang’s rain-shadow geography creates a very different environment.
Why Upper Mustang Is a Top Monsoon Trek Destination in Nepal?
The main reason is geography.
Upper Mustang lies behind the major Himalayan ranges, which shield the region from much of the moisture associated with the South Asian monsoon.
This makes the region substantially drier than many popular trekking routes farther south.
For someone searching specifically for a monsoon trek in Nepal, Upper Mustang should therefore be high on the list.
The region also has another advantage during this period: the landscape can feel quieter than during the major autumn trekking season.
With fewer visitors, trekkers may have more opportunities to experience villages, monasteries, and cultural sites without the same level of traffic found during peak periods.
However, fewer trekkers should not be confused with completely empty trails.
Upper Mustang remains a restricted trekking destination, and visitors must arrange the appropriate permits and travel through the required trekking arrangements.
What to Expect: Trail Conditions During Monsoon in Mustang?
The most important thing to remember is:
Monsoon in Upper Mustang does not mean guaranteed rain-free trekking.
Rain can still occur, and weather can change.
Road and flight conditions can also be affected outside the immediate Upper Mustang rain-shadow area. This is especially relevant for travelers entering the region via Pokhara and Jomsom.
Once trekking deeper into Upper Mustang, however, the landscape is generally much drier than the southern side of the Himalayas.
Expect:
Dry and dusty trails
Strong afternoon winds
Significant sun exposure
Rapid temperature changes
Occasional localized rain
Possible cloud or haze
Excellent dry-landscape scenery
Potential transportation delays before or after entering the region
A lightweight rain jacket should still be packed, even for a monsoon Upper Mustang trek.
The rain shadow reduces rainfall; it does not eliminate weather uncertainty.
For the best experience, plan shorter walking periods during the strongest afternoon winds, protect your eyes and face from dust, stay hydrated, and keep your itinerary flexible enough to accommodate transportation changes.
For travelers who can only visit Nepal during the summer months, this makes June through August a genuinely viable season for Upper Mustang, rather than a compromise destination.
Tiji Festival Timing – Trekking Upper Mustang for the Festival
The Tiji Festival is one of the most important reasons travelers choose to visit Upper Mustang in May. Held in the ancient walled city of Lo Manthang, the festival combines Buddhist traditions, masked dances, religious ceremonies, music, and centuries-old local culture.
Nepal Tourism Board notes that many visitors travel to Lo Manthang specifically for the festival, which is usually scheduled in May.
For travelers interested in combining trekking with cultural exploration, planning around Tiji can turn an already remarkable Upper Mustang trek into a particularly memorable experience.
What Is the Tiji Festival and Why It Draws Trekkers to Lo Manthang?
Tiji, also spelled Teeji, is a traditional Buddhist festival celebrated in Lo Manthang. It is associated with the local Tibetan Buddhist tradition and is known for its elaborate masked dances and religious performances.
The festival is traditionally linked to the story of Dorje Jono, a deity who defeats a destructive demon and protects the region from drought and other troubles.
For visitors, however, Tiji is much more than a performance.
It provides an opportunity to experience an important part of Upper Mustang’s living cultural heritage.
During the festival period, Lo Manthang becomes considerably more active as local residents, monks, visitors, and trekkers gather for the ceremonies.
The atmosphere is very different from visiting the city on an ordinary trekking day.
Travelers should remember that Tiji is a religious and cultural event, not simply a tourist show. Visitors should dress respectfully, follow local instructions, avoid disrupting ceremonies, and ask before photographing people at close range.
The festival is particularly attractive for travelers who want to combine:
Upper Mustang trekking
Tibetan Buddhist culture
Traditional architecture
Monasteries and religious sites
Photography
Local festivals
The historic city of Lo Manthang
Because Tiji takes place around May, it also fits naturally into the spring trekking season, which generally offers favorable conditions for traveling through Upper Mustang.
Tiji Festival 2027 Dates and How to Plan Your Trek Around It
The exact Tiji dates are determined according to the Tibetan lunar calendar, so they should always be confirmed from a reliable official or local source before finalizing travel arrangements.
For a 2027 trek, travelers should not rely on a generic “May” date published years in advance.
Confirm the exact 2027 festival dates before booking your international flights, domestic transportation, accommodation, and trekking itinerary.
This is particularly important because the festival attracts additional visitors to Lo Manthang.
If you are traveling specifically for Tiji, it is sensible to arrange your restricted-area permit, guide, transportation, accommodation, and itinerary well in advance.
Upper Mustang is a restricted trekking region, and the Department of Immigration states that permits for restricted areas are issued through authorized trekking agencies.
Best Time to Trek Upper Mustang by Traveler Type
The best time for an Upper Mustang trek depends on the type of experience you want.
A photographer may prefer a different month from someone who wants the warmest possible trekking conditions. A first-time high-altitude trekker may prioritize predictable weather, while an experienced traveler looking for solitude may deliberately choose a shoulder season.
Best Season for First-Time Trekkers
For most first-time trekkers, autumn is the easiest recommendation, particularly October and early November.
During this period, weather conditions are generally stable, visibility is often excellent, and temperatures are more comfortable than during winter.
The main advantage for beginners is predictability.
You are less likely to spend your trek dealing with the extreme cold associated with winter, while the heavy monsoon conditions affecting many parts of Nepal have already passed.
October is particularly suitable for first-time Upper Mustang trekkers who want to concentrate on enjoying the scenery and cultural experience rather than dealing with challenging seasonal weather.
Spring, especially April and May, is another excellent option.
However, anyone planning a May trek should check whether their dates overlap with Tiji and expect greater demand around Lo Manthang.
Regardless of season, Upper Mustang is still a high-altitude trek, so first-time trekkers should prepare for altitude, dry air, strong sunlight, cold nights, and potentially strong winds.
Best Season for Photographers and Landscape Enthusiasts
For photographers, October and November are among the strongest months.
The combination of dry conditions, clearer skies, dramatic landscapes, and strong Himalayan visibility can produce excellent conditions for landscape photography.
Upper Mustang is particularly distinctive because its scenery differs from the lush green valleys commonly associated with Nepal.
Instead, photographers can capture:
Barren Himalayan valleys
Red and orange cliffs
Dramatic rock formations
Ancient settlements
Tibetan-style architecture
Monasteries
Prayer flags
Mani walls
High mountain landscapes
Lo Manthang’s historic buildings
May is especially interesting for cultural photographers because of the Tiji Festival.
During the festival period, photographers have opportunities to document traditional costumes, masked dances, religious ceremonies, architecture, and everyday cultural life.
However, cultural photography requires sensitivity.
Always respect local customs and ask permission before photographing people at close range, especially during religious ceremonies.
Best Season to Avoid Crowds in Upper Mustang
If avoiding busy trekking periods is your priority, consider late spring, summer/monsoon, or the shoulder periods around the main autumn season.
The major autumn trekking period is popular across Nepal, and Upper Mustang also attracts travelers seeking its dry weather and clear mountain views.
By contrast, June through August can provide a quieter trekking experience while still benefiting from Upper Mustang’s rain-shadow climate.
This is one of the reasons Upper Mustang is unusual compared with many other Nepal trekking destinations.
You can potentially travel during Nepal’s monsoon season without experiencing the persistent rain found on many southern Himalayan trails.
Winter offers even greater solitude, but there is an important trade-off: fewer people does not automatically mean better trekking conditions.
The cold, wind, possible snow, and reduced services make winter considerably more demanding. Winter conditions in Mustang are extreme at higher elevations, and trekking is advised against.
For most travelers seeking fewer crowds without extreme winter conditions, late spring or summer is a better compromise.
Month-by-Month Trekking Conditions in Upper Mustang (2026)
Understanding Upper Mustang weather month by month helps you choose the right travel dates based on weather, visibility, crowds, and trekking conditions. Because conditions vary by elevation and location, the information below is a practical seasonal guide rather than an exact weather forecast.
Upper Mustang Trekking Conditions by Month
Month
Season
General Conditions
Best For
January
Winter
Very cold, windy, possible snow
Experienced trekkers
February
Winter
Cold with possible snow and limited services
Experienced trekkers
March
Spring
Cold mornings; conditions improving
Early-season trekking
April
Spring
Dry and increasingly comfortable
Excellent trekking
May
Spring
Favorable conditions; Tiji Festival
Tiji Festival & culture
June
Monsoon
Relatively dry due to rain shadow
Monsoon trekking
July
Monsoon
Dry compared with most of Nepal; windy
Monsoon trekking
August
Monsoon
Generally dry; occasional rain and wind
Monsoon trekking
September
Autumn
Conditions becoming more stable
Shoulder-season trekking
October
Autumn
Dry, clear, and comfortable
Best overall
November
Autumn
Clear but increasingly cold
Mountain views
December
Winter
Very cold; possible snow and strong winds
Experienced trekkers
January & February
January and February are the most challenging months for most Upper Mustang trekkers. Higher elevations can experience freezing temperatures, snow, and strong winds, while some local services may be limited.
March, April & May
Spring brings gradually improving conditions. April and May are particularly favorable, with more comfortable trekking conditions. May is also important for travelers planning to experience theTiji Festival in Lo Manthang.
June, July & August
Although these months fall within Nepal’s monsoon season, Upper Mustang lies in the Himalayan rain shadow, making it significantly drier than many other trekking regions. June to August can therefore be an excellent choice for monsoon trekking, although wind, dust, occasional rain, and transportation disruptions are still possible.
September, October & November
Autumn offers some of the most reliable trekking conditions of the year. September generally improves as the monsoon retreats, while October and early November are especially good for clear skies, mountain views, and comfortable trekking.
December
December marks the beginning of the harsh winter period. Temperatures fall significantly, and higher areas can experience snow and strong winds. Winter trekking is possible with specialist preparation but is not recommended for most travelers.
How Season Affects Upper Mustang Permits and Restricted Area Rules?
Weather determines when you may want to trek, but it does not remove the administrative requirements for entering Upper Mustang.
The current Department of Immigration trekking-route fee table lists the Upper Mustang permit at USD 50 per person per day.
This is important because older information online may still show a different Upper Mustang fee structure.
Always check the latest Department of Immigration information before publishing or booking, because government fees and trekking regulations can change.
In addition to the Upper Mustang restricted-area permit, travelers should also check the other permits or conservation-area entry requirements applicable to their itinerary.
Does Trekking Season Affect Permit Cost or Availability?
The Upper Mustang permit fee is not presented by the Department of Immigration as a seasonal rate in its current Upper Mustang fee table. The current listed rate is USD 50 per person per day.
However, seasonal travel can still affect the practical planning of your trek.
During peak periods such as October and November, transportation, accommodation, guides, and other trekking logistics can be in higher demand.
During winter, the issue is less about the permit itself and more about weather, accessibility, accommodation, and local services.
This is why arranging the permit alone is not enough.
A properly planned Upper Mustang trek should coordinate:
For travelers booking with Hi Nepal Travels and Treks, arranging the required restricted-area documentation in advance can make the planning process much simpler, particularly for fixed-date journeys or trips planned around the Tiji Festival.
Packing List by Season for Upper Mustang Trek
Upper Mustang’s dry climate can make packing seem simple, but the region’s high altitude, strong sunlight, wind, and large temperature differences between day and night require careful preparation.
Your packing list should change depending on when you travel.
What to Pack for Spring and Autumn Treks
Spring and autumn are the most popular seasons, so a versatile layering system works well.
Essential items include:
Layered trekking clothing
Warm fleece or insulated mid-layer
Windproof and waterproof outer shell
Comfortable trekking trousers
Thermal base layers
Warm hat and gloves
Sun hat or cap
UV-protection sunglasses
Sunscreen
Reusable water bottle or hydration system
Comfortable trekking boots
Warm sleeping bag suitable for the season
Headlamp
Personal medications and basic first-aid supplies
Power bank and charging accessories
Trekking poles
Lightweight rain protection
Do not underestimate the sun.
At high altitude, UV exposure can be intense even when temperatures feel cool, so sunglasses, sunscreen, and sun protection are essential.
What to Pack for Monsoon Season Trekking?
A monsoon Upper Mustang trek still requires rain protection even though the region lies in the rain shadow.
Pack:
Lightweight waterproof jacket
Waterproof protection for electronics
Quick-drying trekking clothing
Windproof layer
Sunglasses
Sun protection
Dust mask or buff
Trekking poles
Water-resistant backpack cover
Warm layers for cold mornings and evenings
Sturdy trekking shoes
A windproof layer is particularly useful because afternoon winds can be more noticeable than rainfall.
What to Pack for Winter Trekking in Mustang?
Winter requires a significantly warmer setup.
If attempting a winter trek, you should be prepared for:
Heavy insulated jacket
High-quality thermal base layers
Warm fleece or down layers
Insulated gloves
Warm hat
Neck gaiter or buff
Thick trekking socks
Winter-rated sleeping bag
Appropriate footwear for snow and freezing conditions
Sunglasses with strong UV protection
Sunscreen
Headlamp
Emergency supplies
Winter equipment should not be treated as optional.
Upper Mustang can become extremely cold at higher elevations, and weather conditions can change quickly.
For most travelers, however, the better solution is not simply carrying more winter equipment, it is choosing a more favorable trekking season.
Wind Factor – Why Afternoon Timing Matters Every Day in Upper Mustang?
One of the most important weather factors to understand before an Upper Mustang trek is wind.
Visitors often focus on rainfall when planning their trip, particularly because Upper Mustang is known as a monsoon-friendly destination. However, wind can have a much more noticeable effect on your daily trekking experience than rain, especially on exposed trails and during the afternoon.
The Kali Gandaki valley and the surrounding Mustang landscape are highly exposed to mountain winds. As the day progresses, winds can become stronger, creating dusty conditions and making exposed sections of the trail feel colder.
This is one reason experienced trekkers and guides generally prefer to start walking early and complete the most exposed sections before the strongest afternoon winds.
Understanding Mustang’s Daily Wind Patterns
Upper Mustang’s dry, open terrain offers little protection from the wind.
During clear weather, the sun warms the land and surrounding air, while differences in temperature and pressure across the deep valleys and surrounding mountains contribute to the characteristic daily wind pattern.
The exact strength and timing of wind varies according to season, elevation, valley, weather system, and location.
You should therefore avoid treating a particular hour as a guaranteed daily wind forecast.
Instead, use the general pattern as a planning principle:
Mornings are often calmer, while afternoon conditions can become increasingly windy.
This is particularly noticeable around exposed sections of the route.
Wind can also carry dust, which may reduce comfort and visibility. Travelers with sensitive eyes may find sunglasses or protective eyewear particularly useful.
The wind can make a relatively moderate walking temperature feel much colder. This is especially important during spring, autumn, and winter when temperatures can already be low.
How to Plan Daily Trekking Hours Around the Wind?
A practical strategy is to start trekking relatively early in the morning.
Early starts provide several advantages:
Cooler but often calmer conditions
Better morning visibility
More comfortable walking before afternoon winds increase
More time to complete the day’s distance
Greater flexibility if weather changes
Better opportunities for morning photography
Your guide can adjust the walking schedule according to the actual conditions on the trail.
For example, if strong winds are forecast or already developing, your guide may recommend an earlier departure or a shorter break at an exposed location.
Do not feel that you need to maintain a rigid schedule simply because your itinerary says you will walk for a certain number of hours.
Mountain weather should always take priority over an exact timetable.
For photographers, early starts have another advantage.
The softer morning light can produce excellent conditions for photographing Lo Manthang, cliffs, monasteries, villages, and Himalayan landscapes before the stronger midday sunlight and afternoon winds arrive.
Worst Time to Trek Upper Mustang (And Why)
There is no universally “impossible” month for every traveler, but mid-winter is generally the least favorable period for a conventional Upper Mustang trek.
The combination of low temperatures, strong winds, possible snowfall, frozen conditions, and reduced local services can make the journey substantially more demanding.
Trekking Challenges During Peak Winter Months
December through February presents the greatest seasonal challenges.
At higher elevations, temperatures can drop well below freezing, particularly at night. Snow can affect trails and passes, while icy conditions can make walking more difficult.
Another issue is local infrastructure.
Upper Mustang is a remote Himalayan region, and many communities have traditionally adapted their lives around the harsh winter. Some residents move toward lower areas during the coldest period, which can mean fewer open accommodation and service options.
This matters because a trek is not only about whether a trail can physically be walked.
You also need:
Accommodation
Food
Transportation
Communication
Permit arrangements
Emergency support
Local guides and logistics
Nepal Tourism Board advises against winter trekking in Mustang because of the region’s severe winter conditions.
For most visitors, there is therefore little reason to choose the harshest winter months when spring, summer, and autumn offer significantly easier alternatives.
Winter can still appeal to highly experienced trekkers seeking solitude, but it should be approached as a specialist high-altitude trip rather than a normal holiday trek.
Upper Mustang Trek Difficulty by Season
Upper Mustang is often described as a moderate-to-challenging trek, but season can significantly influence how difficult the route feels.
The physical challenge comes from a combination of:
High altitude
Long walking days
Dry air
Uneven and rocky terrain
Ascents and descents
Strong winds
Temperature changes
Remote locations
Limited services in some sections
The same route can feel considerably easier in October than during a cold winter day with strong winds.
How Altitude and Weather Combine to Affect Difficulty?
Altitude is one of the most important considerations.
Much of the Upper Mustang trekking route takes place at high elevation, with Lo Manthang located at approximately 3,840 m (12,598 ft).
At this altitude, your body has to work harder because there is less available oxygen than at sea level.
Weather can make the experience even more demanding.
Strong sun + dry air + long walking hours = increased dehydration and fatigue risk.
This is why travelers should not judge Upper Mustang difficulty solely by distance.
A relatively short walking day can still be demanding if you are ascending rapidly or dealing with strong wind and cold temperatures.
The best way to manage the challenge is gradual acclimatization, appropriate hydration, sensible pacing, adequate nutrition, and listening to your body.
If symptoms of altitude illness develop, they should never be ignored.
Do not continue ascending if you are experiencing serious or worsening altitude-related symptoms. Inform your guide immediately and follow professional medical advice.
Seasonal planning also helps. For most trekkers, spring and autumn provide the most manageable combination of weather and trail conditions.
Conclusion – Choosing the Right Season for Your Upper Mustang Trek
The best time to trek Upper Mustang depends on the experience you want, but the region’s rain-shadow climate gives travelers more flexibility than many other trekking destinations in Nepal.
If you want the best overall combination of stable weather, clear Himalayan views, and comfortable trekking conditions, choose October or November.
If you prefer spring conditions and want the possibility of experiencing the Tiji Festival in Lo Manthang, consider April or May.
If your travel schedule falls during Nepal’s monsoon season, don’t automatically rule out Mustang. June, July, and August can be excellent months for Upper Mustang trekking because the region lies in the Himalayan rain shadow.
If you want solitude, winter may seem attractive, but December through February is the most challenging period because of severe cold, wind, possible snow, and reduced services.
Ultimately, the best Upper Mustang trek is not simply about picking a month.
It is about matching the season to your fitness level, trekking experience, photography goals, cultural interests, tolerance for cold, available travel dates, and preferred level of solitude.
Whichever season you choose, plan your permits and logistics carefully. Upper Mustang is a restricted region, and the journey requires more preparation than an ordinary Nepal trekking route.
For travelers who want local assistance with permits, transportation, accommodation, guides, acclimatization, and itinerary planning, working with an experienced Nepal trekking agency can make the journey considerably smoother.
With the right season and preparation, Upper Mustang offers something few other places in Nepal can match: an arid Himalayan landscape, centuries-old Tibetan-influenced culture, dramatic mountain scenery, ancient monasteries, and a trekking experience that feels remarkably different from the classic routes of Nepal.
FAQs
Can You Trek Upper Mustang in the Rain?
Yes. Upper Mustang is one of Nepal’s best options for trekking during the monsoon because it lies in the Himalayan rain shadow. However, rain can still occur, and conditions can change. You should carry a lightweight waterproof layer and keep some flexibility in your itinerary. The larger practical concerns during monsoon can include wind, dust, changing visibility, and transportation conditions outside the rain-shadow area.
Is Upper Mustang Trek Possible in Winter?
Yes, but winter is not recommended for most trekkers. December through February can bring severe cold, strong winds, snow, and reduced services at higher elevations. Experienced trekkers with suitable winter equipment and strong logistical support may undertake the journey, but spring or autumn is a much better choice for most travelers.
What Is the Coldest Month in Upper Mustang?
January is generally among the coldest months, with December and February also experiencing severe winter conditions. Exact temperatures vary significantly depending on elevation, location, time of day, and weather conditions. Higher settlements and exposed areas can feel considerably colder than lower parts of Mustang.
How Many Days Do You Need to Trek Upper Mustang?
A typical Upper Mustang trekking itinerary commonly takes around 12–16 days, depending on the starting point, transportation arrangements, acclimatization schedule, and route. Longer itineraries allow more time for acclimatization and exploration, while shorter itineraries may use more road transportation. The right duration depends on whether you want a trekking-focused experience or a combination of trekking and vehicle travel.
Is Upper Mustang Good for a Monsoon Trek?
Yes. Upper Mustang is one of the best monsoon trekking destinations in Nepal. Its rain-shadow location means it receives considerably less rainfall than many popular trekking regions farther south. June, July, and August can therefore be excellent alternatives for travelers who cannot visit during spring or autumn.
What Is the Best Month to Trek Upper Mustang?
For most travelers, October is one of the best months for an Upper Mustang trek. It generally offers a strong combination of dry weather, good visibility, comfortable trekking conditions, and excellent Himalayan scenery. April, May, September, and November are also strong choices depending on your priorities.
Is April a Good Month for Upper Mustang Trek?
Yes. April is part of the spring trekking season and generally provides increasingly favorable conditions. It is a particularly good option for travelers who want to avoid the colder winter months while traveling before the main monsoon period.
Is May a Good Month to Visit Upper Mustang?
Yes. May can be an excellent month, particularly for travelers interested in the Tiji Festival in Lo Manthang. The exact festival dates vary each year according to the Tibetan lunar calendar, so travelers should confirm the dates before booking.
Is June a Good Time to Trek Upper Mustang?
Yes. June marks the beginning of Nepal’s monsoon season, but Upper Mustang’s rain-shadow geography makes it much drier than many other trekking destinations. It is a particularly good option for travelers seeking a summer or monsoon trek in Nepal.
Is July a Good Month for Upper Mustang?
Yes, with the right expectations. July falls within the Nepal monsoon season, but Upper Mustang remains relatively dry because of its rain-shadow location. Expect wind, dust, strong sunlight, and possible localized rain, and allow flexibility for transportation.
Is August a Good Time to Trek Upper Mustang?
Yes. August is another viable monsoon trekking month in Upper Mustang. The region’s dry climate makes it substantially more suitable for trekking than many wetter areas of Nepal during this period.
Is September a Good Month for Upper Mustang?
Yes. September is a transition period between monsoon and autumn. Later September can offer increasingly stable weather and improving visibility as the monsoon retreats.
Is October the Best Month for Upper Mustang Trek?
For many travelers, yes. October combines dry conditions, clear skies, excellent mountain visibility, and comfortable trekking temperatures. It is also one of the busiest trekking periods, so advance planning is recommended.
Is November Good for Upper Mustang Trek?
Yes. November remains one of the strongest months for trekking, particularly during the first half of the month. Temperatures begin to fall toward winter, but clear skies and dry conditions can make the month excellent for trekking.
Can You Trek Upper Mustang Without a Guide?
For foreign travelers entering the restricted Upper Mustang area, the required restricted-area permit must be arranged through an authorized trekking agency, and travelers should follow the current Department of Immigration requirements for restricted-area trekking. Because regulations can change, travelers should confirm the current requirements before departure.
How Much Is the Upper Mustang Permit?
The current Department of Immigration trekking-route fee table lists the Upper Mustang Restricted Area Permit at USD 50 per person per day. Other applicable permits or entry fees may be separate depending on your itinerary. Always verify the latest official fee before booking, because government regulations can change.
Does Upper Mustang Get Rain During Monsoon?
It can. The rain-shadow effect means Upper Mustang receives far less monsoon rainfall than many parts of Nepal, but it does not mean the region is completely rain-free. Pack basic rain protection and remain prepared for changing weather.
When Is the Best Time for Photography in Upper Mustang?
October and November are excellent for landscape photography because of generally clear skies and strong visibility. May can be especially rewarding for cultural photography because of the Tiji Festival in Lo Manthang. Early morning and late afternoon can provide softer natural light, although afternoon winds may make exposed photography more challenging.
When Is Upper Mustang Least Crowded?
Summer/monsoon and shoulder periods generally offer a quieter experience than the major autumn trekking season. Winter is quieter still, but the severe conditions make it unsuitable for most travelers. For a balance between fewer visitors and reasonable weather, late spring or summer can be a good option.
What Should I Pack for Upper Mustang?
Regardless of season, pack layered clothing, a warm insulating layer, wind protection, sun protection, sturdy trekking footwear, a reusable water bottle, personal medication, and appropriate rain protection. Your winter equipment should be substantially heavier than your spring or autumn setup.
Is Upper Mustang Very Windy?
Yes, wind is an important part of the Upper Mustang climate. Exposed valleys can become particularly windy during the afternoon. This is one reason many trekkers prefer an early start, completing longer or more exposed sections before the strongest winds develop.
What Time Should I Start Trekking Each Day?
There is no single fixed departure time for every route. However, early morning starts are generally advantageous because conditions can be calmer and visibility can be better. Your guide should adjust the daily schedule according to the route, weather, altitude, and actual wind conditions.
Few places in the Himalaya feel as untouched by time as Lo Manthang. Behind mud-brick walls that have stood for six centuries, this small capital of the former Kingdom of Lo guards a Tibetan Buddhist culture that has all but vanished across the border. Golden-hued cliffs, ancient monasteries painted with fading murals, and a fortress-like royal palace make it one of Nepal’s most extraordinary destinations.
Having guided and travelled through Upper Mustang across many seasons, we at Hi Nepal Travels and Treks put together this honest, practical guide to help you plan the journey properly, permits, timing, costs, and the local knowledge that turns a trip into an experience.
What Is Lo Manthang and Why It Matters
Lo Manthang is the ancient walled capital of Upper Mustang, a high-desert region in north-central Nepal that borders Tibet. Founded in 1380 by Ame Pal, it served as the seat of the Kingdom of Lo for over 600 years. Nepal formally absorbed the kingdom in 2008, but the last king, the Raja of Mustang, was recognised until then, making it one of the last living remnants of a Tibetan-style monarchy.
The town sits at roughly 3,840 metres on the arid Tibetan plateau. Its whitewashed walls enclose a maze of narrow alleys, chortens, and monasteries. Because the area was closed to outsiders until 1992, its culture stayed remarkably preserved.
Quick Answer: Lo Manthang is a medieval walled city in Upper Mustang, Nepal, once the capital of the Kingdom of Lo. It is famous for its 15th-century Tibetan Buddhist monasteries, desert landscape, sky caves, and the annual Tiji Festival.
Where Is Lo Manthang Located?
Lo Manthang lies in the northern part of the Mustang district, deep inside the rain-shadow of the Annapurna and Dhaulagiri massifs. The Kali Gandaki River, carving the world’s deepest gorge is your natural highway into the region.
Detail
Information
Region
Upper Mustang, north-central Nepal
Elevation
~3,840 m (12,600 ft)
Nearest Airport
Jomsom (STOL)
Gateway City
Pokhara
Distance from Tibet
~20 km
Permits Required for Upper Mustang
Upper Mustang is a restricted trekking area, so foreign trekkers need special permits and must follow stricter regulations than on standard trekking routes. The rules help regulate tourism in this culturally and environmentally sensitive region near the Tibetan border.
Restricted Area Permit (RAP): The current Department of Immigration fee for Upper Mustang is USD 50 per person per day. For example, a 10-day permit costs USD 500, while a 14-day permit costs USD 700.
Annapurna Conservation Area Permit (ACAP): The current Nepal Tourism Board park-entry fee table lists NPR 3,000 per foreign visitor for entry into the Annapurna Conservation Area.
TIMS Card and Licensed Guide: Upper Mustang is among Nepal's trekking routes where trekkers must be accompanied by a licensed trekking guide and obtain a trekking-agency-issued TIMS Card.
Registered Trekking Agency: The restricted-area permit must be arranged through a registered trekking agency rather than obtained independently by the trekker.
Here is where Upper Mustang breaks the usual Nepal trekking rules. Because it sits behind the great Himalayan wall, monsoon rains barely reach it. That means summer, otherwise a poor season for most Nepal treks, is a genuine window here.
Season
Weather
Notes
Spring (Mar–May)
Dry, warming, clear
Best views; Tiji Festival in May
Summer/Monsoon (Jun–Aug)
Mostly dry, warm days
Rare rain-shadow trekking window
Autumn (Sep–Nov)
Crisp, clear, cool nights
Excellent conditions, popular
Winter (Dec–Feb)
Very cold, some closures
Locals migrate south; harsh conditions
Winter brings bitter cold, and many locals leave for warmer areas, so teahouses and services thin out. Spring and autumn remain the most comfortable choices, while summer suits those who want to trek during Nepal's off-season.
The Tiji Festival: Lo Manthang's Cultural Highlight
If you can time your visit for May, the three-day Tiji Festival is unforgettable. Held in the central square of Lo Manthang, it re-enacts the myth of Dorje Jono defeating a demon to bring rain and prosperity to the valley.
Monks in elaborate masks and silk robes perform ritual dances over three days, watched by the whole community. It is one of the most authentic living festivals in the Himalaya, not a tourist show, but a genuine spiritual event.
Did You Know? Tiji dates shift each year according to the Tibetan lunar calendar, so book early. Accommodation in Lo Manthang fills quickly during the festival, and prices rise.
What to See in and Around Lo Manthang
Lo Manthang rewards slow exploration. Give yourself at least two full days here rather than rushing in and out.
Inside the Walled City
Jampa Lhakhang: The oldest monastery, dating to the early 15th century, home to a towering Maitreya Buddha and rare mandala murals.
Thubchen Gompa: A vast assembly hall with restored 15th-century wall paintings.
Chodey Gompa: The main active monastery where you may hear monks chanting.
The Royal Palace: A four-storey mud-brick building that once housed the King of Lo.
Beyond the Walls
Chhoser Sky Caves: A short ride north, these ancient multi-storey cave dwellings carved into cliffs are among Mustang's greatest mysteries.
Namgyal Monastery: A hilltop gompa serving as the region's high court and study centre.
Ghar Gompa (Lo Gekar): One of the oldest Buddhist sites in Nepal, linked to Guru Rinpoche.
Travel Tip: Many monasteries charge a small entry fee and forbid interior photography to protect fragile murals. Always ask permission before taking photos of people or sacred art.
The Classic Upper Mustang Trekking Route
The traditional trek follows the Kali Gandaki upstream through a landscape of eroded cliffs, ochre canyons, and cliff-perched villages. Here is a typical itinerary from Jomsom.
Day
Route
Elevation
1
Fly Pokhara–Jomsom, trek to Kagbeni
2,810 m
2
Kagbeni to Chele
3,050 m
3
Chele to Syangboche
3,800 m
4
Syangboche to Ghami
3,520 m
5
Ghami to Charang
3,560 m
6
Charang to Lo Manthang
3,840 m
7
Explore Lo Manthang & Chhoser
3,840 m
8–11
Return via Dhakmar, Ghiling, Chuksang
Varies
12
Trek to Jomsom, fly to Pokhara
2,720 m
Because the trail crosses several passes above 3,700 m, altitude matters. Ascend gradually and stay hydrated. For a deeper look at planning, see our full Upper Mustang trek guide.
Altitude and Health on the Trek
Lo Manthang sits below 4,000 m, so serious altitude sickness is less common than on Everest or Annapurna routes. Still, several passes push higher and the dry, dusty air can be tough.
Safety Tip: The strong afternoon winds in Mustang carry fine dust. A buff or face scarf and good sunglasses protect your eyes and lungs. Sun protection is essential at this elevation.
Lo Manthang Trek Cost Breakdown
Upper Mustang Cost is one of Nepal's more expensive trekking destinations because of its restricted-area permit, mandatory guide arrangements, and relatively high transportation and accommodation costs in this remote region.
For a roughly two-week trip, the following gives a realistic per-person estimate for 2026. Actual costs vary depending on your itinerary, group size, season, and whether you choose flights or road transportation.
Expense
Approx. Cost (USD)
Restricted Area Permit
$400-$500+
ACAP Permit
$22–$35
Licensed Guide (per day)
$25–$40
Porter (optional, per day)
$20–$30
Teahouse Lodging & Food (per day)
$30–$45
Pokhara–Jomsom Flights (return)
$200–$260
For a broader sense of daily spending, see our trek amenities cost guide and tips on budget trekking in Nepal. Don't forget to factor in fair tipping for your guide and porter.
Where to Stay in Lo Manthang
Accommodation is simple but comfortable. Lo Manthang has several teahouses and a couple of higher-end guesthouses catering to travellers who want more comfort. Expect twin rooms, shared bathrooms in basic lodges, and hearty local meals.
Rooms are limited during the Tiji Festival, so advance booking is vital. Our tips on booking teahouses and understanding typical teahouse food apply well here too.
What to Pack for Upper Mustang
The high desert brings intense sun by day and freezing nights, plus persistent wind and dust. Pack for extremes.
Warm down jacket and thermal base layers
Windproof outer shell
Buff or scarf for dust protection
High-SPF sunscreen and lip balm
Quality sunglasses (UV protection)
Broken-in trekking boots or trail runners
Reusable water bottle and purification
For gear decisions, compare trekking boots vs trail runners, review the full trek packing list, and consider whether you need a sleeping bag. You can also arrange rental gear in Kathmandu before you fly.
Common Mistakes to Avoid
Rushing the itinerary. People often try to reach Lo Manthang in a hurry and miss its atmosphere. Slow down.
Skipping the buffer day. Jomsom flights cancel often; without a spare day you risk missing everything.
Underestimating cold and wind. Even in summer, nights are cold and afternoon winds are fierce.
Photographing sacred sites without asking. Respect local customs; some interiors are strictly off-limits.
Booking last minute during Tiji. Permits, flights, and rooms sell out fast.
Why Travel With a Local Guide
Beyond the legal requirement, a knowledgeable guide transforms Upper Mustang. The murals, monasteries, and festivals carry layers of meaning you would never grasp alone. Local guides also read the weather, arrange jeeps, handle permits, and open doors - sometimes literally, to monasteries that are usually locked.
At Hi Nepal Travels and Treks, we work with licensed guides who know the Lo dialect, the monastery caretakers, and the safest ways to handle the region's unpredictable roads and flights. That local relationship is what makes the difference between simply seeing Lo Manthang and truly understanding it.
Expert Advice: If you have extra days, combine Upper Mustang with a visit to the pilgrimage site of Muktinath or explore Lower Mustang villages like Kagbeni, which offer a gentler introduction to the region's culture.
Nearby Trips to Combine With Lo Manthang
Because you'll be in the Annapurna and Mustang region anyway, consider extending your adventure. Popular pairings include:
The remote Nar Phu Valley for even wilder Tibetan-influenced landscapes.
The high-altitude Tilicho Lake trek.
A relaxed few days in Pokhara before or after, with plenty to do around Phewa Lake.
Final Thoughts
Lo Manthang is not the easiest or cheapest trek in Nepal, and that is exactly why it stays so special. Behind its ancient walls lies a way of life that survived where the rest of the Tibetan world changed forever. The red cliffs, the wind, the fluttering prayer flags, and the quiet chant of monks stay with you long after you leave.
Plan carefully, respect the culture, allow enough time, and travel with people who know the region well. If you're ready to explore the walled capital of Upper Mustang, the team at Hi Nepal Travels and Treks would be glad to help you sort permits, guides, flights, and a realistic itinerary that fits your pace and budget. Reach out whenever you're ready to start planning.
FAQ's
What is Lo Manthang?
Lo Manthang is the historic walled capital of the former Kingdom of Lo in Nepal’s Upper Mustang region. Located at around 3,840 meters, it is known for its ancient monasteries, traditional Tibetan-style houses, royal palace, narrow streets, and rich Himalayan culture.
Where is Lo Manthang located?
Lo Manthang is located in Mustang District of Gandaki Province in north-central Nepal, close to the Tibetan border. It lies within the restricted Upper Mustang area and is surrounded by the dramatic landscapes of the Trans-Himalayan region.
Why is Lo Manthang called the walled city?
Lo Manthang is known as a walled city because its historic settlement is enclosed by a traditional defensive wall with gates. The wall protected the ancient kingdom and helped preserve the town's distinctive medieval character.
What is Lo Manthang famous for?
Lo Manthang is famous for its ancient monasteries, historic palace, traditional Tibetan-influenced architecture, surrounding caves, Buddhist culture, and spectacular desert-like Himalayan landscapes. It is also an important destination on the Upper Mustang Trek.
How high is Lo Manthang?
Lo Manthang sits at an altitude of approximately 3,840 meters (12,600 feet) above sea level. Because of its elevation, travelers should allow enough time for acclimatization when visiting or trekking in Upper Mustang.
How do you get to Lo Manthang from Kathmandu?
The most common route is to travel from Kathmandu to Pokhara, continue to Jomsom, and then travel by road toward Lo Manthang. Travelers can also visit Lo Manthang as part of a longer Upper Mustang trekking or jeep journey.
Can you drive to Lo Manthang?
Yes, Lo Manthang can be reached by road from Jomsom through the Upper Mustang region. A 4WD jeep is generally preferred because the route includes rough, mountainous and unpaved sections.
What are the best places to visit in Lo Manthang?
Some of the main attractions include the Lo Manthang Royal Palace, Jampa Lhakhang, Thubchen Monastery, Chodey Monastery, the old city walls, traditional streets, and surrounding villages and caves. The nearby Chhoser area is also popular for its ancient cave settlements.
Can you visit Lo Manthang as part of the Upper Mustang Trek?
Yes. Lo Manthang is one of the major highlights and traditional destinations of the Upper Mustang Trek. Trekkers typically spend time exploring the walled city and nearby cultural sites before continuing or returning along the Upper Mustang route.
Do you need a permit to visit Lo Manthang?
Yes. Lo Manthang lies within Nepal's restricted Upper Mustang area, so travelers need the required restricted-area trekking permit. The permit requirements and fees can change, so it is best to check the latest regulations before traveling.
Do you need a guide to visit Lo Manthang?
Yes. Travelers visiting the restricted Upper Mustang region must follow the applicable guided-travel requirements and travel with an authorized trekking agency or guide. A local guide can also make it easier to understand the region's history, culture and monasteries.
What is the best time to visit Lo Manthang?
The best time to visit Lo Manthang is generally during spring (March–May) and autumn (September–November). These seasons usually offer favorable trekking conditions, clearer mountain views and more comfortable weather.
Can you visit Lo Manthang in winter?
Yes, but winter travel can be challenging because temperatures are very low and snow can affect roads and trekking routes. Some local services may also operate on a limited basis, so winter visitors should plan carefully.
What is the Tiji Festival in Lo Manthang?
The Tiji Festival is a major three-day Buddhist festival celebrated in Lo Manthang. It features traditional dances, religious ceremonies, colorful costumes and rituals based on Tibetan Buddhist traditions, making it one of the most culturally significant events in Upper Mustang.
How much does a trip to Lo Manthang cost?
The cost of a Lo Manthang trip depends on the itinerary, permits, transportation, accommodation, guide and porter services, and trip duration. A guided Upper Mustang journey generally costs more than trips to unrestricted trekking regions because of the restricted-area permit and additional logistical requirements.
Imagine sipping coffee in Pokhara at sunrise, then standing inside the towering Annapurna Sanctuary- less than an hour after takeoff, you’ll be standing atAnnapurna Base Camp, surrounded by some of the highest mountains on Earth, including Annapurna I (8,091 m). That is exactly what the Annapurna Base Camp helicopter tour delivers. It compresses a week-long trek into a single unforgettable morning.
But before you book, the biggest question is always the same: how much does it actually cost in 2026, and what do you get for the price?
After years of arranging these flights for travellers of every kind, we at Hi Nepal Travels and Treks have put together this honest, detailed breakdown. You will find real price ranges, package comparisons, seasonal advice, and the practical tips most websites leave out.
Quick Answer: Annapurna Base Camp Helicopter Tour Cost in 2026
Here is the short version for anyone in a hurry.
Sharing tour (per person, from Pokhara): approximately USD 450–600
Private charter (whole helicopter, from Pokhara): approximately USD 2,000–2,600 for up to 4–5 passengers
From Kathmandu (private): approximately USD 3,500–4,500
These are indicative 2026 ranges. Actual prices shift with fuel costs, season, group size, and operator. Always request a written quote before paying.
What Is the Annapurna Base Camp Helicopter Tour?
The Annapurna Base Camp (ABC) helicopter tour is a scenic mountain flight that takes you deep into the Annapurna Sanctuary and, in most cases, lands briefly at or near base camp itself at around 4,130 metres.
Instead of walking 7 to 12 days, you fly over lush valleys, terraced hills, and glaciers, then step out into a natural amphitheatre ringed by peaks like Annapurna I (8,091 m), Machhapuchhre (Fishtail), Hiunchuli, and Gangapurna.
It is ideal for travellers who are short on time, have limited fitness, or simply want a comfortable, high-impact mountain experience. Families, couples, older travellers, and luxury visitors love it. If you would rather earn the view on foot, compare it with the classic Annapurna Base Camp trek cost guide first.
Annapurna Base Camp Helicopter Tour Cost Breakdown 2026
Let’s look at pricing in more detail, because “how much” depends heavily on how you fly.
Tour Type
Departure Point
Approx. 2026 Cost
Best For
Sharing (Per Person)
Pokhara
USD 450–600
Solo travellers, couples, and budget-minded flyers
Private Charter
Pokhara
USD 2,000–2,600(up to 4–5 people)
Families, private groups, and travellers wanting flexible timing
Sharing (Per Person)
Kathmandu
USD 900–1,100
Travellers staying only in Kathmandu
Private Charter
Kathmandu
USD 3,500–4,500
Groups looking for a full-day helicopter experience
Pro Tip: Flying from Pokhara is almost always cheaper and faster than flying from Kathmandu, because Pokhara sits much closer to the Annapurna range. If your schedule allows, base yourself in Pokhara for the flight.
Why Sharing Tours Are So Popular
In a sharing tour, the helicopter is filled with individual passengers (usually up to 4–5) who split the cost. This dramatically lowers the price per head, often to a third of a private charter.
The trade-off is flexibility. You fly on the operator’s schedule, and the trip only runs if enough passengers book for that date. Weight limits also mean seat assignments and landing rotations are managed by the pilot.
Why Choose a Private Charter
A private charter gives you the entire helicopter. You control the departure time, you are not waiting on strangers, and the experience feels far more exclusive.
For a family of four or a group of friends, a private charter from Pokhara can actually work out similar per-person to a sharing flight, while offering more comfort and photo time. It is the top choice for luxury travellers and honeymooners.
What’s Included in the Helicopter Tour Price?
A trustworthy operator should clearly state what your package covers. Typically included:
Round-trip helicopter flight (Pokhara or Kathmandu to ABC and back)
Experienced high-altitude pilot
Landing at or near Annapurna Base Camp (weather permitting)
Airport transfers on the flight day (varies by operator)
ACAP permit and any required government fee.
Government taxes and service charges
Often NOT included:
Hotel accommodation before or after the flight
Travel insurance covering helicopter evacuation and high altitude
Personal expenses, tips, and meals beyond any breakfast stop
Extra charges if you exceed the standard baggage or weight limit
Important Note: Always ask whether the ACAP fee is included. Rules and fees are set by authorities and can change, so read our ACAP permit cost guide to understand what applies.
Weight Restrictions and Luggage Allowance
Helicopter flights to Annapurna Base Camp operate under strict weight limitations due to the high-altitude environment. Most operators request each passenger’s weight in advance to ensure safe flight planning and proper seating arrangements.
Passengers are generally advised to carry only a small daypack, as baggage allowances are limited. Heavy luggage can affect aircraft performance and may need to be left at your hotel or the operator’s office. If travelling with professional camera equipment or other bulky items, inform your operator before departure so suitable arrangements can be made.
Factors That Affect the Cost
Prices are not fixed. Here are the main things that move them up or down:
Departure city. Pokhara is cheaper than Kathmandu.
Season. Peak months (Oct–Nov, Mar–May) see higher demand and prices.
Fuel prices. Aviation fuel directly affects charter rates.
Group size. Sharing splits cost; small groups pay more per head for private flights.
Weight. High altitude limits payload, which can affect passenger numbers.
Operator quality. Established companies with strong safety records may charge slightly more, and it is worth it.
Budget Tip:Book a sharing flight during the shoulder season and depart from Pokhara for the lowest realistic price. Combine it with cheaper accommodation using our budget trekking tips to keep overall costs down.
Who Should Choose the Annapurna Base Camp Helicopter Tour?
Not every traveller wants—or is able—to spend a week trekking through the Annapurna region. The Annapurna Base Camp helicopter tour offers an excellent alternative for visitors who want to experience the Himalayas in just a few hours.
This tour is particularly suitable for:
Travellers with limited time who want to see the Himalayas without committing to a multi-day trek.
Senior travellers looking for a comfortable way to experience Annapurna Base Camp.
Families with children who may find high-altitude trekking physically demanding.
Couples and honeymooners seeking a memorable mountain experience.
Photographers and content creators who want breathtaking aerial views of the Annapurna Sanctuary.
People recovering from injuries or with moderate fitness levels who cannot complete a week-long trek.
If you enjoy trekking and cultural experiences, the classic Annapurna Base Camp Trek may still be the better option. However, if your priority is seeing the mountains comfortably within a limited schedule, a helicopter tour is one of Nepal’s most rewarding experiences.
Annapurna Base Camp Helicopter Tour Itinerary
Here is a typical morning flight from Pokhara. Timings are approximate and depend on weather.
Time
Activity
6:00 AM
Hotel pickup in Pokhara and transfer to Pokhara Airport helipad for check-in.
6:30 AM
Meet your pilot, attend a safety briefing, and prepare for boarding.
6:45 AM
Take off and enjoy a breathtaking helicopter flight over the Annapurna foothills, lush valleys, and traditional mountain villages.
7:15 AM
Land at or near Annapurna Base Camp (4,130 m / 13,550 ft), surrounded by towering Himalayan peaks.
7:20–7:35 AM
Spend approximately 15 minutes taking photos, enjoying panoramic views of Annapurna I, Machapuchare, Hiunchuli, and surrounding mountains, and experiencing the high-altitude alpine environment.
7:35 AM
Board the helicopter for the return flight. Depending on your package and weather conditions, enjoy an optional breakfast stop at a scenic mountain lodge.
8:30–9:00 AM
Arrive back in Pokhara and transfer to your hotel, concluding your unforgettable Annapurna Base Camp Helicopter Tour.
Did You Know? Some premium packages include a landing at a viewpoint lodge lower down (such as around Machhapuchhre Base Camp or a hillside restaurant) for a mountain breakfast. This helps your body adjust and gives you more relaxed photo time.
Best Time for the Annapurna Base Camp Helicopter Tour
Weather is everything on a mountain flight. Clear skies mean spectacular views; clouds mean delays or cancellations.
Season
Months
Conditions
Recommendation
Autumn
Sep–Nov
Clear skies, stable weather, best views
Best overall
Spring
Mar–May
Warm, blooming rhododendrons, good visibility
Excellent
Winter
Dec–Feb
Crisp, sharp views but cold; some snow delays
Good on clear days
Monsoon
Jun–Aug
Cloudy, rainy, frequent cancellations
Not recommended
Expert Advice: Book the earliest morning slot. In the Annapurna region, clouds usually build up by late morning, so early flights have the highest success rate. If you’re deciding on timing, our Best Time to Visit Annapurna Base Camp Guide is a useful read.
Weather Delays, Cancellations & Refund Policy
Mountain weather in Nepal changes quickly, and helicopter flights operate only when conditions are safe. Even during the best trekking seasons, morning fog, strong winds, or cloud cover can delay or cancel departures.
If your flight cannot operate due to weather:
Most reputable operators will reschedule your flight to the next available weather window.
If rescheduling is not possible, refunds are generally provided according to the company’s cancellation policy.
Flights are never guaranteed because pilot safety decisions always take priority over schedules.
For this reason, we strongly recommend keeping at least one extra day in your Nepal itinerary. A buffer day greatly increases your chances of completing the flight without affecting your onward travel plans.
Helicopter Tour vs Trekking to Annapurna Base Camp
Not sure whether to fly or walk? Here is an honest comparison.
Factor
Helicopter Tour
Trekking
Duration
2.5–5 hours total
7–12 days
Fitness needed
Minimal
Moderate to good
Cost
Higher per hour
Lower per day, more days
Altitude adjustment
Sudden (short exposure)
Gradual and safer
Cultural experience
Limited
Rich villages and teahouses
Best for
Short on time, comfort seekers
Adventure lovers, budget trekkers
If you have the time and fitness, the trek is deeply rewarding, and our Annapurna vs Everest Base Camp comparison can help you plan. If time is tight, the helicopter is unbeatable. Many travellers even combine both: trek partway and fly out.
Altitude and Safety: What You Must Know
Even though the flight is short, you go from around 800 metres in Pokhara to 4,130 metres in minutes. That rapid gain can cause mild dizziness, headache, or shortness of breath.
This is why pilots keep landings short, usually 5–15 minutes. Your body barely has time to react before you descend again.
Safety Tips:
Stay hydrated the day before and morning of your flight.
Move slowly at base camp; don’t run around for photos.
Tell your operator about any heart, lung, or altitude conditions.
Warning: Never pressure a pilot to fly or land in poor weather. Mountain flying demands respect. A postponed flight is far better than an unsafe one.
How High Does the Helicopter Fly?
Many travellers wonder how high the helicopter actually flies during the Annapurna Base Camp tour.
Most flights cruise above the valleys before gradually ascending into the Annapurna Sanctuary. The helicopter lands at or near Annapurna Base Camp (4,130 metres / 13,550 feet), depending on weather conditions and operational requirements.
Because the air is significantly thinner at this altitude, helicopters normally remain on the ground for only 5 to 15 minutes. This short landing minimizes altitude-related discomfort while allowing passengers enough time to enjoy the panoramic views and take photographs.
Pilots continuously monitor weather conditions, aircraft performance, and passenger safety throughout the journey, making adjustments whenever necessary.
What to Wear and Pack
Base camp is cold even in autumn, especially in the early morning. Dress in layers you can remove after landing back in warm Pokhara.
Packing Tips:
Warm jacket or down layer
Hat, gloves, and sunglasses (glare off snow is intense)
Sunscreen and lip balm
Comfortable shoes with grip
Camera or phone with a full battery (cold drains it fast)
A light daypack — keep it minimal due to weight limits
For a full checklist you can adapt, see our trek packing list. You won’t need heavy gear, but warm layers matter.
How to Book the Annapurna Base Camp Helicopter Tour
Booking is straightforward when you follow these steps:
Choose your departure city — Pokhara for value, Kathmandu for convenience.
Decide sharing vs private based on your budget and group size.
Pick a peak-season morning for the best weather odds.
Confirm inclusions in writing — permits, transfers, taxes.
Check the operator’s safety record and licensing.
Keep a buffer day in case weather forces a delay.
At Hi Nepal Travels and Treks, our licensed team arranges the entire experience, from hotel pickup to a professional, high-altitude pilot, and clearly explains what is and isn’t included. We would rather set honest expectations than overpromise on weather nobody can control.
Travel Tip: If you’re combining this with other adventures, we can bundle it into a wider itinerary. See our sample 10-day adventure itinerary for ideas, or explore fun add-ons in things to do in Pokhara.
Why Annapurna Base Camp Helicopter Tour Prices Change Every Year?
Helicopter tour prices in Nepal are reviewed regularly and may vary from one season to another. While published rates provide a useful estimate, the final cost depends on several operational factors.
Some of the main reasons prices change include:
Rising aviation fuel costs
Seasonal demand during spring and autumn
Aircraft maintenance and operating expenses
Government taxes or permit updates
Passenger numbers on shared flights
Currency exchange rate fluctuations
For this reason, prices shown online should always be considered indicative. Before confirming your booking, request a written quotation that clearly lists all inclusions, taxes, and any additional charges.
Is the Annapurna Base Camp Helicopter Tour Worth It?
For most travellers, yes. In under an hour, you witness a landscape that trekkers spend a week reaching. The value lies in time saved and the sheer drama of the flight.
It is worth it if you:
Have limited time in Nepal
Cannot trek for fitness or health reasons
Want a comfortable, memorable mountain experience
Are celebrating something special
It may not suit you if you:
Are on a tight backpacker budget
Crave the physical challenge and culture of trekking
Get anxious about small aircraft or sudden altitude
Be honest with yourself about which traveller you are. There is no wrong answer, only the right choice for your trip.
Combining Your Helicopter Tour With Other Experiences
Since you’ll likely be in Pokhara, make the most of it. The lakeside city is one of the most relaxing spots in Nepal.
Catch a golden sunrise at Sarangkot the day before your flight.
Go paragliding over Pokhara for another aerial thrill.
Booking a late-morning flight. Clouds ruin views. Always go early.
No buffer day. Weather delays happen; don’t schedule your international flight for the same evening.
Ignoring weight limits. High altitude reduces payload; heavy passengers may affect seating.
Skipping insurance. Ensure your policy covers helicopter and high-altitude activities.
Choosing on price alone. Safety and reputation matter more than saving a few dollars.
Conclusion: Plan Smart, Fly High
The Annapurna Base Camp helicopter tour is one of the most spectacular short adventures in Nepal. In 2026, expect to pay around USD 450–600 per person for a shared flight from Pokhara, or USD 2,000–2,600 for a private charter, with Kathmandu departures costing more.
Choose an early morning slot in autumn or spring, confirm exactly what your package includes, keep a buffer day for weather, and pack warm layers. Do that, and you’ll come home with images most travellers only dream of.
Remember that prices, fees, and regulations can change, so always confirm current details before booking.
Ready to fly into the heart of the Annapurnas? Get in touch with Hi Nepal Travels and Treks for an honest quote, licensed pilots, and friendly local advice tailored to your dates. We’re happy to answer questions, compare options, and help you build the perfect Nepal itinerary, no pressure, just genuine guidance.
Contact Hi Nepal Travels and Treks today for the latest 2026 pricing, available departure dates, and a personalised quote for your Annapurna Base Camp helicopter adventure.
Frequently Asked Questions
How much does an Annapurna Base Camp helicopter tour cost in 2026?
A sharing tour from Pokhara costs roughly USD 450–600 per person, while a private charter runs about USD 2,000–2,600 for up to five passengers. Kathmandu departures cost more due to the longer flight. Prices shift with season, fuel, and operator, so always request a written quote first.
How long is the tour?
From Pokhara, the round trip takes about 2.5 to 3 hours, including a short landing at base camp. From Kathmandu, allow 4 to 5 hours because of the extra flying distance and a possible refuel stop in Pokhara along the way.
Can you actually land at Annapurna Base Camp?
Yes, weather and space permitting, helicopters land at or near base camp at around 4,130 metres. Landings are brief, usually 5–15 minutes, to limit altitude exposure and manage engine performance. Occasionally pilots land slightly lower if conditions or crowding require it.
Is the helicopter tour safe?
It is generally safe with licensed operators, experienced pilots, and clear weather. Flights follow strict weight rules and only run in good conditions. Because mountain weather changes quickly, flights may be delayed or cancelled for safety. Always keep a buffer day in your plan.
What is the best time for the tour?
Late September to November and March to May offer the clearest skies and best views. Early morning flights are ideal before clouds form. Winter can be crisp and beautiful on clear days, while monsoon months from June to August see frequent cancellations.
Do I need a permit?
You enter the Annapurna Conservation Area, so an ACAP permit may apply. Reputable operators usually handle required permits within the package. Rules can change, so confirm inclusions and carry a passport copy on the flight day.
Will I get altitude sickness?
Serious altitude sickness is unlikely due to the short exposure, but some people feel mild dizziness or headache. Stay hydrated, move slowly at base camp, avoid alcohol the night before, and tell your operator about any health conditions in advance.
How many people fit in the helicopter?
Most tours use helicopters carrying up to five passengers, but high-altitude weight limits often reduce this. Pilots manage seating and landing rotations based on total weight to fly safely into the sanctuary.
Can families and older travellers join?
Absolutely. The tour is popular with families, couples, and older travellers because it needs little fitness. Just inform the operator of any medical conditions and follow the pilot’s guidance during the short high-altitude landing.
Should I fly from Pokhara or Kathmandu?
Pokhara is closer to the Annapurna range, so it is cheaper and faster. Kathmandu is convenient if you’re already there, but expect higher costs and a longer flight. If possible, base yourself in Pokhara for this tour.
What happens if the flight is cancelled?
If weather cancels your flight, reputable operators reschedule to the next available slot or refund according to their policy. This is why a buffer day is essential. Never book your international departure for the same day.
Is it worth the money?
For time-short travellers, those unable to trek, or anyone wanting a comfortable, dramatic mountain experience, it is very worthwhile. Budget backpackers or adventure lovers who want the full cultural trek may prefer walking to base camp instead.
Is breakfast included in the helicopter tour?
Some premium helicopter tour packages include breakfast at a mountain-view lodge after landing, while others cover only the helicopter flight. Always confirm what is included when booking.
Is there a luggage or baggage limit?
Yes. Helicopters operating at high altitude have strict weight restrictions. Passengers should bring only essential items in a small daypack and follow the baggage allowance provided by the operator.
Can children join the Annapurna Base Camp helicopter tour?
Yes. Children can join the tour when accompanied by an adult. Families should inform the operator in advance, so appropriate seating arrangements and safety guidance can be provided.
What helicopter is usually used for the tour?
Most operators use high-altitude helicopters such as the Airbus H125 (AS350 B3e) or equivalent aircraft, which are specifically designed for mountain operations in Nepal.
Can I book the tour at the last minute?
Yes, subject to aircraft availability and weather conditions. However, during the busy spring and autumn seasons, booking several days in advance is recommended to secure your preferred departure date.
Most travelers fly into Pokhara, glance at the wall of the Annapurnas, and march straight onto the Annapurna Base Camp or Mardi Himal trails. Few of them ever turn northeast toward the Madi River valley, where one of the largest Gurung settlements in Nepal sits quietly on a ridge below Annapurna II and Lamjung Himal. That village is Sikles, and the trail to reach it remains one of the Annapurna region’s best-kept secrets.
We have walked these slate-roofed lanes and shared Dal Bhat in family teahouses where you are often the only foreigner staying the night. If you want close mountain views, authentic village culture, and a route free of the dust and crowds that now plague the busier circuits, the Sikles Trek deserves a serious look for 2026.
What Is the Sikles Trek?
The Sikles Trek is a short, low-altitude village trek northeast of Pokhara that leads to Sikles, one of Nepal’s largest traditional Gurung villages at roughly 1,980 meters. It offers panoramic views of Annapurna II, Lamjung Himal, and the Madi valley, with cultural immersion rather than high passes, making it ideal for families and first-time trekkers.
This trail threads through terraced millet and rice fields, dense rhododendron and oak forest, and several smaller Gurung and Tamang hamlets. Because Sikles lies inside the Annapurna Conservation Area, the landscape stays protected and the air feels clean and unhurried. The whole circuit can be done comfortably in 3 to 5 days, which suits trekkers short on time.
Why Sikles Stays Overlooked
Sikles is overlooked mainly because it lacks a famous base camp or named pass to draw bucket-list trekkers. There is no Instagram-famous viewpoint with a signboard, no high-altitude record to chase, and limited marketing. What you get instead is genuine village life, empty trails, and unobstructed mountain views without the foot traffic.
The bigger trails near Pokhara pull almost everyone toward Ghorepani or Mardi Himal. Sikles, by contrast, feels lived-in rather than staged for tourism. Stone houses, water-powered grain mills, and grandmothers spinning wool on porches are part of daily routine here, not a performance.
Permits and Fees for 2026
The Sikles Trek requires two documents: the ACAP permit and the e-TIMS card. Sikles is not a Restricted Area, so no special RAP is needed, but it sits inside protected conservation land. Both permits are easy to obtain in Pokhara at the Nepal Tourism Board office before you start.
Permit / Fee
Foreigners
SAARC Nationals
ACAP Permit
NPR 3,000 (~$23 USD)
NPR 1,000
e-TIMS Card
NPR 2,000 (~$15 USD)
NPR 1,000
Carry passport-size photos and a copy of your passport for the paperwork. You can read more in our guides to the TIMS card and overall trekking rules and costs in Nepal. For your tourist visa, remember the standard fees: $30 USD for 15 days, $50 USD for 30 days, and $125 USD for 90 days.
Do You Need a Guide?
Sikles falls inside the Annapurna Conservation Area, where Nepal now strongly enforces the licensed-guide rule for foreign trekkers. While Sikles itself is not a Restricted Area requiring a guide by special permit law, hiring a licensed guide is the current expected practice. We recommend confirming the live rule with your operator before departure.
A local guide also adds real value here. Trail junctions in the Madi valley are not always marked, and a Gurung-speaking guide opens doors to homestays and stories that you would never access alone. If you are a solo female trekker, a guide is especially worth arranging.
Sikles Trek Itinerary: 4-Day Plan
The classic Sikles loop runs 4 days from Pokhara, beginning with a short drive to the trailhead and following the Madi River up to Sikles before looping back via forested ridges. Daily walking time stays moderate at around 4 to 6 hours, with gentle elevation gain well within safe limits.
Day
Route
Walking Time
Max Elevation
1
Pokhara to trailhead (drive), trek to Tangting
4–5 hours
1,600 m
2
Tangting to Sikles Village
5–6 hours
1,980 m
3
Sikles exploration & viewpoint, descend to Parche
4–5 hours
2,100 m
4
Parche to roadhead, drive to Pokhara
3–4 hours
1,400 m
Because the maximum sleeping elevation stays below 2,100 meters, altitude sickness is not a major concern on the standard loop. Still, if you extend toward Kapuche Glacier Lake at around 2,500 meters, keep your daily sleep-elevation gain modest and review our notes on altitude sickness.
The Kapuche Glacier Lake Extension
For trekkers wanting more, a 2-day extension from Sikles leads to Kapuche Glacier Lake, one of the lowest-elevation glacial lakes in Nepal at roughly 2,546 meters. The trail descends and climbs along the Seti tributary, ending at a turquoise lake fed directly by hanging glaciers below Annapurna III.
This add-on transforms the trek into a 6-7 day adventure and is best done with a guide who knows the river crossings. The terrain involves steep, narrow forest paths and occasional landslide-prone sections, so wear proper boots and trek poles.
Best Time to Trek Sikles
The best seasons for Sikles are autumn (late September to November) and spring (March to May), when skies are clear and rhododendrons bloom on the ridges. The trek is lower than most Annapurna routes, so it stays comfortable even in late autumn when higher trails turn cold.
Season
Conditions
Verdict
Autumn (Sep–Nov)
Clear skies, crisp air, stable weather
Best overall
Spring (Mar–May)
Rhododendron bloom, warm days, some haze
Excellent
Monsoon (Jun–Aug)
Heavy rain, leeches, lush green terraces
Wet but possible
Winter (Dec–Feb)
Cold nights, clear days, quiet trails
Doable, pack warm
Unlike the high-altitude crossings, Sikles remains walkable during the monsoon, though leeches and slippery trails make it uncomfortable. If you want a guaranteed dry summer trek, the rain-shadow regions of Upper Mustang and Upper Dolpo are far better monsoon choices. For more on timing, see our guide to the best time for the Annapurna region and trekking in October.
Getting to the Trailhead
Sikles begins with a 2-3 hour drive northeast from Pokhara to the road head near Tangting or Bhujung, depending on road conditions. Private jeep hire is the most reliable option, and rates fluctuate seasonally.
Public buses run partway but are slow and infrequent. We generally recommend a shared or private jeep, since the final stretch of road can be rough and unpredictable after rain. Build flexibility into your plans in case a landslide forces a longer walk-in.
Money, Charging, and Connectivity on the Trail
There are no ATMs beyond Pokhara, so carry all your NPR cash before leaving the city. Teahouses in Sikles, Tangting, and Parche operate on a small cash economy, and most extra services cost money on top of your room and meals.
Expect to pay roughly 200 to 500 NPR to charge a phone or power bank, similar amounts for a gas-heated hot shower, and a small fee for Wi-Fi where it exists. For connectivity, Ncell generally provides the strongest coverage throughout the Annapurna and Madi valley region, so buy a local SIM in Pokhara if you need to stay online.
Our breakdown of trek amenity costs explains these trail upcharges in detail, and our budget trekking guide helps you plan daily spending.
Food, Water, and Eating Well
Stick to fresh, locally grown carbohydrates on the trail, with the classic Dal Bhat (lentil soup, rice, and vegetable curry) as your reliable, refillable fuel. Lower-altitude villages like Sikles grow their own vegetables, so meals are fresher than on remote high routes, but we still recommend prioritizing vegetarian dishes.
For water, never buy plastic bottles. Carry a reusable bottle paired with a reliable purification system such as a UV purifier, a Sawyer squeeze filter, or chlorine dioxide drops. This keeps you healthy and protects the conservation area’s environment. Learn more about teahouse food on Nepal’s trails.
Gurung Culture and Trail Etiquette
Sikles is a deeply Gurung village with strong Buddhist and animist traditions, so respectful behavior matters. Always walk clockwise around mani walls, stupas, and chortens, keeping these sacred structures on your right side as you pass.
Before entering any monastery or village temple, remove your shoes and hat. Outdoor photography is fine, but never photograph inside monastery prayer halls unless a resident monk gives explicit permission. Ask before photographing people, and a smile goes a long way in these tight-knit communities.
Packing and Gear
Sikles is a low-altitude trek, so you need far less heavy gear than a high-mountain expedition, but layers still matter for cool evenings. A good base layer, fleece, light down jacket, and rain shell cover most conditions across the seasons.
If you do not own everything, you can easily arrange rental trekking gear in Kathmandu or Pokhara. Check our full trek packing list and our guide to choosing a sleeping bag for the right warmth rating.
Insurance and Safety
Standard travel insurance is not enough for any Nepal trek. Make sure your policy covers high-altitude emergency helicopter evacuation and treatment for AMS, HAPE, and HACE. While Sikles is lower-risk, accidents and rapid weather changes happen, and rescue coverage is essential.
The trail is gentle but includes some steep, slippery forest sections, especially near Kapuche. Trek with proper footwear, use poles on descents, and let your guide set a sensible pace.
Tipping Your Crew
Tipping is culturally expected in Nepal and forms a vital part of your guide and porter’s income. A standard guideline is 10% to 15% of your total trek cost, distributed among the crew at the end of the trip.
Hand tips over personally and thank your team directly. Our detailed guide and porter tipping guide breaks down realistic amounts for different trek lengths.
Who Should Choose Sikles?
Sikles suits trekkers who value culture over altitude, families with children, photographers, and anyone wanting a short escape from Pokhara without crowds. If you have already done the popular routes and want something quieter, this is the trail. Those craving high passes should look at the Mardi Himal trek or compare the Annapurna and Everest base camp options instead.
Pair Sikles with a few relaxed days exploring things to do in Pokhara, a boat trip on Phewa Lake, or a Sarangkot sunrise for a balanced trip.
Frequently Asked Questions
How many days does the Sikles Trek take?
The standard loop takes 3 to 5 days from Pokhara, with walking times of roughly 4 to 6 hours daily. Adding the Kapuche Glacier Lake extension stretches it to 6-7 days.
Is the Sikles Trek difficult?
No. It is rated easy to moderate. The maximum sleeping elevation stays around 2,100 meters, so altitude is not a serious concern, though some forest sections are steep.
Can I do the Sikles Trek solo?
Sikles sits in the Annapurna Conservation Area, where Nepal strongly enforces the licensed-guide rule for foreigners. We recommend hiring a licensed guide and confirming the current regulation before you travel.
How do I get to the Sikles trailhead?
Drive 2-3 hours northeast from Pokhara by private or shared jeep to the road head near Tangting or Bhujung. Confirm live jeep rates and road conditions in advance.
What is the best month for the Sikles Trek?
October and November offer the clearest skies and most stable weather. March to May brings rhododendron blooms and warm days with occasional haze.
Are there teahouses on the Sikles route?
Yes. Simple teahouses and homestays operate in Tangting, Sikles, and Parche. Facilities are basic, and most extra services like charging and hot showers cost an additional 200 to 500 NPR.
Is there Wi-Fi on the Sikles Trek?
Limited Wi-Fi exists in some teahouses for a small fee, but it is unreliable. An Ncell SIM card gives the most consistent mobile coverage in this part of the Annapurna region.
How much does the Sikles Trek cost?
Permits cost NPR 3,000 for ACAP and NPR 2,000 for e-TIMS. Daily teahouse costs, guide fees, and jeep transport vary, so budget realistically and carry all cash from Pokhara.
Can I see Annapurna from Sikles?
Yes. Sikles offers striking close views of Annapurna II, Annapurna IV, and Lamjung Himal directly above the village, especially at dawn from the upper viewpoints.
Is the Sikles Trek good for families?
Absolutely. Its low altitude, short walking days, and strong cultural experience make it one of the best family-friendly treks near Pokhara.
The Annapurna Circuit Trek is a true Himalayan adventure, one that takes trekkers deep into the heart of Nepal’s most diverse and dramatic mountain landscapes. Often ranked among the best treks in the world, this legendary route delivers a new thrill almost every day, from steamy lowland valleys to the stark, wind-swept heights of the high Himalaya.
Along the trail, trekkers pass through traditional Gurung and Thakali villages, ancient monasteries, sacred pilgrimage sites, and some of the most breathtaking scenery in the Annapurna region. The journey winds through lush forests, thundering rivers, glacial valleys, and high-altitude deserts before culminating at the iconic Thorong La Pass (5,416 m), one of the highest trekking passes on Earth.
What makes the Annapurna Circuit Trek truly unforgettable is its constant change: landscapes, climate, culture, and emotions evolve with every step. This guide highlights the major attractions during the Annapurna Circuit Trek, focusing on the places, viewpoints, and experiences that make this classic Nepal trek a once-in-a-lifetime journey for adventure seekers.
1. Besisahar to Chame – Lush Valleys, Rivers, and Traditional Villages
The Annapurna Circuit Trek officially begins in Besisahar, a lively town that marks the gateway to the Annapurna region. The lower trail gently introduces trekkers to Nepal’s rural mountain life before the terrain gradually becomes more alpine.
This scenic section of the trek takes you through:
Terraced rice fields carved into green hillsides
Suspension bridges crossing roaring rivers
Waterfalls fed by glacial streams cascading down cliffs
Authentic Gurung and Manangi villages untouched by mass tourism
Villages such as Jagat, Dharapani, and Chame offer warm Himalayan hospitality, traditional stone houses, and early glimpses of snow-capped peaks. Walking through these settlements provides a genuine insight into daily mountain life and sets the cultural foundation of the Annapurna Circuit Trek.
As the trail ascends toward Upper Pisang, the landscape changes dramatically. Lush greenery slowly gives way to dry, rugged terrain, massive cliffs, and Tibetan-influenced architecture. Upper Pisang itself is known for its stone houses, prayer flags, and panoramic mountain views.
One of the most striking natural attractions in this section is Paungda Danda, also known as Heaven’s Gate. This towering rock face rises abruptly above the Marshyangdi River, creating one of the most dramatic scenes on the Annapurna Circuit.
Beyond its visual impact, Paungda Danda holds spiritual significance for local communities, adding cultural depth to its natural beauty. This area marks the point where many trekkers realize they’ve entered the true high Himalayas.
3. Manang Valley – Acclimatization, Culture & Mountain Views
Manang (3,540 m) is one of the most important, rewarding, and major attractions during the Annapurna Circuit Trek. More than just an overnight halt, Manang is the heart of proper acclimatization and a place where Himalayan culture, scenery, and comfort come together.
Surrounded by towering peaks such as Annapurna II, Annapurna III, Annapurna IV, Gangapurna, and Tilicho Peak, the valley feels raw, powerful, and unmistakably high-altitude. Most trekkers spend an extra day here, not only for safety, but because Manang has so much to offer.
Major Attractions in Manang:
Acclimatization hikes to Gangapurna Lake and Ice Lake, offering breathtaking panoramic views
Visit to Braga (Braka) Monastery, one of the oldest and most important monasteries in the Annapurna region
Himalayan Rescue Association (HRA) altitude-awareness briefing for safe trekking
Cozy bakeries, coffee shops, and mountain lodges, a rare comfort at this elevation
Manang is often the point where trekkers feel fully connected to the Himalayas, physically, mentally, and emotionally.
👉 Hi Nepal Travels and Treks carefully schedules acclimatization days in Manang, ensuring a safer ascent and a more enjoyable trekking experience.
4. Explore Ancient Buddhist Monasteries Along the Annapurna Circuit
One of the most enriching cultural attractions during the Annapurna Circuit Trek is exploring ancient Buddhist monasteries and village gompas that have stood for centuries.
These sacred sites reflect Tibetan-influenced Himalayan Buddhism and offer a deeper understanding of the spiritual traditions that shape mountain life.
Notable Buddhist Monasteries on the Route:
Braga (Braka) Monastery near Manang, perched dramatically above the valley
Local village gompas in Upper Pisang, Kagbeni, and Manang
Prayer wheels, mani walls, and fluttering prayer flags along the trail
Stepping into these monasteries provides a peaceful contrast to long trekking days, offering moments of silence, reflection, and connection with the spiritual rhythm of the Himalayas.
5. Attend a Local Buddhist Puja Ceremony – A Spiritual Experience
Along the Annapurna Circuit Trek, timing may allow you to witness or participate in a local Buddhist puja (prayer ceremony). These ceremonies offer an authentic glimpse into Himalayan spirituality that goes beyond sightseeing.
During a puja, you can experience:
Monks chanting mantras in melodic rhythm
Butter lamps flickering against the mountain backdrop
Prayer flags fluttering in the crisp high-altitude air
For many trekkers, attending a puja becomes one of the most memorable cultural experiences of the trek, connecting you deeply to the local traditions and spiritual life of the region.
Tip: Respectful observation is key; photography is usually allowed, but follow the guidance of monks or local guides.
6. Tilicho Lake (Optional Side Trip) – A High-Altitude Gem
The side trek to Tilicho Lake (4,919 m) is one of the most rewarding detours and major attractions during the Annapurna Circuit Trek, offering an adventurous extension for trekkers with extra time and energy.
Turquoise waters that contrast dramatically with the barren surrounding landscape
Less crowded, offering a remote, serene trekking experience
Though the hike is physically demanding, reaching Tilicho Lake is immensely satisfying, rewarding trekkers with unparalleled mountain scenery and a profound sense of accomplishment.
Pro Tip: Proper acclimatization in Manang is essential before attempting this side trip to ensure a safe and enjoyable experience.
7. Yak Kharka & Thorong Phedi – Entering the High Himalayas
After leaving Manang Valley, the Annapurna Circuit Trek enters the high Himalayas, where the landscape becomes increasingly dramatic. Forests give way to barren alpine terrain, oxygen levels drop, and yaks replace mules as the main pack animals.
Key stops in this high-altitude stretch:
Yak Kharka – a small settlement surrounded by towering peaks, perfect for acclimatization and enjoying wide alpine vistas
Thorong Phedi – the last village before the Thorong La Pass, offering basic lodges and breathtaking views
These settlements provide:
Vast, unbroken alpine scenery
Crystal-clear night skies, ideal for stargazing away from light pollution
A growing sense of anticipation and preparation before crossing Thorong La Pass
Trek Tip: Take it slow in this section; proper pacing helps prevent altitude sickness and lets you fully absorb the beauty of the high Himalayas.
8. Thorong La Pass (5,416 m) – The Pinnacle of the Annapurna Circuit
Thorong La Pass is the ultimate highlight and a major attraction during the Annapurna Circuit Trek and a milestone for every trekker. At 5,416 meters, it is one of the highest trekking passes in the world, offering both a physical challenge and a visual feast.
Why Thorong La is Unforgettable:
Panoramic views of Annapurna, Dhaulagiri, and Mustang
A true test of endurance, resilience, and mental strength
A surreal experience of walking beneath a sky full of stars if you start the climb before dawn
The summit is marked by prayer flags fluttering in the wind, and the sense of achievement is unmatched. Many trekkers describe it as the most emotional and empowering moment of the entire trek.
Trekking with experienced guides from Hi Nepal Travels and Treks ensures safe navigation, proper acclimatization, and support for this challenging section.
9. Muktinath Temple – Spiritual & Cultural Landmark
Descending from Thorong La Pass, trekkers arrive at Muktinath (3,800 m), one of Nepal’s most sacred pilgrimage sites. This serene location is revered by both Hindus and Buddhists, making it a unique convergence of faiths in the high Himalayas.
Why Muktinath is Special:
Holy pilgrimage site with spiritual significance for multiple religions
108 stone water spouts (Muktidhara) used for ritual cleansing
An eternal natural flame temple that symbolizes divine presence
Peaceful surroundings offering a moment of reflection after the challenging Thorong La ascent
The combination of spirituality, stunning mountain backdrop, and calm ambiance makes Muktinath a highlight not only for religious pilgrims but also for trekkers seeking cultural immersion and inner peace.
Tip: Arrive early in the morning to enjoy the tranquil atmosphere and observe the rituals without crowds.
10. Kali Gandaki Gorge – The World’s Deepest Gorge
From Muktinath, the trail follows the Kali Gandaki River, flowing between Annapurna I and Dhaulagiri, forming the world’s deepest gorge. This section is not just about scale; it’s a journey through history, culture, and geology, and major attractions during the Annapurna Circuit Trek.
Highlights of the Kali Gandaki Gorge:
Wind-swept valleys that reveal the raw Himalayan terrain
Ancient salt trade routes, once a vital link between Tibet and Nepal
Fossilized ammonites (shaligrams) embedded in the valley cliffs, considered sacred by Hindus
Villages like Kagbeni and Marpha, showcasing strong Tibetan and Thakali cultural influences
Walking through the gorge offers trekkers a rare opportunity to witness how geography and culture intertwine. From dramatic cliffs to historic villages, the Kali Gandaki Gorge is a living museum of the Himalayas.
Tip: Stop in Kagbeni for a tea break and explore the old monasteries and traditional stone architecture; it’s a perfect cultural pause on your trek.
11. Ride a Horse in the Mustang Region – A Unique Himalayan Experience
In Lower Mustang, especially around Jomsom and Kagbeni, horses remain a vital part of daily life and transportation. For trekkers, a short horse ride is more than a novelty; it’s a chance to experience traditional Himalayan travel firsthand.
Why Horse Riding in Mustang is Special:
Experience local transport traditions used for centuries in the Mustang region
Explore ancient trade routes, once traveled by salt caravans connecting Tibet and Nepal
Enjoy dramatic desert landscapes from a new perspective, with the barren Himalayan plateau stretching before you
A horse ride here provides a slower, more immersive way to enjoy Mustang’s unique terrain, culture, and scenery, a memorable highlight for adventure and culture lovers alike.
Tip: Hire horses locally through your teahouse or trekking agency like Hi Nepal Travels and Treks to ensure safety and proper guidance.
12. Marpha Village – Apple Orchards & Thakali Culture
Often called the most picturesque village on the Annapurna Circuit, Marpha is a cultural and sensory delight. Nestled in the Kali Gandaki valley, the village combines natural beauty, traditional architecture, and rich local heritage.
Highlights of Marpha:
Apple orchards and traditional apple brandy production
Whitewashed stone houses and clean, quaint streets
Thakali culture and cuisine, including local dishes like Thakali Khana Set
Marpha is the perfect spot to pause, enjoy a meal, and soak in village life while trekking. Its charm and hospitality make it a must-visit cultural stop on the Annapurna Circuit Trek.
Tip: Try the local apple brandy and take a stroll along the stone-paved streets for the perfect photo opportunity.
13. Tatopani – Relax in Natural Hot Springs
After days of trekking through high-altitude valleys, Tatopani is a rejuvenating oasis. Known for its natural hot springs, it offers both physical relief and a chance to unwind before continuing the journey.
Why Tatopani is a Trekker Favorite:
Natural hot springs by the Kali Gandaki River for relaxation
Muscle recovery after long trekking days and high passes
Warm, subtropical climate providing a comfortable contrast to the alpine chill
Soaking in the hot springs surrounded by mountains is an unforgettable way to recharge and reflect on the trek’s progress.
Tip: Early morning or late evening visits are quieter and more peaceful, giving you a true Himalayan retreat experience.
14. Trek Through Blooming Rhododendron Forests – Nature’s Colorful Canvas
One of the most beautiful natural attractions on the Annapurna Circuit Trek is walking through rhododendron forests in full bloom. These forests transform the trail into a vibrant tapestry of color, especially in spring.
What to Know:
Best time to visit: Spring (March–April), when rhododendrons are at their peak
Where to see them: Ghorepani, Chame, and lower elevations along the trail
Why it’s special: Bright reds, pinks, and whites contrast dramatically with snow-capped peaks and alpine valleys
Hiking through these forests offers not just scenic beauty but also a chance to connect with the rich biodiversity of the Annapurna region, making every step visually rewarding.
Golden light on Annapurna, Dhaulagiri, and Machhapuchhre peaks
Short and accessible hike, ideal for a spectacular view without added fatigue
One of Nepal’s most photographed viewpoints, perfect for memorable trek photos
The sunrise at Poon Hill provides a serene finale to the trek, leaving trekkers with a lasting impression of the Himalayas’ majesty.
16. Enjoy the Night Sky – Himalayan Stargazing
Far from urban lights, the Annapurna Circuit offers some of the clearest night skies in Nepal, a hidden treasure for trekkers.
Where to Experience It:
Manang, Yak Kharka, Thorong Phedi, and other high-altitude stops
What you’ll see: Countless stars, recognizable constellations, and the Milky Way stretching across the sky
The serene silence of the mountains makes stargazing even more magical
For many trekkers, gazing at the star-filled sky is a peaceful, almost meditative experience, often remembered as one of the highlights of the journey.
17. Interact With Local People – Authentic Himalayan Connections
Beyond landscapes and landmarks, one of the most meaningful aspects of the Annapurna Circuit Trek is interacting with local communities.
What Makes This Special:
Visit Gurung villages in lower regions, Thakali and Manangi settlements higher up
Share meals, stories, and cultural traditions with locals
Learn firsthand about Himalayan lifestyles, agriculture, and mountain hospitality
These interactions add depth and richness to the trek, providing memories and insights that no scenic viewpoint alone can offer.
Tip: Trekking with a local operator like Hi Nepal Travels and Treks enhances cultural experiences and ensures respectful, authentic engagement with communities along the trail.
Why the Annapurna Circuit Trek Is Truly Special
The Annapurna Circuit Trek is not just another Himalayan trek; it’s a journey through constantly changing landscapes, cultures, and experiences. Every day brings something new, keeping trekkers engaged and inspired from start to finish.
What Makes This Trek Unique:
Diverse landscapes: From lush tropical valleys and roaring rivers to barren alpine deserts and high mountain passes
Rich cultural variety: Trek through Hindu villages, Tibetan-influenced settlements, and centuries-old monasteries
Challenging yet rewarding trails: Easy walking sections give way to extreme high passes, including the iconic Thorong La
Ever-changing experiences: Each day feels like a completely new adventure, combining scenery, culture, and personal achievement
No other trek in Nepal offers such a blend of natural beauty, cultural immersion, and adventure all in one route.
Trek the Annapurna Circuit with Hi Nepal Travels and Treks
The major attractions during the Annapurna Circuit Trek make this journey one of the most remarkable experiences in the Himalayas. This trek is far more than just walking from one village to another; it’s an exploration of Nepal’s diverse landscapes, cultures, and traditions. From the challenging heights of Thorong La Pass and the spiritual serenity of ancient monasteries to the vibrant greenery of subtropical forests and the hospitality of mountain villages, every step reveals something unforgettable.
Along the way, trekkers are rewarded with breathtaking vistas of snow-capped peaks, roaring rivers, glacial valleys, and high-altitude deserts. These attractions combine adventure, culture, and natural beauty into a journey that touches both the senses and the soul.
For anyone seeking thrilling adventure, cultural immersion, awe-inspiring scenery, and a profound sense of personal achievement, the Annapurna Circuit Trek is an experience that delivers it all. The memories, stories, and perspectives gained on this trail stay with you long after you return, making it a truly once-in-a-lifetime Himalayan journey.
Frequently Asked Questions (FAQs)
What are the major attractions during the Annapurna Circuit Trek?
Major attractions include Thorong La Pass, Manang Valley, Muktinath Temple, Tilicho Lake, Kali Gandaki Gorge, Marpha village, Tatopani hot springs, rhododendron forests, and Buddhist monasteries.
Is Thorong La Pass the hardest part of the Annapurna Circuit Trek?
Yes, Thorong La Pass (5,416 m) is the most challenging section due to altitude and long trekking hours, but proper acclimatization makes it achievable.
Can beginners enjoy the Annapurna Circuit Trek?
Yes, beginners can complete the trek with good fitness, proper acclimatization, and guidance from experienced trekking companies.
When is the best time to see rhododendron forests on the Annapurna Circuit?
But what about the Mardi Himal trek cost? Is it affordable?
Venturing into the heart of the Himalayas lies a land of dreams for many adventurers, and the Mardi Himal Trek offers a perfect blend of natural beauty and cultural richness. But before you lace up your hiking boots, it’s crucial to understand the costs involved. This guide will help you with the Mardi Himal Trek budget, covering everything from permits to food.
A Hidden Gem in the Annapurna Region
The Mardi Himal Trek is often overshadowed by its more famous neighbors, like the Annapurna Base Camp Trek. However, it offers a more intimate experience with fewer crowds, stunning vistas, and a chance to explore the untouched beauty of the Himalayas.
While popular routes like the Everest Base Camp or Annapurna Circuit see a constant flow of trekkers, the trek to Mardi Himal remains relatively quiet. This solitude allows for a more personal encounter with nature, providing a sense of peace and tranquility. Fewer crowds mean you can enjoy the trails and viewpoints without the hustle, making it perfect for those seeking a more contemplative experience.
The trek offers unparalleled views of the Annapurna Range, including iconic peaks like Machapuchare and Hiunchuli. As you ascend, each vantage point presents a new perspective, with the landscape transforming dramatically from lush forests to alpine meadows. These vistas are not only breathtaking but offer a photographer’s paradise, with every turn revealing postcard-worthy scenery.
Cultural Encounters with the Gurung Community
Beyond the natural splendor, the Mardi Himal Trek offers a rich cultural experience. The trail weaves through traditional Gurung villages, where you can witness and partake in local customs and traditions. The hospitality of the Gurung people living in this region is legendary, offering trekkers a warm welcome and a glimpse into a way of life that has remained largely unchanged for generations.
Major Mardi Himal Trek Expenses to Consider
When planning for the trek, it’s essential to consider several key expenses that will contribute to the overall Mardi Himal trek cost. Here’s a detailed breakdown of Mardi Himal Trek Expenses:
Trekking Permits for Mardi Himal
To trek in the Annapurna region, you’ll need two essential permits:
Annapurna Conservation Area Permit (ACAP)
Having the ACAP is mandatory for all trekkers to enter the Annapurna region. It is a must for the maintenance and conservation of the area. The funds collected are used to preserve the natural environment and support sustainable tourism practices, ensuring the region remains pristine for future generations.
TIMS Card (Trekkers’ Information Management System)
The TIMS card is essential for safety and security. It helps authorities keep track of trekkers in the region, making it easier to assist in case of emergencies. Obtaining these permits is straightforward and can be done in Kathmandu or Pokhara, ensuring you are compliant with local regulations.
These permits not only ensure your safety but also contribute significantly to the local economy and conservation efforts. By purchasing them, you play an important part in preserving the natural beauty and cultural heritage of the Himalayas, making your trek more sustainable and impactful.
Mardi Himal Trek Cost for Accommodation
Accommodation along the Mardi Trek is relatively affordable. Tea houses are the primary option, and they provide basic amenities like a bed, blanket, and sometimes a warm shower.
Tea House Experience
Tea houses along the route offer a cozy and comfortable place to rest. While amenities are basic, they provide everything a trekker needs after a long day of hiking. The communal atmosphere often leads to interesting conversations with fellow trekkers from around the world, adding a social dimension to your journey.
Moreover, the cost per night’s stay in these accommodations is relatively lower than other popular treks in Nepal, keeping your Mardi Himal trek expenses more reasonable.
Price Range for Lodging
The price for the lodging varies depending on the altitude and remoteness of the location during the trek.
Higher up, prices may increase slightly due to the logistical challenges of transporting supplies to remote areas, as no means of transportation; all needed goods need to be carried by hand or using animals.
Despite the simplicity, the hospitality and warmth of the hosts make every stay memorable.
Additional Amenities
While most tea houses offer simple accommodations, some also provide additional services like Wi-Fi and hot showers for a small fee. These comforts, though minimal, can be a welcome luxury on the trail, offering a chance to rejuvenate and recharge for the next day’s adventure.
Sometimes, some simple means can play a big part in making your trek memorable and successful.
Mardi Himal Trek Expenses For Food and Beverages
The Mardi Himal trek expenses can be impacted by the food’s cost, which can vary depending on the location and your dietary preferences. Tea houses offer a range of local and international dishes.
Typical Meals on the Trail
The menu in tea houses typically includes both local Nepalese cuisine and popular international dishes. Meals such as dal bhat, noodles, and pancakes are common, with prices ranging. The portions are generous, ensuring you have the energy needed for trekking.
Hydration and Drinks
Staying hydrated is crucial, and bottled water, tea, and other beverages are readily available. Prices range depending on the altitude. While bottled water is convenient, consider using purification tablets or a filtration system to reduce plastic waste and save money.
Dietary Preferences
For those with specific dietary requirements, it’s advisable to communicate your needs in advance. Most tea houses are accommodating and can prepare meals that cater to vegetarian, vegan, or gluten-free diets, ensuring you stay nourished throughout the trek.
Mardi Himal Trek Budget to Hire Guides and Porters
While planning for the Mardi Himal trek budget, make sure to separate the cost for the guide and porter, as you need to hire them during the trek. Although it’s possible to trek independently, hiring a guide or porter can significantly enhance your experience.
Guide Services
A guide offers valuable insights into the region’s culture and history. Their knowledge of the trails ensures you stay on the right path and navigate any challenges with ease. Guides can also facilitate interactions with locals, enriching your cultural experience.
Porter Services
Porters can carry your gear, allowing you to focus on enjoying the trek. This service is particularly beneficial for those not accustomed to carrying heavy loads at high altitudes. Hiring a porter supports the local economy and provides employment opportunities in the region.
Combining a Guide and Porter
Many trekkers opt for both a guide and a porter, benefiting from the expertise of the guide while lightening their physical burden. This combination can make the trek more enjoyable and less physically demanding, allowing you to fully appreciate the journey.
Mardi Trek Cost for Transportation
If you’re starting your trek from Pokhara, you’ll need to account for transportation to and from the trailhead.
Transportation options include buses and taxis. Buses are the more economical choice, offering a scenic and adventurous ride to the starting point at Phedi. Taxis, while more expensive, provide comfort and convenience, especially for groups.
Once on the trail, there may be minimal additional transportation costs, as the trek is primarily on foot. However, it’s wise to budget for unforeseen circumstances, such as returning to Pokhara sooner than planned or taking alternative routes.
Although the transportation covers a small part of your Mardi Himal Trek budget, it is crucial to include it while planning for the trek. Booking transportation in advance can often secure better rates and ensure availability, particularly during peak trekking seasons. Consider coordinating with other trekkers to share costs and enhance the journey with new friendships.
Mardi Trek Cost for Trekking Gear and Equipment
If you don’t already own trekking gear, you might need to rent or purchase items like hiking boots, jackets, and trekking poles. A certain part of your Mardi Himal trek cost needs to be invested in the trekking gear and equipment for a comfortable and successful trekking adventure. Prices can vary significantly along the trekking route, so it’s worth shopping around in Pokhara or Kathmandu.
Buying vs. Renting Gear
Investing in quality gear is crucial for a comfortable trek. Items such as sturdy hiking boots, a warm jacket, and a reliable backpack are essential. While purchasing gear can be costly, renting from local shops offers a budget-friendly alternative, providing the necessary equipment without the high expense.
Renting Options in Pokhara and Kathmandu
For those who trek infrequently, renting gear can be more economical. Shops in Pokhara and Kathmandu offer a wide range of items for rent, allowing you to choose based on your specific needs. However, if you plan to trek regularly, investing in your own gear ensures a perfect fit and long-term savings.
Packing Tips
The weather in the Himalayas can be unpredictable, so packing layers and waterproof clothing is advisable. Ensuring you are prepared for various conditions enhances your comfort and safety on the trail, allowing you to focus on the experience rather than the elements.
Cost of Travel Insurance for Mardi Himal Trek Budget
Trekking in the Himalayas comes with inherent risks, so having comprehensive travel insurance that covers high-altitude trekking is essential. Allocating the Mardi Himal trek cost for such insurance can vary depending on the duration and coverage.
Importance of Insurance
Investing a certain part of the Mardi Trek cost in travel insurance is vital for peace of mind, covering unforeseen events such as medical emergencies, evacuation, or trip cancellations. Ensuring your policy includes high-altitude activities is crucial, as many standard plans do not cover trekking above certain elevations.
When selecting insurance, compare different providers to find a plan that suits your needs. Consider factors such as coverage limits, emergency evacuation options, and the provider’s reputation. A well-chosen policy ensures you are protected, allowing you to enjoy your trek with confidence.
In the event of an emergency, having clear communication with your insurance provider is key. Familiarize yourself with the claims process and keep necessary documentation accessible. This preparation ensures prompt assistance when needed, minimizing stress during challenging situations.
Miscellaneous Expenses
Although the Mardi Trek cost is not impacted much by miscellaneous expenses, some tea houses charge a small fee for charging devices. As electricity is limited, particularly in remote areas, having a backup power source like a portable charger can be useful. This ensures you stay connected and capture every memorable moment of your trek.
Available at some locations for a nominal fee, hot showers provide a welcome respite from the cold. While not always available, prioritizing tea houses that offer this service can enhance your comfort, particularly after a long day on the trail.
It’s customary to tip guides and porters at the end of your trek, usually around 5-10% of their total fee. Tipping is a way to show appreciation for their hard work and dedication, contributing to the local economy and supporting the people who make your trek possible.
Estimated Total Cost of the Mardi Himal Trek
Combining all these elements, a budget traveler could expect a week-long trek to Mardi Himal. This estimate includes permits, accommodation, meals, transportation, and the services of a guide or porter. However, costs can vary based on personal preferences and spending habits.
Flexibility is key when budgeting for your trek. Unexpected expenses can arise, so having a financial buffer ensures you can handle any surprises. Planning for a slightly higher budget allows for spontaneous decisions, like extending your stay at a particularly beautiful location.
Your personal preferences, such as accommodation choices and dietary habits, will influence your overall budget. Opting for luxury options or indulging in additional services can increase costs, while a more frugal approach can keep expenses low. Understanding your priorities helps tailor the trek to your budget.
Budgeting Tips for Trekkers
There are many ways to save money on the trek, from sharing accommodation and transportation to bringing your own snacks. Research and preparation are key, enabling you to make informed decisions that align with your budget without compromising the quality of your experience.
Plan Ahead: Booking accommodations and services in advance can sometimes secure better rates.
Travel Off-Peak: Prices are often lower during the off-peak trekking seasons.
Pack Light: Limit the need for a porter by packing only the essentials.
Planning your trek well in advance allows you to take advantage of early booking discounts and better availability. Researching and comparing options ensures you get the best deals on accommodation, transportation, and services, optimizing your budget.
Traveling during off-peak seasons not only reduces costs but also offers a quieter and more serene trekking experience. The trails are less crowded, and tea houses are more accommodating, providing personalized service and a peaceful atmosphere.
Packing efficiently minimizes the need for additional porter services, reducing costs. Prioritize essential items and consider multi-functional gear to save space and weight. A well-packed bag enhances mobility and comfort, allowing you to enjoy the trek without unnecessary burdens.
Embracing the Experience
The Mardi Himal Trek is more than just a trek; it’s an opportunity to connect with nature, culture, and yourself. With careful planning and budgeting, you can immerse yourself fully in the experience, creating memories that will last a lifetime.
Embrace the cultural encounters along the way, engaging with locals and fellow trekkers. These interactions enrich your journey, offering new perspectives and friendships that transcend borders.
As you traverse the majestic landscapes, take the time to pause and appreciate the beauty around you. Each moment is unique and fleeting, so savor the serenity and wonder of the Himalayas, knowing that this adventure is a gift to be cherished.
Final Thoughts
The Mardi Himal Trek offers a remarkable adventure through the breathtaking landscapes of Nepal. By understanding the costs involved, you can better plan and budget for your journey, ensuring a stress-free and enjoyable trek. Whether you’re a seasoned hiker or a first-time trekker, this guide aims to prepare you for the financial aspects of your adventure, allowing you to focus on the incredible experience that awaits.
Embark on your journey with confidence, knowing that the pristine beauty of the Himalayas and the warmth of Nepalese hospitality are within reach.
Safe travels!
FAQs
1. How long is the Mardi Himal Trek?
Program for an Eight-Day Mardi Himal Trek Tour. Depending on the route and itinerary selected, the Mardi Himal trek usually takes four to eight days. The whole walking distance is roughly 25–28 miles, or 41–45 kilometers. However, the duration can be customized.
2. Is Mardi Himal Trek difficult?
The Mardi trek is considered moderately difficult and suitable for beginners with a reasonable level of fitness due to the steep ascents and descents, especially on the upper sections from High Camp to Base Camp.
3. How to go to Mardi Himal from Pokhara?
You have to drive to the trailhead, which is typically Kande, in order to get to Mardi Himal from Pokhara. A multi-day hiking route will then begin, typically stopping at Pothana/Deurali, Low Camp, High Camp, and Mardi Base Camp. The trek usually takes four to five days before you return to Pokhara.
4. Which month is best for Mardi Himal trek?
The best seasons for the Mardi Himal trek are March through May in the spring and September through November in the fall because of the steady weather, clear skies, and pleasant temperatures. While spring offers rhododendron blooming, autumn is the most popular season for trekking because it provides unhindered views of the mountains.
5. Which is the toughest trek in Nepal?
The Dhaulagiri Circuit Trek and the Kanchenjunga Circuit Trek are frequently cited as the most difficult treks in Nepal due to their remote location, challenging terrain, high elevations, and camping requirements.
6. Is the Mardi Himal trek cost affordable?
Yes, trekking to Mardi Himal is typically regarded as an affordable trek, especially compared to other treks in the Annapurna region, such as the Annapurna Circuit and the Annapurna Base Camp trek. It has reasonable costs due to its short duration, proximity to Pokhara, and basic teahouse infrastructure.